Posted on Leave a comment

When You Slip Down the Rabbit Hole Writing a Social Post

3-22-22 Five-Ten Freerider PRO Canvas Parley Plastic
OK, nothing’s simple. Welcome to the 2020’s right?
What started as a “rah-rah” post quickly turned into questions, a bunch of searching around on the web, ordering a wack of washing bags, learning about external washing machine filters I need to research more tonight – buuuuut, we’re trying really hard not to green-wash posts right? That counts for something!
 
Back to our post shown in bold:
 
Five-Ten Freerider PRO Canvas feature uppers made from 50% recycled ocean bound plastic and 50% recycled polyester.
 
The Freerider PRO Canvas contains plastic that would have been destined for the oceans through a partnership with Parley Ocean.
 
Will this pair of shoes save your planet? Well, nah, but supporting products like these announce a clear intent and manufacturers listen to your dollars…
 
You know, even a small angle of change now will make a huge difference down the line (think of a triangle as the legs start to stretch from each other, or you’re walking through the woods and start off 5 degrees off target – doesn’t seem like much at first but by the end the distance can be quite big right?)
 
I support everyone who’s making a commitment to a little less plastic or finding uses to repurpose existing plastic!
Shop the Five-Ten Freerider Pro at BikeCo.com
 
 
now, down the rabbit hole… right click to open in a new tab (or hold your finger down on your iphone I think that opens a new tab option too)
 
learn more about Parley Ocean & Adidas here:
 
or learn about how Adidas is working to help close the loop (important when you think how many synthetic materials are in our current kits right?) including a program to easily donate out of use shoes and clothes to be re-purposed minimizing virgin material production as well as helping keep plastic out of the trash / ocean in the first place: https://www.adidas.com/us/sustainability
 
or read about some options available to minimize both virgin and “up-cycled” clothing from depositing microplastics into the water systems: https://www.nytimes.com/wirecutter/blog/reduce-laundry-microfiber-pollution/
All and all – we should keep educating ourselves and working to make the planet a little better than it was the day before.
Posted on Leave a comment

Clipless or Flats for MTB?

clipless or flats for mtb? Pedal Comparison

Wondering if clipless or flats are right for you? Let’s take a minute and go through some of the differences and preferences that will help you define Clipless or Flats for MTB.

First let’s look at some pedaling basics that will help you whether you choose to ride clipped in or on platform pedals.

Good Pedaling Practices

Spinning Circles

Spin circles. Seems simple right? Ironically after all the years of riding this probably one of my least applied practices… I’m going to reference a clock face with 12 being straight up, 3 being forward and we’re talking about the drive side crank, clock reference is flipped for non-drive.

Ideally you’re using a combination of muscles and movements when you pedal your bike, not just smashing down in the say 1 to 4 o’clock positions. (I’m so guilty of that).

Now, whether you’re running clipless or flat pedals you can take advantage of spinning better circles. It’s more efficient, it’s easier on your body, it probably looks better (according to my riding buddies who give me a hard time). How does the concept work?

Even though there is clearly a position of the most power you can still “drive” the pedals throughout most of the pedal stroke whether you’re riding flats or clipless. On the bottom of the pedal stroke, like say 4 to 8 o’clock you “drag” your foot back. Think of it like a moonwalk move or scuffing your foot almost. On the top of the circle you’re pushing that “scuffing” until the pedal drops back into the optimum power position.

Does this add a ton to your speed? Nah. But it is more efficient (when I remember to do it) and it fires different muscles that in turn helps ease the load across the rest of your legs.

One of the things new riders imagine is that with clipless pedals you can “pull” up on the opposite of the power down stroke. And, sort of you can, but again, it’s not nearly as efficient as the down stroke but every bit does help.

Footwork Matters

Getting the right foot “down” at the right time makes  a big difference. Learn to corner with your outside foot down. It greatly improves your ability to weight the bike and “drive” it through the corner with your feet. It also improves your ground clearance as you lean the bike over.

Heels Down

Again, this is for either pedal type. Get your heels down when you’re descending. It improves how the bike is weighted and gives you much more control, particularly in steep chutes.

Downsides?

Let’s get these out of the way right off the bat and move on with the day right? Here are the most common fears for each type of pedal.

Clipless: “What if I don’t get out of them?”

Yup. It’ll happen, but, from my experience it is absolutely not in the situation you’d think. I’ve run full speed out of crashes and then thought about, man, I never even mentally made the choice to clip out. It becomes automatic really quickly.

When I found it “more” likely to happen frankly is tired, at the top of a climb, when I would think I clipped one foot out and lean over only to find that I had in fact, clipped the other foot out. Almost always happens when there’s people watching. It’s like Murphy’s law.

Flats: “What if they hit me in the shins?”

Ya. That happens too. The last real good one I had was at the top of a trail bouncing off like a 6″ tall by 2′ long “table” messing around while chatting with friends. I wasn’t paying real attention and just kinda tried to save a foot coming off and then yup, snakebite.

The few times I’ve had bigger get offs with flat pedals I’ve been well clear of the bike pretty fast.

So there are the typical worries. Let’s compare some other aspects.

Comparing Cliplesss & Flats

Where are the real differences in your day to day riding? Let’s take a look.

Efficiency(?)

I started out riding clipless and went to flats the last few years. Honestly I haven’t noticed any efficiency differences – but – I’ve never been renowned for my pedaling prowess.

I’d imagine that clipless pedals are slightly more efficient for the average rider. I haven’t really looked into the weight differences between flats and clipless plus cleats either. If you’re riding XC / Trail and long adventure days that weight will mean more than an hour and a half rip after work.

Technique

Clipless pedals tend to hide technique issues. You can cheat on your bunny hops, you can pull the bike up or yank it around side to side in the air a bit easier if you’re offline, etc.

Here’s the scoop on that though: probably no one is grading your technique at the end of the ride except you right? So if you’re more confident clipped in then go for it.

When I rode clipless I kept a pair of flats around for the occasional rip to work on technique. It’s interesting as I found that where I thought “flats will be great in the gnarly stuff” once I got bouncing around in it I realized “hmm, I miss being attached to the bike a bit more!”. The bottom of our local Car Wreck trail was my big eye opener on that.

Once I moved permanently to flats I found that I had to corner slightly different or my “upper” or inside foot tended to bounce off the pedals. Clipless had kept me hooked in for all those years and it was an eye opener that I had been just floating that foot essentially.

If you ride flats you’re going to need to concentrate more on keeping your feet “planted” on the bike consistently. Whether bunny hopping the obstacles, or ripping through the chatter.

Using your knees as “suspension” to absorb the bike up and drive it down is a great technique to practice whether you’re running flats or not.

Confidence

You know, your riding is really about you. What are you confident on? What causes you concern? Sounds over simplified, but really if you’re thinking about “extra” things when you really should be concentrating on other things that’s no good right?

I’m going to use a recent experience as an example, although not MTB related. I was on the freeway the not too long ago on my motorcycle. Now, I’ve got a lot of years and a ton of miles on motorcycles so admittedly it can seem a bit “autopilot” at times. It was a high speed day but with traffic – nothing too out of the ordinary heading up to the shop from San Diego. Anyhow, when the hills dropped away into Del Mar and I got a cross wind there was a repetitive thumping on the side of my head… Turns out I hadn’t fastened the helmet! Instantly that was all I could think about. I didn’t want to pull over in the construction area and get creamed by a car so I rode on a bit looking for an offramp. I’m big on helmet safety and this was really not a good feeling and I got hyper focused on it. To the point that when I got off the freeway to correct it I ended up pulling over onto a steep grade and nearly dumping the adventure bike on my legs! I had been so mis-focused that I made a mistake I probably never had made in 20+ years of riding moto… Point is, if you’re having to really put tremendous thought into something it will have other consequences.

Are you worried about that technical single track and whether you could get a foot out before you tumbled off the edge? Well, being aware of that is one thing. Hyper focusing on it to the point you are scared isn’t fun or effective.

If you’re confident or even cautiously confident or aware you’re much better off.

Clipless Pedals Explained

Clipless pedals use a cleat to engage with spring loaded “clamps”.

As you saw in the video most clipless pedals are engaged by stepping “in and down”. The forward tab of the cleat fits under the forward bar and then you step down with your heel. As you step down the rear of the cleat’s radius will put pressure on the spring loaded bar (shown as rear in the video, but could be either front or rear depending on design) opening the bars allowing the cleat to pass before the spring clamps the bars in place.

To exit clipless pedals you pivot your heel outboard. This rotates the cleat in the clamps allowing the cleat to disengage. The geometry of the design means that it generally takes less pressure to clip out than to clip in as the spring loaded bar doesn’t need to move the same amount.

It’s pretty simple and your muscle memory will pick up on it quickly.

Differences in Clipless Feel

The main difference in clipless pedals is the amount of “float” they have in the design.

Float can be two different motions: lateral or rotational.

Lateral float is how much extra area there is for the cleat to move inboard or outboard while staying engaged. For instance Time pedals tend to have more lateral float than Shimano pedals.

Rotational float is dependent on cleat design. Most pedals have a similar range of rotational float before the pedal disengages, although some manufacturers may offer cleats that have different shapes providing quicker or later disengagement.

Many pedals offer adjustable spring rates. This adjusts to rider preference for clip in pressure, hold while clipped in, and to a lesser extent the clip out pressure. When I rode Time pedals I like a mid pressure setup. If I ride HT clipless pedals I tended to tighten the spring more to provide a more confident clip out feel (seems sort of counterintuitive I know, but it works).

Shopping Clipless Pedals

As mentioned previously there is a feel difference between clipless pedals.

Riders looking for a very “set in” almost like a ski boot feel gravitate to the Shimano lineup.

Those who prefer a bit more movement in their pedals tend to shop the Time lineup. The lateral float is felt most during climbing if you are a rider who likes to wiggle around.

Shopping Flat Pedals

Flat pedals come in a variety of sizes and shapes.

Pedals generally are somewhat “sized” depending on your shoe size. If you’ve got big feet you should shop bigger pedals – makes sense right? (Luckily we list the platform dimensions to help riders compare our selection of platform pedals).

clipless or flats for mtb PNW Loam Pedal Dimensions

Thinner pedals will slightly improve ground clearance. Thicker pedals may tend to have better bearings for heavier riders.

Some riders prefer more mechanical concave to help sit “into” the pedal.

Hell, some riders love the look and color of a model and that’s enough! We only carry proper pedals so you don’t have to worry about falling in love with a garbage brand or model here at BikeCo.com

The Worst of Both Worlds

OK, this is a bit of a soapbox rant based mostly on my opinion. Grain of salt if you want – or agree with me and be right! (hahaha, just kidding)

What about pedals that have clips on one side and flats on the other? Well, they’re the worst of both worlds.

Reasons to commit to one or the other:

Clipless side – if you’re trying to clip in and only one side of the pedal has the assembly what are the mathematical odds that it’s facing the correct way? You might think 50% – but you’re wrong. Murphy’s law comes into play and its almost ALWAYS on the bottom and you have to flip the pedal around with your foot till you get it to step into it.

Flat pedal side – ever seen the road biker clippty clomping around the coffee shop and then WHAM!! slipped on the cleat? Ya. Cleats are metal. Metal on hard surfaces tends to be slippery as hell. Clipless shoes have a large area removed to accommodate mounting cleats and allowing them to move forward to back and side to side. So, your clipless shoe with a cleat in it essentially has a big void of traction right near the contact point of your shoe. That means your choices on the platform pedal side are total shit traction, or you can move way forward on the pedal to get to the shoe’s sole around your midfoot or further back. Which isn’t great for control.

Hopefully you’ve learned about the differences between clipless and flats for MTB – we invite you to shop both types of pedals as well as The Best in MTB here on BikeCo.com!

Return to Top of Page

Posted on Leave a comment

5 MTB FUNdamentals

5 MTB FUNdamentals and 10 Riding Tips

5 MTB FUNdamentals for your new Mountain Bike

A lot of new riders are gravitating to the Ibis Aluminum Frames, the Ibis Ripmo AF and Ripley AF. So what are some of the tips and tricks to help you have the most fun on trail? Funny you should ask…

Here are some of the top 5 things that help new MTB riders get the most out of their bikes.

Deity TMAC Pedal Rotation

Pedals: Flats vs. Clipless

Sport level bikes don’t include pedals. That’s because unlike your beach cruiser rider preference makes a big difference in setup.

Flat Pedals

Flat pedals, also called platform pedals, are fairly self explanatory. Available in a variety of shapes and sizes riders can pick a pedal size somewhat relative to their foot size. Flat pedals also are available in a wide range of colors to accent your build.

The upside to flat pedals is you don’t clip in or out. The downside, you don’t clip in or out, so riders need to be a bit wary of keeping weight on the pedals so they don’t spin into your shins.

Personally, I ride flat pedals because I feel they’re easier on my lower back these days. It did take a bit to get used to putting more effort into keeping my feet firmly planted at first, and you can’t “cheat” on bunny hops to get over obstacles. When cornering I keep my pedals at a bit of an angle to keep weight on them compared to clipless pedals which helps keep you firmly on the bike.

Shop our favorite Flat Pedals here

Shimano XTR M9120 Pedal rot 2

Clipless Pedals

Clipless pedals, somewhat ironically named, you clip in to. There’s a story there but the long and short is they’re called clipless. Cleats on your shoes engage the pedals when you step “into” the pedal and disengage when you rotate your heel outward (rotating from the ball of your foot near the cleat).

Clipless pedals are technically going to be “more efficient” as you can “pull” up and drive “over” while pedaling (opposite to the down power stroke). How much more efficient is up for debate – the more efficient “circles” you pedal the more efficient they are. It’s good practice to pedal efficient “circles” in flats too.

Stepping in and clipping out can be intimidating to new riders. Let’s put it this way: it quickly becomes second nature. I’ve had full speed get-offs where I have no idea how my brain knew to rotate my ankles out of the pedals as I ran down trail trying not to actually hit the ground (cartoon style). However, it’s also likely that at least once in your riding you will think you clipped one foot out, when you clicked the other out, lean the wrong way and fall. Usually in front of people. Murphy’s law…

My advice to clients, you don’t want to be “thinking” about your pedals very much. If you’re intimidated of clipless start with flats. You’ll know when you’re ready to try the other. In fact, before I went full time to flats I kept a composite pair around to ride now and then to keep me from developing too many bad habits in clipless.

Shop Clipless Pedals on BikeCo.com

Suspension: Design & Setup

Without getting too far into it: suspension design makes a huge difference in a bike’s personality and performance. Well designed suspension is confident and predictable through the entirety of it’s travel. The Ripley AF and Ripmo AF both feature DW (Dave Weagle) suspension. Its efficient, confident and predictable. Ibis’ designers created bikes that have a good balance of material stiffness minimizing lateral flex without being tooth rattling stiff. (as a side note, there was a brand a couple years ago that had so much lateral flex that the suspension would tend to “lock” mid travel, creating an instant infinite spring rate flinging riders all over. You could see it on EWS riders… it was nuts)

Learn about suspension setup basics on the following tabs.

Each tab has a video with the basics of Air Spring / PSI, Volume Spacers, Compression, Rebound (or watch it all in one place with the final tab).

Each tab also has a text section with a bit more in-depth look at the typical MTB suspension settings and how they intertwine.

PSI / Spring Rate

MTB suspension must accommodate a wide range of rider weight. To achieve this nearly all forks and rear shocks use an adjustable air spring.

By varying air pressure riders set a desired sag, or percentage of travel that the bike “sits into” under neutral loading.

Modifying this sag percentage will change small bump compliance as well as bottom out characteristics.

Learning how to Pre-Charge your suspension pump will help you make finite adjustments to sag.

Typically 15% sag is for a firm setup and 20% sag is considered plush.

Air Spring Fine Tuning Control(s): Volume Spacers & Compression

Volume Spacers
Air springs ramp rate, sometimes called Spring Rate, is based on how air compresses in the containment cylinder. As the air is compressed the PSI increases according to the decreasing volume of the containment. This is done via non-compressible volume spacers in the air chamber.

Compression.
Hydraulic damping assists air spring providing support in mid-stroke and bottom out.

Opposing Control: Rebound.
Higher spring rate will drive the suspension back to neutral with more force than a lower spring rate. To keep the bike from skipping across trail rebound damping is utilized.

Volume Tuning

**on the Ripmo AF’s DVO Onyx fork much of this adjustment is done by the OTT or Off the Top negative air spring adjuster. However, Volume Spacing is used on most forks and nearly all air shocks.

As suspension compresses (travel reduces) a piston moves closer to the end of a sealed container. By decreasing the volume of the container the PSI pushing back on the piston is increased.

By adding or removing non-compressible volume spacers riders modify the air spring’s ramp rate which directly changes the amount of support and bottom out feel of the fork or shock.

By removing volume spacers a rider increases the available volume in the suspension. The larger volume compresses less per mm of travel resulting in a lower PSI per mm of travel. This creates less support and is utilizes more travel.

Adding volume spacers decreases the available volume. With less air volume the PSI per mm of travel increases providing more support and greater resistance to bottom out.

Opposing Control: Rebound.
Rebound may need to be adjusted for volume tuning depending on how drastic of a PSI change is being tuned in or out of the suspension.

“Helping” Control: Compression.
Compression provides additional support and bottom out resistance.

Compression

Compression controls provide damping to slow suspension travel as a load is applied and the suspension is compressed. (easy one right?)

When riders have found sag and volume spacing preferences compression controls provide minute adjustments to dial in performance. Adding compression provides more support allowing the suspension to ride taller in its travel which is important when dialing in a bike’s personality in corners, etc.

With too little compression a bike will sit deep in the travel. This compromises cornering and braking force resistance. Headtube angle, bottom bracket height, front to rear weight bias, etc are modified as a bike goes through its travel. Maintaining control of the use of travel is paramount for good performance.

Since compression hydraulically slows the suspension’s use of travel it therefor lowers the air spring’s PSI. Properly setting compression controls will help ease the load on the rebound system by controlling the air spring’s push back onto the rebound circuit.

Too much compression will cause a bike to feel harsh and not use appropriate amounts of travel.

Generally, compression settings are fine tuned after sag and volume spacing have riders “in the ballpark.”

Low speed compression controls mid-stroke as well as support in cornering and against brake dive.

High speed compression helps with bottom out and high shaft speed inputs.

3 positions switches are a type of compression circuit with Open the most plush, Mid providing some additional support and Firm for climbing. If you climb in firm remember to put it back to plush for the downhill or you’re in for a potentially rough ride.

Rebound

Rebound damping controls a suspension’s shaft speed returning to a neutral position. Or, how fast the air spring pushes back as the load changes.

More rebound damping slows the suspension by decreasing the amount of fluid allowed to pass through the hydraulic design.

Less rebound damping allows the suspension to return faster with less hydraulic restriction on the damper.

Rebound setting is based on weight, ground speed, terrain and aggression. Setting the rebound properly means finding the right frequency or feel for your riding.

If your rebound is too fast, or doesn’t have enough clicks of rebound, the bike will tend to skip and suffer poor small bump compliance.

When the rebound is too slow, or you have too many clicks of rebound, the suspension may “pack up” creating a harsh ride as each bump uses progressively more travel forcing the suspension deeper into the travel, which will have higher spring rates.

Opposing: Air Spring PSI / Spring Rate.

“Helping” Control: Low & High Speed Rebound.

Some suspension is designed with 2 rebound circuits. The High Speed Rebound circuit is designed to provide additional control resisting increased PSI late in suspension travel.

Typically High Speed Rebound settings are used as the Low Speed Rebound controls edge towards closed. Example: you might not use any clicks of High Speed Rebound until you reach “X” clicks on the low speed.

Suspension is designed to be setup with a certain amount of SAG depending on riding style. Most rear shocks are between 25-33% sag. So, when you’re balanced on the bike it will sit 25 to 33% into the travel. This allows the suspension to have droop for more control when the trail “falls” away while also helping with small bump compliance.

Too much sag will create a sloppy ride that lacks support and tends to bury itself into terrain. Too little sag and the bike will lack grip and abuse the rider over every small bump on trail.

Shocks also have a variety of ways to adjust rebound, compression and volume tuning. If you’re new to the sport having a good resource to work with will help you take the surprises out of setup for your skillset and terrain.

Rebound and compression dampers control how fast the wheel returns to extension (rebound) and how fast the suspension will compress (compression). Oversimplified, imagine plates moving through a liquid in a tube. The plate with the bigger holes will allow more fluid to go from one side to the other more quickly (less rebound or less compression) reducing the size of the holes will slow the plate’s ability to transfer the fluid (more rebound or more compression control).

Rebound settings will depend on the air spring’s pressure. More pressure will result in more rebound clicks to control the higher spring rate.

As your riding improves you will tend to speed up your bike’s suspension, by lowering the amount of rebound damping, to allow the bike to more quickly reset for the next terrain feature.

The Ripley AF features FOX Performance DPS rear shock and a FOX Performance GRIP fork.

FOX Float Performance DPS

Air Spring & Volume Spacers

The Ibis Ripley uses a 190 x 45mm shock, spec’d with the Fox Float Factory DPS.

SAG is adjusted by PSI – typically trail riding styles gravitate to 25-30% sag. This would measure about 13mm for a plush setup and 11mm for a more firm setup.

Volume Spacers

Volume spacing provides fine tuning options to support the air spring.

By changing to a larger volume spacer, thus reducing the volume, you increase the air spring’s ramp rate for improved bottom out support and pop.

Conversely smaller volume spacers produces a more linear feel as the air has more volume during shock compression per mm of travel.

Do not install more or larger volume spacers than the FOX advises. Installing more than the maximum volume spacers will result in  product damage and potential for injuries, etc.

FOX Performance DPS Rebound Adjustment

FOX FLOAT Performance DPS Rebound Controls

The DPS provides a rebound control with 11 clicks of adjustment.

Heavier riders will use more rebound control than lighter riders to slow the air spring’s return to neutral.

As your ground speeds increase it is common to allow your bike to rebound more quickly to prepare for the next terrain feature and avoid suspension packing from slow rebound setup.

FOX Performance DPS Compression Control

FOX Float Performance DPS Compression Controls

The Fox Float Performance DPS shock provides the blue 3 position switch which adjusts from Firm, Mid and Open. Also known as a “climb switch” the use of this is dependent on rider style, preference and terrain.

FOX Float 34 Performance Series GRIP Fork

Ibis Ripley Fork Travel Options

130mm Ibis Ripley

The Ripley is spec’d with a 130mm FOX 34. This provides the bike with it’s stock 66.5 degree headtube angle and 335mm bottom bracket height.

Riders looking for a little more aggressive setup may investigate the 140mm option.

140mm Ibis Ripley

Perhaps more than the additional 9% of travel the 10mm adds are the geometry modifications. Raising the front of the Ripley will slacken the headtube, increase the trail measurement and slightly lift the bottom bracket.

These are popular shifts for riders pushing the Ripley into bigger trails, attacking the steepest, burliest terrain.

Wondering which is right for you? Chat with our team today and we’ll help you define which riders benefit from which travel setup.

Air Spring & Volume Spacers

The FOX 34 provides riders a range of setup options using air spring as well as volume spacers.

Suggested sag is 15% for a firm feel and 20% for a plush fork. On the stock 130mm setup 15% equals 20mm or about 0.8 inch of sag. 20% will use 26mm or about 1″ of sag.

Riders who choose the 140mm option will find the sag settings quite close to the 160. 15% is 21mm while 20% is 28mm. (as mentioned in the previous tab the additional travel is more about the geometry change than “more” travel).

Volume Spacers

The 130mm FOX 34 is factory spec’d with 2 volume spacers (bike manufacturers may or may not change this). The 130mm fork can carry a maximum of 5 volume spacers.

At 140mm the factory spec is 1 volume spacers with a maximum of 5.

Do not install more volume spacers than the FOX advises. Installing more than the maximum volume spacers will result in  product damage and potential for injuries, etc.

FOX 34 GRIP Rebound Controls

The GRIP damper provides 10 clicks of low speed rebound located at the red knob on the bottom of the fork lowers.

FOX Performance GRIP compression lever

FOX GRIP Compression Controls

The Performance GRIP offers a 3 position on-the-fly adjuster for Open, Mid and Firm.

FOX also offers micro-adjust detents between the settings.

The Ripmo AF features the DVO Topaz T3 rear shock and DVO Onyx D1 fork.

Air Spring & Volume Spacers

The Ibis Ripmo AF uses a 210 x 55mm shock.

SAG is adjusted by PSI – typically Enduro riding styles gravitate to 25-30% sag. This would measure about 17mm for a plush setup.

Volume Spacers

Volume spacing provides fine tuning options to support the air spring.

By adding volume spacers, thus reducing the volume, you increase the air spring’s ramp rate for improved bottom out support and pop.

Conversely removing volume spacers produces a more linear feel as the air has more volume during shock compression per mm of travel.

Do not install more volume spacers than the DVO advises. Installing more than the maximum volume spacers will result in  product damage and potential for injuries, etc.

DVO Topaz T3 Rebound Control

DVO Topaz T3 Rebound Controls

The Topaz T3 has 22 clicks of rebound adjustment.

Topaz T3 Compression Switch

The Topaz T3 features an Open, Mid and Firm switch for on the fly adjustment.

Support modifications can also be made by adjusting the rubber bladder from 200 psi (lighter riders) to 200 PSI (heavier riders)

DVO Onyx D1

Air Spring

For the 160mm travel Onyx SC D1 suggested sag is 15% for a firm feel and 20% for a plush fork. On the stock 160mm setup 15% equals 24mm or about 1 inch of sag. 20% will use 32mm or about 1.3″ of sag.

DVO Rebound Adjustment

The DVO Onyx SC D1 fork offers a wide range of tuning capacity with 22 clicks of rebound.

DVO Onyx SC D1 Compression Controls

The DVO Onyx SC D1 provides Low and High speed compression controls to fine tune support.

DVO Low Speed Compression Location

The Low Speed Compression, seen above, features 6 clicks of adjustability.

DVO High Speed Compression

High Speed Compression is adjusted by spinning the above dial in full rotations. Don’t feel for detents. There are 5 rotations of High Speed Compression adjustment on the Onyx SC D1.

Tires: Size, Patterns and Pressure

If you’ve jumped around on BikeCo.com you see we’re heavily tied with Maxxis MTB tires. There’s a reason for this. We all buy our own tires, and Maxxis makes the best performing and longest lasting offerings.

Choosing the right Size & Tread Pattern makes a big difference in your bikes’ personality. Ibis’ aluminum bikes are spec’d with fairly aggressive tires. There’s a reason for this: nothing is worse than putting your new bike into a corner and having it slide out. Hard on the rider, hard on the psyche. So generally, you’ll see more aggressive tires to ensure plenty of grip.

Learn more about Maxxis MTB Tires in the video below:

Conversely, if you’re looking for the very fastest climbing you probably want something lighter, with less lug that will accelerate more quickly.

A lot of riders may find a slightly faster rear tire than the front provides a nice balance. With modern rim width most tires are in the 2.3-2.5 range these days. Stay even, or slightly wider in the front for a balanced feel.

There are many different types of sidewalls as well. Chat with your sales team about how different sidewall technology is applied based on rider weight, terrain, personality, etc. Heavier sidewalls tend to be much more resistant to cuts or punctures and offer additional damping for improved small bump compliance. The cost is well, they’re heavier.

Tire pressure is important. A lot of your bike’s small bump compliance will come down to how much PSI you run.

Tires will slowly lose pressure, so it’s good to check them before each ride. Depending on your weight, the sidewall technology, tire size, rim width, ground speed, etc, etc you might run from the mid teens to over 30 PSI. Most trail riders will find the lower end of the 20psi range appropriate.

You can look at the sidewall of your tire to gauge your PSI. If you’re seeing singular slash “/ / /” marks spaced across the sidewall you’re getting a good amount of tire compliance. If you see x marks, “XXX”, you should come up a couple PSI.

You want to balance small bump feel, cornering support and keeping your rims off rocks to fine tune your tire pressure.

If you’re the rider who tends to go a bit aggressive off the bat a more aggressive sidewall technology or even a rim insert like the CushCore Pro or XC on the rear tire will help keep the wheel round and true longer.

Still want to know more about tires? Check out more data on MTB sidewall and compound technology here.

MTB Brakes

So, mountain biking is a dynamic sport in a wide range of conditions. One of the real eye openers to me when I started riding was that in steep stuff you’re not going to be able to come to a full stop. Not a big deal really, but just pointing it out hahaha…

MTB brakes are designed balancing weight and performance. More bikes are spec’d with 4 piston brakes from trail and enduro riding while xc / trail bikes tend to have 2 piston brakes.

4 piston brakes provide more power most notably as they increase the contact surface area with larger pads than 2 piston brakes.

Rotor size also modifies performance. Larger rotors have more leverage as well as greater circumference, or more metal, to better resist heat saturation.

There are a couple enemies to brake performance: overheating (particularly chronic overheating) and contamination.

You’re going to occasionally overheat your rotors. You’ll typically hear them get noisier, you’ll feel power loss (don’t touch them while you’re riding – you’ll end up branded for a long long time) and you’ll see them darken by the end of the ride. This all equates to less friction coefficient and less efficient brakes. Don’t stress though there are ways to resurface the rotors after a big day in the steeps. What you don’t want to do is just stress them over and over and over and wonder why you’re having to replace them more often. If you’re constantly cooking rotors look at larger diameter or more heat resistant models.

Rotor and pad contamination is more a pain to deal with. MTB brake pads are extremely susceptible to contamination. Don’t use spray lubes, don’t use non-approved cleaners near them, don’t handle them excessively, obviously keep grease away from them… Contaminated pads tend to sound like a goose honk and lack power. You can typically salvage the rotors but often will have to replace the pads. Be aware of what gets near your rotors and pads. Personally I only wash my bike with water and Muc-Off to avoid any strange contamination issues.

You can check out the home mechanic section on BikeCo.com for how-to service writeups, blogs and videos. Or learn more and shop the best brakes, rotors & brake accessories in MTB here.

The final thing about brakes is how to best use them, which leads us into our fifth Fundamental.

Top 10 MTB Riding Skills to Improve Your Riding

(So here we have a list of the top ten MTB riding skills, inside a list of 5 MTB FUNdamentals to give new MTB riders more fun on the trail – quite the SEO coup right here eh?)

Let’s start with brake techniques

1:
Three seconds on, three seconds off. This helps keep you from overheating brakes. I was sure I had this mastered but our racers would get behind me and count when I started riding. Letting the brakes cool rather makes a big difference ensuring the power is there when you want it. When you get on the brakes get on them good, then let them go. Keeping them “kinda” engaged won’t slow you down and will heat up the rotors and pads reducing their efficiency.

2:
Brake where it matters! (obviously don’t shoot off a cliff saying “but Nate said!!”) Like we mentioned before MTB brakes aren’t able to pull you to a stop in every condition. If you’re riding down a steep chute it’s probably best to check up before you roll in, slow down to speed you can handle, let the bike accelerate down the chute and get on the brakes before the inevitable turn at the bottom. As your skills improve you’ll more easily see where you can pull a handful of brakes to slow down and let the bike work in the other terrain. Slow down BEFORE the corner, don’t grab a handful of brake IN the corner (it will stand the bike up and you’ll quit turning!)

3:
Get confident with 1 finger braking. Hydraulic brakes are plenty strong. 1 finger will give you all of the hydraulic power available while keeping more fingers on the grips for better control. Find a not scary steep section and feel how easy it is to lock up the brakes with one finger. Then work into being comfortable riding with 1 finger braking and the rest on the grips.

4:
This fourth one is one of my all time, keep you on the bike, in the sport tips: ride at 70 or 80% of your skillset. That leaves a chunk of talent left for the unexpected. If you ride at 100% of your skill level you are going to crash. A lot. And it hurts after a while. I would speculate that very few of our pro racers ever go a true 100% since slow is smooth and smooth is fast…

5:
Keep your head up! By the time your front wheel is encountering something it’s pretty well too late to do much about it other than maybe pull up or push down. If you drop your eyesight into your front wheel track you’re going to miss the next obstacle or turn setup and just really be a passenger on the bike. These bikes are really capable, don’t get super stiff and let the bike help you through the small and medium hiccups.

6:
Use your knees and elbows as suspension. Going back to the “don’t ride stiff” or “dead sailor”. You weigh more than the bike, so keeping your body moving as clean as possible will help the bike ride better and you enjoy the trails more. Learn to pump the trail, get light where you need to, suck the bike up over obstacles.

7:
Don’t sit down on descents. Keep your weight on your pedals, rather than your saddle. This helps keep the center of gravity much lower and your bike is less likely to become an inverted pendulum trying to fling you all over.

8:
Practice proper footwork. Learning to keep your outside foot down in corners will give you much better ground clearance to lean the bike into a turn as well as providing you the proper weighted position. Inside foot up, outside foot down. Turning left, right foot down. Turning right, left foot down.

9:
Your bike should be setup for you! Personal preference is something I’m not going to argue too much about, buuuuuut, when I see 5’8” riders with 810mm bars and at 6’1” tall with a 76” wingspan I’m running 785mm (advice I got years ago from some of our tall racers) I wonder you know? Too narrow of bars will be nervous and twitchy. Too wide and you’re going to lose your “power position” and not be able to correct small mistakes as easily. Think about pushup position. You don’t want to be too far either direction from where you have the ability to make power.

10:
Practice makes perfect, but don’t try so hard you overwhelm yourself. I often will find 1 thing to focus or work on even today when I ride. Like, today I’m going to have proper footwork through every corner and not stay in the 3-9 position being lazy for example. If I go riding with someone newer to the sport I try to offer maybe 1 bit of advice per ride. Adding too much can be overwhelming (believe me I have EWS pros offer me all kinds of advice and it’s good – but – at some point it’s like ya, not gonna be able to clear that huge section hahaha).


Hopefully this tips make you more confident in your riding and able to better understand your setup.

If you’re in the market for a complete bike, suspension upgrade, Pro Tune suspension, brake or wheel upgrades or any riding accessories make sure to check out BikeCo.com and chat with our sales team!

Navigating 2022 MTB Products

Navigating 2022 MTB Products with BikeCo.com

Navigating 2022 MTB Products and Getting the Most of Your Current Setup

We’re sure you’ve heard all about manufacturing, shipping, product sitting at customs, etc, etc, etc. Well, let’s look at some of the realities and solution of 2022 MTB Products to help keep you on trail, riding your bike and stoked.

We can break it down into a couple areas that affect the typical rider.

Product availability and how to stretch the service life of your existing parts.

Without writing a thesis on the product availability issues I’m going to try to break it down into the basics of what we see in the market and how its changing product availability and purchasing.

Ibis Exie Frame Detail Made in USA branding

New is still New! Ibis launched the USA made Exie for 2022

Bikes & Bits

2022 MTB Bikes

The pandemic’s rush on sporting goods doesn’t really affect bikes in the tiers that BikeCo.com works. Sport to pro race level bike sales have continued to grow over the years, but not at the explosive, and frankly unmaintainable, rates that say kid bike sales have exploded during the pandemic.

So why the delays and wait times on bikes at our level? Manufacturing slow downs from staffing legislation both domestically as well as overseas have had a big impact. Shipping and customs have been another choke point for product. (A lot of our local trails overlook the Pacific and the amount of ships sitting waiting to be unloaded is a literally staggering thing to see)

Brands have been forced to really look at what can be produced and in what windows. In order to protect their markets, as well as their dealer markets, most bike brands have gone to allocation models providing dealers access to a specific amount of goods per timeframe.

How does the allocation model protect the market? Well, its based on previous sales levels so retailers are able to at least maintain during this market transition until we get back to the old normal or define the new normal. It also keeps a single entity from putting together orders of scale that would push the quantity of dealers down which would dramatically affect the manufacturer’s market equity having “all the eggs in one basket” so to speak.

Some manufacturers have set exact size / color / build options and quantities that retailers will have access to. Others have an allocated quantity of availability and the dealer can pre-order size / color / build or frame options.

At BikeCo we’ve built out our website to show 3 levels of bike and frame availability to help clients understand ETAs. Under the Bikes & Frames menu we have an In-Bound and In-Stock option.

On this page there are listings for In-Stock products (pretty self-explanatory), In-Production and In-Bound bikes and frames.

In-Production product has been acknowledged as received by either the manufacturer or BikeCo and is in the process of build up or shipment. This is fairly imminent product.

In-Bound product is part of the next allocation window and has been assigned some details depending on vendor requirements and is due reasonably soon.

As products are pre-sold they are removed from the categories in pretty close to real time, so this is a fairly accurate portrait of product availability windows.

You can call, email, chat or use a contact form for more details and to secure products.

Available In-Stock, In-Production and In-Bound products are available with typical deposit requirements. If you’re interested in product that doesn’t show In-Stock, In-Production or In-Bound a pre-deposit option is available to secure a waiting list position for the next allocation. Pre-deposits are minimal deposits on product we have reasonable belief we will have access to (ie, we won’t be taking deposits for tricycles, cargo bikes or things we know we won’t have access to). Chat with our team for details on this. Shop In-Bound & In-Stock Bikes and Frames here.

SRAM 12sp Eagle XX1 Chains: Available in Black, Rainbow, Gold & Copper to add some bling to your bike

2022 MTB Bits

Delayed, but available. That’s been the theme so far. Our purchasing team has stayed ahead of the curve and while it’s not the “order on Tuesday deliver on Friday” model anymore typically we’ve been able to keep a reasonable stock of the right products available.

What’s not in-stock is likely on its way. Our website’s inventory is updated daily to provide local and web clients access to the best parts. Don’t see what you need? Contact our team and we’ll get you the details or other options available.

As of now we haven’t seen the supply chain grind to a stop at our tier of product like you may have heard about from lower end products, etc. The sport to pro race level product has a handful of advantages that have helped keep it in production and inbound.

First, while the margins are lower than the kid or beach cruiser bits the overall value is higher. So in the same shipping space your GX, XO1, XX1 (or equivalent) products will generate more cashflow for manufacturers.

Second, sport to pro race level bikes really do create a trickle down in brand acknowledgement so there has been a commitment to keep the eye candy products coming in.

Toilet Paper Hoarding?

Well, I never was the one having to move my car out of the garage to make room for the pallet of paper goods. That said, I do have a couple bits in my toolbox in case I needed them in couple week window that might be a dry spell for product.

In my “shit happens” kit I have 2 pairs of brake pads, a chain and an old front tire. Car still fits in the garage…

Brake pads can be contaminated in odd and annoying ways so it’s nice to have access to a fresh pair.

The chain gives me the ability to either replace my current chain at about 50% wear, while the cassette and chain ring are still viable and performance will be good.

I keep an old front tire around, not really because tires are hard to get but in case I need it before a last minute adventure when I can’t get to the shop.

These bits have been in my toolbox pre-pandemic and will stay in there post pandemic too.

I’ve been watching availability from vendors and most bits have had some availability or options available.

Let’s say I need a cassette – well, that might have some availability issues and could be a couple weeks out. But, most cassette issues aren’t a catastrophic failure (I’ve never seen one like break in half). So if I stay ahead of the wear rate I can pre-order the bits I’ll need a few weeks out for a drivetrain replacement. If I bend or break a tooth you can bend it back or file it down. If it’s in one of the smaller gears more dependent on each tooth you might skip over that cog when putting the power down. Long and short, there are ways around most issues.

So how can you get the most service life out of your existing bits?

Popular Maxxis MTB Sidewall Protection Options EXO EXO+ DD

The right sidewall will help you balance damping (increased plushness across small bumps), support (lower PSI for better grip and tire shape), as well as help keep your rims off terrain!

Maintenance (and non-maintenance) to Extend Service Life

Let’s keep you on the trail with your existing kit as long as possible. Here are some tips that we use to keep our bikes running well deep into service life cycles.

Clean

A clean bike tends to be a happier bike.

Before each ride wipe the fork, rear shock and adjustable seatpost shafts. This will minimize debris into the seals, foam rings and lube oil which will extend performance.

Wipe your chain, chain ring, derailleur pulley wheels and cassette to keep dirt to a minimum.

An occasional bike wash helps keep dirt and debris away from your suspension pivots.

But, Not TOO Clean

Aggressively over washing your bike will displace bearing lubricants leading to metal on metal contact and premature wear. Be wary when washing your bike not to spray directly into bearing access, etc.

I used to take my drivetrain apart and soak it in degreaser. Looking back, if anything, it might have lead to premature wear. It certainly didn’t extend the life of anything in my opinion. I would make a case that its hard to get the degreaser back out of the areas which will require lubrication. Maybe it was just an excuse to have some garage time alone…

I’ve never been one for the carbon fiber wonder spray, you know that restores that shine your bike probably never really had if its matte anyhow? Well, if you’re into it just be aware when you put it on that it’s likely to contaminate brake pads and rotors. If I was going to use it I would remove the wheels and put them a distance away to protect the rotors. I would spray the fluid onto a rag and wipe it on to avoid overspray on my brakes and pads.

Lube

Before each ride use the appropriate chain lube for your riding. We’ve touched on this before and you can read more here – but the jist is this: not enough lube expedites chain wear, which increases the rate of stretch, which hammer forms chain ring and cassette teeth. Use a lube for conditions – a wet lube in dry conditions is likely to attract and hold more debris than a lube for drier conditions.

I also lube my fork, rear shock and adjustable seatpost shafts now and then. There are a variety of lubes available for this – a little dab about once a month will help keep the suspension feeling fresh. Along these lines – occasionally burping your fork lowers, either with the modern burp valves or using a zip tie will minimize gulped air buildup and the negative spring effect which tends to make a fork feel harsh.

Other Odds & Ends

Bolt Checks: a loose bike is wearing out bits faster than it should. A quick review of your fasteners can help keep your bike on trail longer.

Suspension Setup Checks: you don’t need to check your fork or shock’s PSI daily, or weekly, hell I don’t check mine even monthly with a gauge. I do take a look at the sag when I jump on the bike and if it’s notably off I’ll put a gauge on it and correct it. The air springs on your bike are relatively low volume and susceptible to changes based on altitude, heat, etc. Make sure to precharge your pump when you measure the PSI or I can assure you you’re going to “find it low”… Running suspension a bit too plush typically won’t hurt the bike, but it is likely to affect your opinion of how the bike is riding and your enjoyment. Put a premium on your enjoyment and keep an eye on your setup.

Tire PSI, Sidewall & Rim Protection: even after all the years in the industry rebuilding a wheel is outside my scope. So, a folded wheel means I’m not riding until I get one of the guys to fix it. That’s not great.

Keeping an appropriate PSI for your size, terrain, ground speed and style will help keep your rims off those sharp lips that want to eat up your rim and spokes.

Riding the right sidewall technologies will go a long way to keeping an air gap between rim and terrain. The right rim protection is even more insurance.

Shifting: Avoid dump shifting! Just because “you can” push and dump a fistful of gears doesn’t mean it’s a good plan… Check out the video below for details.


Need more details? We’d love to hear from you. Reach out to the BikeCo.com team and we will dial you in the with the best products and service in MTB.

How-To Videos & Links:

Click through the tabs below to see a variety of how-to videos and find links to other blogs on BikeCo.com below the videos!

Click through the tabs to see some of our How-To videos that will help you keep your bike on trail longer.

Links to more MTB Tips & Tricks

Check out some of our favorite Tips & Tricks for the Home Mechanic under the Content menu


MTB Bolt Checks – Simple but Critical To Your Safety

importance of mountain bike bolt checks


Chain Lube Best Practices. Its that important.

MTB Pre-Ride Chain Clean & Lube Best Practice


Pre-Ride Cleaning & Lube

chain lube video blog image


Basic Bike Wash Tips & Tricks

BikeCo Tips and Tricks Bike Wash Blog Title Image 3


Four Ways to Improve Chain, Cassette & Chain Ring Service Life

Chain Stretch Explained

Posted on Leave a comment

Adjustable Travel on Dropper Posts

Adjustable Travel on Dropper Seatposts OneUp & PNW

Adjustable Travel on Dropper Posts

Fine tune your MTB fit with these MTB  seatposts featuring adjustable travel on dropper posts.

Adjusting adjustable travel? Isn’t that like a double negative? No, not really.

For riders who are looking for the maximum travel on their dropper post the adjustable sizing from OneUp Components and PNW provides a wide range of fit options.

Your adjustable post fit is based on your leg length and frame size. While many riders are content running a size that will have the seatpost collar a touch above the frame collar others want all they can get.

If you’re one of those riders a post with travel adjustment is what you’re looking for.

You can purchase a slightly longer travel post than would normally fit and shim down the travel slightly. (we touch on sizing adjustable posts here)

So why not just stop the post where you want it? Well, most riders want the seatpost to sit at full XC pedaling position so they can quickly get back on the power. Having to adjust it each time is slower and will result in different lengths almost every time. (I’ve seen a DIY “travel stop” with a cable to the saddle – but I’m not sure I’d be looking for another cable looped trying to catch my legs, pants, trees, branches, whatever while I’m descending…)

OneUp Dropper V2

One of the most popular adjustable posts thanks to its compact total size combined with long travel the OneUp Dropper V2 features a toolless travel adjustment.

Watch the video to understand how to quickly adjust your OneUp Dropper V2 travel with the provided dowel spacers.

OneUp Dropper V2 Travel Adjustment

Adjusting the travel on your OneUp Dropper V2 is quick and easy.

First loosen the collar. Typically you can do this with your hands, although sometimes a soft strap wrench is needed to get the collar free.

You’ll need to bump the travel, in the video I do it on the post – it’s much easier with a remote installed, to free the white retainer.

Once the collar and the retainer are out of the way you install the desired amount of spacers for the proper travel adjustment in the three channels around the dropper post shaft.

Ensure that you have the same amount in all three channels before continuing.

Similar to removing the retainer a bump down in travel will help reseat the retainer in place.

Tighten the collar appropriately and test the function.

PNW Loam & Rainier Gen 3 RAD Seatposts

PNW posts are made to handle the rigors of the Pacific North West – often wet and muddy. The Rainier in particular is designed to compensate for these factors. Both the Loam and Rainier offer toolless adjustable travel to fine tune fit.

Watch the video to understand how to quickly adjust PNW Seatpost Travel.

How To Adjust PNW RAD Seatpost Travel

The PNW Rainer and Loam seatposts feature toolless travel adjustment. Adjusting seatpost top out allows riders to maximize their total seatpost travel with the seatpost installed as deep in the frame as possible.

Start by lowering the seatpost from full extension, but not so low that you can’t loosen the collar and move the adjuster. About halfway is fine.

Loosen the collar. Typically you can do this by hand, but a soft strap wrench might be needed to get it moving.

Carefully move the collar up the seatpost shaft. Do not scratch the seatpost shaft or you’re likely to have issues with the internals seals, etc.

Rotate the seatpost to expose the arc allowing you to get under the lip of the plastic adjuster. Pull the adjuster up to allow it to rotate.

Realign the adjuster’s arrow to the number corresponding to the amount of travel you’d like to limit.

Tighten the seat collar and check the post’s function.

Questions on which adjustable post is best for you? No problem, our team has you covered.

Call, email, chat or fill out the form below for more details!

Return to top of page


Contact Me Regarding This Product

  • Please contact me by:

  • Question on availability? Spec? Compatibility?
    Our team will be in contact within 24 hours!


  • Hidden
  • Hidden
  • Hidden
  • This field is for validation purposes and should be left unchanged.

Posted on Leave a comment

CushCore XC Install & Ride Review

CushCore XC Install and Review with video

CushCore XC Install & Ride Review

CushCore XC Install and Review with video

I started thinking about rim protection a few rides ago. I managed to shove a branch through the center of a tire. Murphy’s law meant it went straight through a spoke hole puncturing the tubeless tape. No quick fix to that one on trail… Before we get into the CushCore XC Install & Ride Review here’s a quick bio and which aspects of my riding suggested rim protection because frankly, I didn’t see myself as a candidate for CushCore.

Riding Bio (R) / Purchasing Bio (P):

R: I’ve been riding long enough that I feel competent in most terrain. I have enough gray hair to know I don’t need to be pushing into the red zone risking crashes. Maximum performance isn’t necessarily my goal, but I don’t want to leave performance on the table either.

P: While traction is game changing for confidence, I’m confident in my particular terrain, and not really out searching for the biggest / burliest lines. I’m not sure I’d pencil in tire protection based on the bio above.

I knew I would be testing this product in a true sense – it might be right for me or it might not.

Balancing tire pressure, tire retention (ie not burping) and sidewall performance have a huge effect on your bike’s personality.


Rear Tire Compression and Deflection
I was shooting self-portraits for the Ride Concept shoe launch when I caught this image. I was going relatively slow and easy (about a bike length roll in) over this rock so the amount of tire deflection caught me off guard and made me think about rim protection more seriously.

R: As a heavier rider with decent cornering I run substantial PSI (around 32) to keep from burping tires. Currently I’ve been riding Maxxis EXO+ sidewalls for the additional support, protection and notably improved damping (another convo for another day).

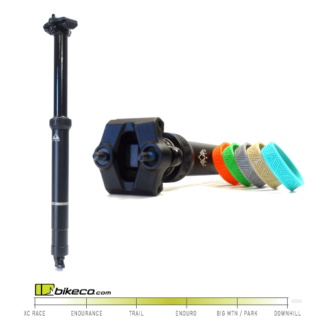
P: Some of CushCore’s biggest draws are the lower PSI, additional sidewall support and to a lesser extent tire pressure ramp. CushCore PRO and XC both act as a volume spacer for your tire as well as contacting the tire’s sidewall, lowering the leverage and adding support.

Burping tires is a sign that you lack support for the conditions. But at over 30 PSI in most conditions I know I’m leaving traction on the table – but I like keeping both air and sealant in the tire. The options here would be going to a Double Down sidewall or looking at rim protection to get the pressures down a bit.


R: I don’t often flat, but, the last two flats I’ve had have been a pain to deal with on-trail.

P: CushCore will help minimize pinch flats providing material between your rim lip and tire. It will also help protect rim tape from deep punctures like mentioned above.

While it might not eliminate all sidewall cuts there are certainly conditions where a bit more sidewall support will get you rolling past the shark’s tooth trying to cut into your tire.

Another factor I considered was a CushCore would help me get out after a near flat and low PSI condition without too much stress on the wheels.


R: I ride aluminum rims. My front wheel tends to stay in good condition. The rear? Well, I’ve been known to be hard on those.

P: Protecting carbon rims from karate chop hits with at least a CushCore XC is a good idea.

Aluminum rims might cost less than carbon, but if you’re constantly bashing on aluminum the maintenance costs add up and the interval between service will continue to decrease. You’ve got to keep them true and tensioned, rim edges start taking a beating and might not seat tires as well. Etc, etc.

And when finish one off it’s still going to cost you spokes, nipples and labor to get back out on trail.


R: I’m not a great climber (I have no idea what this “pain cave” people talk about is in riding – I’m looking for the Fiesta Plateau hahaha) and everyone I ride with is faster than me uphill – so – compromising climbing performance isn’t big on my list of “to-dos”.

P: Well weight is weight. And rolling weight factors out even more. However, the weight can have benefits (I can’t even imagine riding skinwall tires these days) so it might be worth a chat.

I’ve added rolling weight going to the more substantial EXO+ tires without noting too much grief so I thought a CushCore XC would behave similarly.


R: While fairly adept mechanically I don’t need any additional work or pain in the ass processes in my life.

P: CushCore PRO requires more patience to mount. The CushCore XC is easier to mount as it’s less substantial. I figured if I could get the XC on without too much heartache it would hit my requirements.


You can see the purchasing bio weaves back and forth on whether rim protection was for me. I thought about whether I’d prefer rim protection or going from an EXO+ to a DD Double Down tire as well.

So what put me over? The last couple flats I’ve had have been a pain. The most recent would still have compromised a tire, but with a CushCore to protect the tape I could have used a Stan’s Dart or equivalent.

My previous flat to that was a slice in the sidewall that I believe a CushCore (or the DD) would have prevented.

Finally my rear rim is kind of at a point where if I slowed the wear and tear I’ll get a notably longer service interval out of it.

Not to mention I thought it would be interesting to work with tire pressure and check on gains from a bit more damping from the tire setup.

And, truth be told, I get to write articles about it to help clients and call it work! Sorry boys, gotta go test…

CushCore XC Install:

You can check out the video for the actual installation of my CushCore XC as well as some tips on taping a tubeless rim.

I found following the steps to install a CushCore Pro with the XC were problematic for me. As I worked the first tire bead the CushCore would fall out of the bottom of the wheel. After a couple tries I ventured off into my “I think this will work better” mode…

What I found was mounting one side of the tire bead, inserting the CushCore into the tire and then mounting the second bead worked well.

To stretch the new CushCore over the rim I found getting low gave me the best leverage. This meant I could push with my arms instead of just pulling with my hands. Also, for the last third or so rather than pushing in a thumb width at a time I would stretch the insert about a fist width then drive that into trough.

I managed to mount the insert and tire without levers. Which says a lot as I have bad hands and use levers nearly all the time!

Watching the video over my shoulder Joe pointed out he can do that with the CushCore Pro’s too. Not sure I want to try that – but its possible!

CushCore XC Ride Review

PSI Dial In

There’s a fun little test trail in San Diego called E-Ticket. Relatively short, not super burly and has some high G corners with a bit of rock to bang into if you choose.

Best part? SDMBA tool kit at the top complete with a pump! Put the digital gauge in the pocket and do a handful of drops at different pressures.

I typically run about 32 PSI in my rear tire. I decided to start at 28 and work my way down looking for tell-tale x’s or slashes in the tire sidewall.

At 28 I didn’t see any sidewall loading. After a couple drops I found around 23/24 PSI I had X’s in the sidewalls, typically a sign that you’re about a PSI or so too low.

Tire sidewall X'sJust a little low on the PSI for my taste. The X markings have me increase pressure about 2 PSI.

You’re looking for “/” marks showing some deformation but less than the “X”. The tires felt like they behaving, I didn’t notice squirm or roll, but sidewall marks have always been a good reference for me.

After another drop or two I settled in with a sweet spot around 26/27 psi. About 6 psi, or nearly 20% lower air pressure from my typical. This also let me keep the rear tire at the same PSI as the front. It seemed sacrilege to run less PSI in the rear…

CushCore XC On Trail

Deciding that 26.5 would be the test pressure I put a few test rides in.

Climbing

My biggest fear was getting so soft or heavy that climbing would be notably compromised.

As far as the weight – much like the jump to EXO+ from EXO tires – as long as I wasn’t in full “trudge” mode it wasn’t too bad. If I could keep some momentum on the wheel and a clean cadence through the pedals I was happy with it. If I was riding slow enough to “stall” the wheel or quit paying attention to spinning good circles with the pedals (which I’m notorious for) I could feel the added weight. But in most conditions it wasn’t a notable thing.

In fact climbing some of the chunkier trails in my networks I found the added traction was a nice feature. The mental “this should stick” versus “I’m probably going to spin it out and not make it up” made a difference.

Cornering

It’s certainly not a secret that traction is confidence in the corners. But if the sidewalls start rolling or squirming around you feel like the bike (and thus you, the rider) might fling themselves past the tire’s contact patch.

Without tire inserts I frequently burp tires in the 30 PSI range so heading into fast corners in the 26 PSI had me attentive the first few times. I heard the growl of the tire working into the corners but not the tell tale “hiss” when you slip a bead. No spray on the tire at the end of the rides either.

The bike felt like it was on rails rather than having a bit of skip and slide at the same speed and higher PSI.

What I Noticed Most

This sort of surprised me actually – but what I noticed most with the CushCore XC setup was when you float off a waterbar or whatever into a corner.

Without the insert I felt like my bike had two small wiggles, or spikes when it landed and you tried to instantly change direction. Not sure if it was bounce from the PSI or sidewall wiggle or whatever but it had a distinct extra motion side to side.

With the CushCore the bike just stuck. Instantly. Even if you started leaning the bike before you landed it was well behaved. This got me paying attention to other conditions that would really test initial or small bump compliance.

The setup’s additional small bump compliance is really notable. Similarly braking is improved as the tire is more apt to dig in then skip over.

What I Wonder About

The improved small bump compliance and damping does have another side to it. Pushing the bike hard the rear end is a bit more “numb” than before. I don’t notice it at slower speeds but as I creep into the faster stuff I think I loose a little bit of feel out of the rear end. Now whether that’s good or bad I’m not sure just yet. It’s just different.

I wonder how it would feel in really choppy terrain at speed. Will the bike react as I suspect? Will it kind of monster truck over without my input making as much of a difference? Not sure yet. I guess the other side to that is in a choppy, high speed, high stress situation is when you’re most likely to karate chop a rim or pinch flat a tire. So maybe it all would balance out? Definitely haven’t heard any rim “tings” with the insert.

Is a CushCore XC is for me long term or not? You know I haven’t made my mind up just yet. When I went to the more aggressive EXO+ sidewall instead of the lighter EXO option I wasn’t sure I’d stick with it either. With the sidewalls I decided they were for me when I quit thinking about it every ride. Will the CushCore get there? We’ll see – so far it’s passing the tests.

Wondering if a CushCore PRO or XC is for you? Or questions on sidewall technology? Reach out to our expert team today to discuss your riding bio, terrain and aspirations. Our staff will help you dial in the best setup.

Posted on Leave a comment

BikeCo Tips & Tricks: Dismount Tire, Repair Tape & Remount Tire

Dismount, Tape & Remount MTB Tire

BikeCo Tips & Tricks: Dismount Tire, Repair Tape & Remount Tire

Here’s a How-To showing how to remove an MTB tire, repair tubeless tape and remount the tire.

Video & blog below! (PS, excuse some of the wind / street / cat in the audio – we’ve wanted to make sure client’s have access to these especially during our busy season so I’ve been shooting at home – one of my cat’s was quite tired of watching a days worth of video shoots without getting attention in this one!)

Continue reading BikeCo Tips & Tricks: Dismount Tire, Repair Tape & Remount Tire

Posted on Leave a comment

BikeCo Tips & Tricks: Adjusting Chris King Hubs

Tips and Tricks: Adjusting King Hubs

BikeCo Tips & Tricks: Adjusting Chris King Hubs

It’s typical to need to adjust Chris King hubs when the bearing breaks in. This video and write-up will show you how easy adjusting King Hubs is.

(excuse the breeze noise in spots on the video – the Covid home studio can be noisy…)

Continue reading BikeCo Tips & Tricks: Adjusting Chris King Hubs

Posted on Leave a comment

MTB Tire Removal – BikeCo Tips & Tricks

MTB Tire Removal BikeCo Tips and Tricks

MTB Tire Removal – BikeCo Tips & Tricks

Enjoy a quick video and write up illustrating MTB Tire Removal in this post of BikeCo Tips & Tricks. Modern sidewalls can make MTB Tire Removal a bit more of a challenge, but with a couple quick tidbits you will make your life notably easier. Continue reading MTB Tire Removal – BikeCo Tips & Tricks

Posted on Leave a comment

New Bike Assembly

MTB New Bike Assembly Common Issue

New Bike Assembly

A typical new bike delivered from BikeCo.com doesn’t need much to hit the trails. With some basic tools and a bit of skill you’re on your way. You’ve got a fresh BikeCo Build. New Bike Assembly shouldn’t be intimidating.

(so, the modern work from home means this video is in the yard, with my bike “standing in” for a new rig. Obviously your new bike will be cleaner, not have broken spokes in the back wheel, etc! haha. Also, I wouldn’t suggest grass if avoidable to minimize searching for things you might drop…)

Check out the video then read the post for more details.

Continue reading New Bike Assembly