Posted on Leave a comment

Bike Yoke Revive Seatpost Hydraulic Reset – BikeCo Tips & Tricks

Bike Yoke Revive Seatpost Hydraulic Reset

Bike Yoke Revive Seatpost Hydraulic Reset

The Bike Yoke Revive seatpost has been extremely popular. Along with a variety of available travel lengths the Bike Yoke Revive seatpost also stands out with it’s simple hydraulic reset.

If your Bike Yoke Revive adjustable seatpost is “squishy” air has mixed with the hydraulic fluid.

To quickly reset your Bike Yoke Revive seatpost follow these steps.

Bike Yoke Seatpost Hydraulic Reset

First extend the post to its full height.

Insert a 4mm Allen wrench (or appropriate tool) into the reset located on the drive side near the saddle mount.

Gently rotate the Revive reset clockwise until you feel it hit the stop.

While holding the reset against the stop push the seatpost completely down with your other hand.

Release the 4mm Allen (or appropriate tool) in the Revive reset and let go of the saddle.

Bring the saddle to full height using the remote.

If you still have squish in the system repeat these steps.

If your seatpost is rigid go hit the trails…


Click to Shop Bike Yoke and other top Adjustable Seatposts.


Back to Tips & Tricks


Return to top of page.

Posted on Leave a comment

MTB Bolt Checks – Simple but Critical To Your Safety

importance of mountain bike bolt checks

MTB Bolt Checks – Simple but Critical To Your Safety

Consistent MTB Bolt Checks are critical to your bike’s reliability and safety. While components should be checked throughout their service life, it is particularly important to check new fittings. Stem, handlebar, grip and brake assemblies are especially important.

Why You Need to Bolt Check

Light weight, minimal contact and leverage.

With the exception of WTB’s Padloc grips, everything that attaches to your handlebar requires radial clamping force to keep it positioned radially (around the circle of the bar) and laterally (left and right).

If the fastener is appropriately tight the radial assembly produces more “bite” than the loads encountered and nothing moves.

So you torque it and it’s good forever? No. Nope. No.

In fact, you torque it – stress it – re-torque it – and then occasionally check it. Continue reading MTB Bolt Checks – Simple but Critical To Your Safety

Posted on Leave a comment

Chain Lube? Yup, Chain Lube. Pre-Ride Best Practices

MTB Pre-Ride Chain Clean & Lube Best Practice

Chain Lube? Yup, Chain Lube. Pre-Ride Best Practices

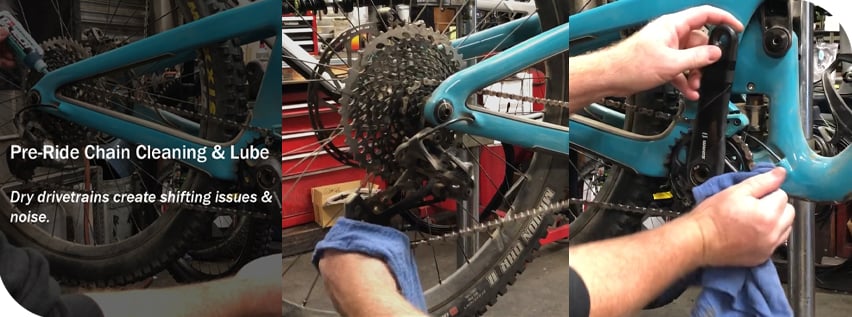
Really? Chain Lube? Yup. Because adhering to good practices cleaning and lubing allows your drivetrain perform better and last longer. Skipping these steps? Well you might have issues that drive you, or your riding buddies nuts.

Some quick drivetrain basics.

Your cassette, chain and chain ring wear in as a group.  It’s more than the anodized finish that wears off as you ride. Chain ring and cassette teeth change shape. The chain “stretches” (wears).

You might be able to get a couple chains and chain rings for each cassette. But if the drivetrain is well worn your new chain won’t want to hold power on the older teeth. Shifting is often compromised. It is likely to tick and skip under load. Older chain rings will often hang the chain instead of releasing it at the bottom of the radius creating a tick.

Overall the performance is probably better from the paired cassette, chain, and chain ring rather than mixing and matching new with worn.

Keeping the drivetrain properly lubed will dramatically slow wear and improve performance.

Continue reading Chain Lube? Yup, Chain Lube. Pre-Ride Best Practices

Posted on Leave a comment

Pre-Ride Chain Cleaning & Lube – BikeCo Tips & Tricks

chain lube video blog image

Pre-Ride Chain Cleaning & Lube – BikeCo Tips & Tricks

Chain Lube? Yup, it’s that important. Want to read more? Check out another blog post about why it’s important as well as my personal program…

Continue reading Pre-Ride Chain Cleaning & Lube – BikeCo Tips & Tricks

Posted on Leave a comment

Eliminate Cable Slap – BikeCo Tips & Tricks

BikeCo Tips and Tricks Eliminate Cable Slap blog

Eliminate Cable Slap – BikeCo Tips & Tricks

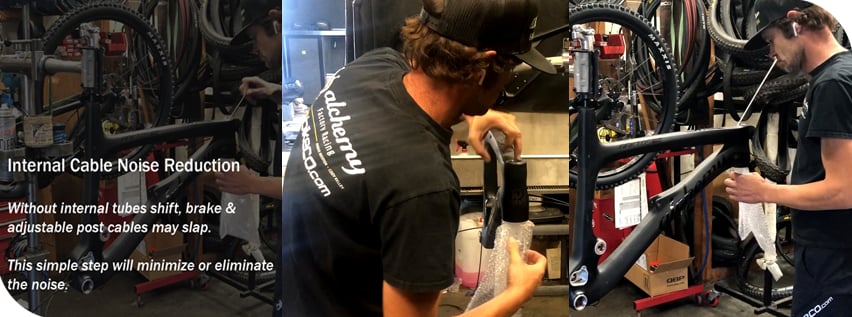
Some internal cable routed frames have tubes between cable ports while others are open. One isn’t necessarily right and the other wrong and each can have unique considerations. Open frames may suffer from cable slap which this video and blog will address.

Continue reading Eliminate Cable Slap – BikeCo Tips & Tricks

Posted on Leave a comment

Headset Adjustment – BikeCo Tips & Tricks

Headset Adjustment – BikeCo Tips & Tricks

OK, disclaimer time. Headsets are critical to your safety. If you aren’t sure of your mechanical aptitude find a professional resource.

Continue reading Headset Adjustment – BikeCo Tips & Tricks

Posted on Leave a comment

MTB Brake Bubble Bleed – BikeCo Tips & Tricks

mountain bike bubble bleed brake

MTB Brake Bubble Bleed – BikeCo Tips & Tricks

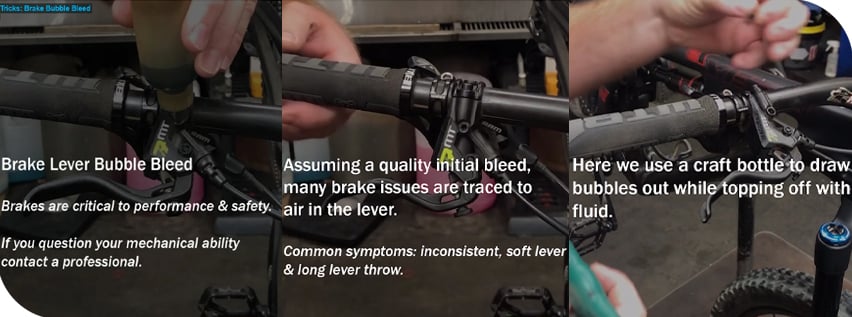
Assuming a quality initial bleed most lever related issues can be traced back to air in the master cylinder. An occasional bubble bleed will help keep your lever feel consistent and brake performance at its best.

OK, disclaimer time. Brakes are critical to your safety. If you aren’t sure of your brakes walk it back and take it to a professional. You do you – we’re just showing you some ideas to add to your mental tool kit…

Continue reading MTB Brake Bubble Bleed – BikeCo Tips & Tricks

Posted on Leave a comment

Basic Bike Wash – BikeCo Tips & Tricks

BikeCo Tips and Tricks Bike Wash Blog Title Image 3

Basic Bike Wash – BikeCo Tips & Tricks

Enjoy a quick video of a Basic Bike Wash to keep your mountain bike looking as well as riding its best.

I love to ride my bike. Frankly, I’m not sure I love maintaining it. But with some basic maintenance everything lasts longer and works better.

This basic bike wash only takes a couple minutes and helps improve drivetrain wear while minimizing potential noise. Especially in areas like Southern California where we have loud, crunchy dirt that loves to get into tight spaces and make your bike annoying…
Continue reading Basic Bike Wash – BikeCo Tips & Tricks

Posted on Leave a comment

On Trail Rotor Resurfacing – BikeCo Tips & Tricks

BikeCo Tips & Tricks On Trail Rotor Resurface Blog Title Image

On Trail Rotor Resurfacing – BikeCo Tips & Tricks

In a pinch, you can correct some rotor contamination or heat saturation issues on trail.  This BikeCo Tips & Tricks video illustrates how On Trail Rotor Resurfacing works.

Rotors that are heat saturated will show excessive black along the pad contact area. This is typical when riders are in steep terrain or aggressively braking repeatedly.

Contaminated rotors will “honk” when the brakes are applied. As opposed to a “squeal” from overheating a brake.

Both of these situations are noisy (annoying) and decrease the brake’s power. With a couple steps you can improve the brake’s performance to get you through your ride.

OK, disclaimer time. Brakes are critical to your safety. If you aren’t sure of your brakes walk it back and take it to a professional. You do you – we’re just showing you some ideas to add to your mental tool kit…

Continue reading On Trail Rotor Resurfacing – BikeCo Tips & Tricks

Posted on Leave a comment

Coil Spring Tuning Basics

7 23 19 Yeti SB165 T2 X01 Complete 1

Coil Spring Tuning Basics

With the launch of the new Yeti SB165 we’ve had a lot of questions. Here we go with some Coil Spring Tuning Basics.

Some very basic principals to start with here.

Coil springs are rated by the weight that creates an inch of spring compression. So a 400lb spring requires 400lbs to compress the first inch and would take 800lbs to compress two inches. However, coil springs are not produced to “exact” standards. That is to say if a coil is offered in say 50lb increments ( example: 350, 400, 450) 400lb spring may actually we anywhere from 376 to 425lbs. That’s a pretty wide range and most quality spring manufactures will have a slightly tighter tolerance, but that’s the concept.

Coil springs are also measured by total length as well as available stroke. Running a coil that is too long or short in either measurement can create problems.

Continue reading Coil Spring Tuning Basics