Shop the Ibis Ripmo AF: The award winning aluminum enduro bike gets better: Compare Ibis Ripmo AF builds: available in Frame Only as well as Deore, NGX and SLX completes.
Want to know more about the aluminum 147mm travel DW Suspension enduro bike?
Compare the Ibis complete kits as well as build highlights and common upgrades / swaps on the Ripmo AF SLX, Deore and NGX kits here.


What’s new on the Ripmo AF?
Well, notably it’s the Swingarm. Ibis’ new rear triangle features some worthy updates.
SRAM UDH (Universal Derailleur Hanger: Consolidating SKUs means you can get a UDH when you need it at home or on a trip.
Changes that allow the revised 55mm chain line which utilizes a slightly wider rear end providing a stiffer chainstay for improved traction and tracking.
Continued improvements to the manufacturing and QC mean your aluminum bike has never been so detail oriented.
Ibis Ripmo AF Marzocchi Suspension
The Ripmo AF is now spec’d with the Marzocchi Bomber Z1 coil fork in 160mm travel.
Ibis ships the Ripmo AF with a medium spring in the Bomber, however, BikeCo.com has you covered. Part of our industry leading setup and service includes installing the right spring for your weight and riding style.
The Ibis Ripmo AF is now spec’d with the Marzocchi Bomber Air rear shock as well.
Both the Bomber fork and Bomber shock will feature parts riders familiar with the FOX lineup will note such as the proven GRIP damper in the fork and many of the internals on the Bomber Air Shock.
Read more about the Marzocchi spec below!
Learn more about the Ripmo AF Marzocchi Bomber fork and Marzocchi Bomber rear shock on these tabs!
*Spec Swap Available: Riders who prefer a more linear setup can spec the DVO Jade X Coil on the Ripmo AF.
Ripmo AF – Air Versus Coil:
The DW Suspension on the Ibis Ripmo AF is capable of running either the air shock or the coil offering. So, who wants what?
Generally the air shock is the preferred option. It has the widest range of adjustability with PSI to adjust sag as well as volume spacing to modify ramp rate (or bottom out control).
Riders looking for the ultimate compliance tend to gravitate to the coil DVO Jade X shock as coil characteristics have a more linear rate through the travel. This gives the shock a more “plush” feeling without as much “kick back” deep in the travel. The other side to that coin however, is the coil shock tends to want to bottom out more easily.
Coil riders can adjust sag and ramp through coil spring rate and preload, however it’s not quite as wide of a range as with an air shock.
Questions? No problem. Our expert staff is here to dial you in. We can help you determine whether a coil or air rear shock is better suited to your size, ground speeds, riding style and terrain.
Stock Fork: Marzocchi Bomber Z1 Coil, 160mm
Ibis Ripmo AF Fork Travel Options
160mm Ibis Ripmo AF
The Ripmo AF is spec’d with a 160mm Marzocchi Bomber. This provides the bike with it’s stock 64.9 degree headtube angle and 341mm bottom bracket height.
Riders looking for a little more aggressive setup may investigate the 170mm option.
170mm Ibis Ripmo AF
Perhaps more than the additional 6% of travel the 10mm adds are the geometry modifications. Raising the front of the Ripmo AF will slacken the headtube, increase the trail measurement and slightly lift the bottom bracket.
These are popular shifts for riders attacking the steepest, burliest terrain.
Wondering which is right for you? Chat with our team today and we’ll help you define which riders benefit from which travel setup.

Marzocchi Bomber Z1 Coil 160mm, 44mm offset, 29”, 110×15
The Marzocchi Z1 is a great option spec’d on the current Ibis Ripmo AF – this is a robust fork with the proven GRIP damper minimizing both issues and downtime. The coil spring and pre-load options give riders a range of adjustability based on weight and BikeCo.com has the right springs to get you setup whether you’re looking for the Medium (factory supplied), Firm or Extra Firm spring rate.
Questions on the coil fork’s performance or setup? When you buy from BikeCo.com you get unparalleled after sales service to help you fine tune the suspension, cockpit, tire pressures, etc!

Coil Spring
For the 160mm travel Marzocchi Bomber Z1 Coil suggested sag is 15% for a firm feel and 20% for a plush fork. On the stock 160mm setup 15% equals 24mm or about 1 inch of sag. 20% will use 32mm or about 1.3″ of sag. Sag and progression can be adjusted with Preload.
BikeCo provides out clients the correct spring based on weight. (Ibis ships with a Medium spring)

The Marzocchi Bomber Z1 Coil fork offers a wide range of tuning capacity with 13 clicks of rebound.

Marzocchi Bomber Z1 Coil GRIP Compression Controls
The Marzocchi Bomber Z1 Coil provides Low Speed compression controls to fine tune support through the GRIP damper.


Stock Rear Shock: Marzocchi Bomber Air
Air Spring & Volume Spacers
The Ibis Ripmo AF uses a 210 x 55mm shock.
The spec’d Marzocchi Bomber Air Shock is the most popular based on its wide variety of setup options.
SAG is adjusted by PSI – typically Enduro riding styles gravitate to 25-30% sag. This would measure about 17mm for a plush setup.
Volume Spacers
Volume spacing provides fine tuning options to support the air spring.
By adding volume spacers, thus reducing the volume, you increase the air spring’s ramp rate for improved bottom out support and pop.
Conversely removing volume spacers produces a more linear feel as the air has more volume during shock compression per mm of travel.
Do not install more volume spacers than the Marzocchi advises. Installing more than the maximum volume spacers will result in product damage and potential for injuries, etc.
More about Marzocchi Bomber Air Shock Volume Spacing can be found here (link opens in new tab)

Marzocchi Bomber Air Shock Rebound Controls
The Marzocchi Bomber Air shock offers 10 clicks of rebound adjustment.
This allows riders to control the rate of return from a compressed state. Ideally, rebound is set fast enough that the fork returns to a neutral position before the next obstacle, without being so fast as to lose traction or feel like a pogo stick!

Marzocchi Bomber Air Shock Compression Controls
From Marzocchi’s Site the Bomber’s Compression control offers unique features:
2-position, non-indexed compression sweep adjust means you can set it and forget it
Innovative tunable sweep to adjust the stop to a narrower window
Want to know more about the Ibis Ripmo AF’s rear Marzocchi shock? Follow this link for the owner’s manual of the Bomber Air Shock (opens in new tab)
Ibis Ripmo AF: Air vs. Coil
Debating air versus coil on your new Ibis Ripmo AF? Let’s look at the differences in the spring concepts.
Coil Ripmo AF
Generally coil shocks are sought after for being more plush on the initial stroke and more linear through the travel. “Linear” means less progressive, or less able to resist bottom out. Now, some of this can be tuned with compression settings on the damper, however, it will never have the same progressive feel as an air shock.
Getting the right coil for you usage is critical for the best performance. Typically riders will purchase two of the less expensive coil springs and decide if they prefer the softer spring with more preload spun into the spring or if the “heavier” spring with less preload is their preference. There is actual a difference in progressiveness with these two approaches while maintaining a cross over sag spring rate. In short, if you’re looking at coils and not 100% sure what you need chat with our team – and save on that titanium ultra light spring while you fine tune with the cheaper steel options!
Air Ripmo AF
Air shocks are mechanically more progressive in nature thanks to the properties of compressing air. Riders who want less ramp rate, or less progressive suspension can remove volume spacers thus increasing the air volume. Adding volume spacers diminishes the volume available to compress which leads to the PSI increasing at each mm of travel – increasing the ramp rate or progression of the suspension.
Most riders will gravitate to the air spring option for the range of adjustability.
Questions? No problem. Chat with our team and we’ll help you dial in your dream build.
Ripmo AF Complete Builds
Ibis’ has a range of builds in their lineup. Whether you’re shopping SRAM, Shimano or want to mix and match for the perfect setup there’s no one better than BikeCo.com to get you dialed in.
The Ripmo AF is available in 3 cost conscious kits:
Deore starting at $3,599
NGX starting at $3,999
SLX starting at $4,099
You can learn more about these three kits, review spec and check out some popular upgrades and swaps to the aluminum Ripmo below.
Use these tabs to learn more about the 2023 Ibis Ripmo AF Completes.
Read up on the kit highlights, common swaps / upgrades as well as view the detail spec.
Ripmo AF SLX Complete
Shimano’s 12sp cost-conscious option without compromising trail performance.
MSRP: $4,099
SLX Build Highlights
The Shimano SLX complete provides great 12sp Shimano performance, Ibis Send Alloy wheels, Marzocchi suspension and an alloy cockpit.
Some of the highlights of the build include:
– Shimano 4 piston SLX Brakes: Some of the most popular and proven brakes on the market.
– Proven Blackbird Send Alloy Wheels
– Bike Yoke Revive Dropper Post (3 sizes available depending on frame size). The Revive has an external control to bleed and reset the post as needed.
SLX Build Frequent Swaps
Common swaps:
Brakes: Magura and TRP are the most common changes here. Magura has more modulation while the Shimano come on a bit stronger. Riders who like Modulation may gravitate to the revised Hope 4 options which bring notably more power to the Hope lineup. TRP brakes are gaining traction for riders who like the Shimano feel but may want a touch more modulation from the longer brake lever.
Chain Guide: add a chain guide for more aggressive riding
Headset: Upgrade to the Cane Creek 110 or Chris King from the stock 40.
Cockpit: If you have a cockpit you like let’s get it on the bike. Or upgrade to a carbon bar or 35mm combination to find tune your SLX build.
Seating: Like cockpit, if you have a saddle or seatpost you love its a common change across all the builds.
Ibis Ripmo AF SLX Spec:
Fork
Marzocchi Bomber Z1 Coil, 160mm, 44mm offset, 29”, 110x15mm
Shock
Marzocchi Bomber Air, 210 x 55
Wheels
Blackbird Send Alloy (Send I front, Send II rear) / 29″ / Ibis Hubs
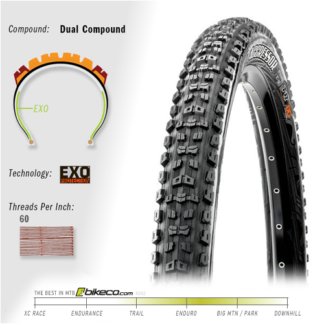
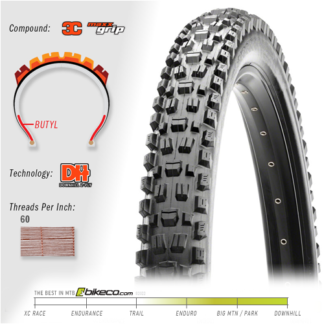
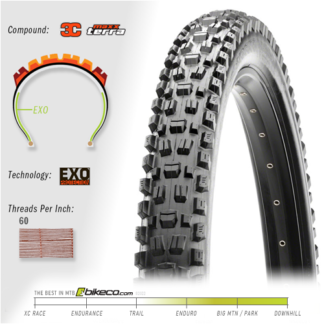
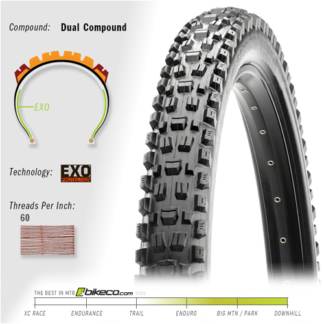
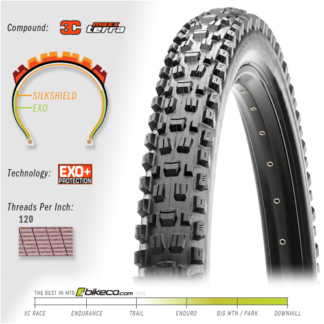
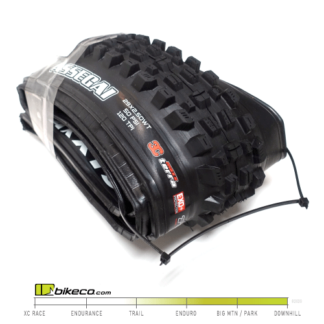
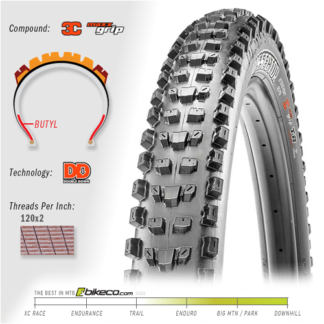
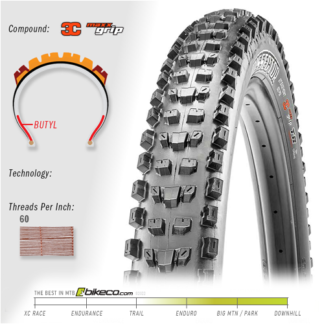
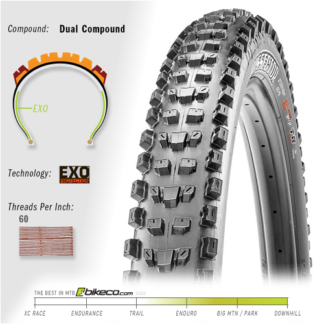
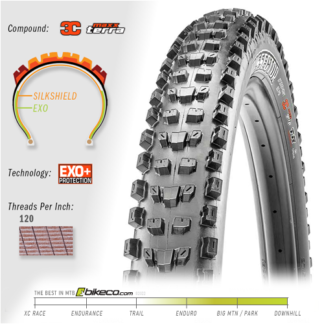
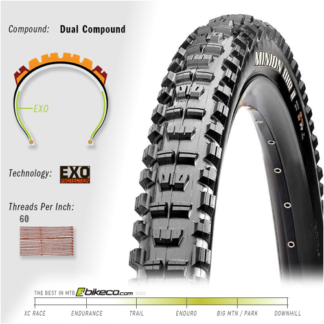
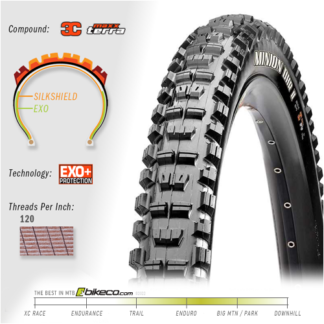
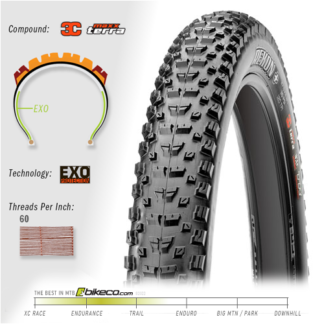
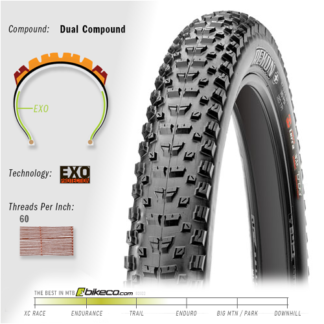
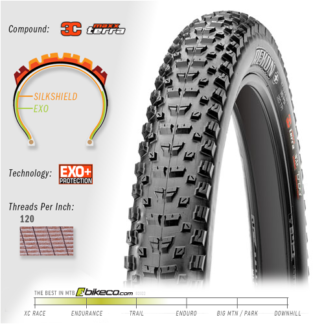
Tires
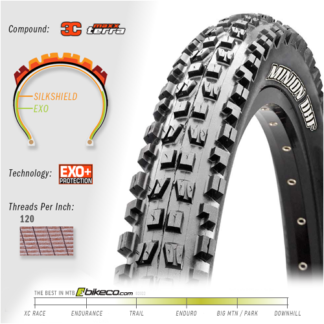
Maxxis Assegai 29” x 2.5” WT, EXO+ casing, 120tpi
Brakes
Shimano SLX M7120, 4 piston
Brake Rotors
Shimano SM-RT66 203/180
Cranks
Shimano SLX M7100 24mm spindle, 30t Alloy Ring
S/M: 170mm, L/XL: 175mm
Bottom Bracket
Shimano SLX BB52
Rear Derailleur
Shimano SLX M7100 Shadow Plus
Shift Levers
Shimano SLX M7100
Cassette
Shimano SLX, 10-51T
Chain
Shimano SLX M7100
Headset
Cane Creek 40 ZS44/ZS56
Grips
Lizard Skin Charger Evo
Handlebar
Ibis 780mm Alloy
Stem
Ibis 31.8mm
S/M: 40mm, L: 50mm, XL: 60mm
Seatpost
Bike Yoke Revive Dropper
S: 125mm, M: 160mm, L: 185mm, XL: 213mm.
Note there is a 250lb rider weight limit on this post.
Saddle
WTB Silverado 142
Ripmo AF NGX Complete
The NGX combines 12sp Eagle components with maximum room for upgrades down the line.
MSRP: $3,599
NGX Build Highlights
– SRAM XD Driver. By spec’ing the XG-1275 cassette the NGX kit utilizes the XD driver allowing riders to use any GX or above cassette at time of replacement without needing a new freehub driver.
– Great Blackbird Send Alloy Wheels
NGX Build Frequent Swaps
With a couple well placed swaps / upgrades your NGX build can be dialed in without breaking the bank.
Common swaps:
Brakes: Magura and Shimano are the most common changes here. Magura has more modulation while the Shimano come on a bit stronger. TRP brakes are gaining traction for riders who like the Shimano feel but may want a touch more modulation from the longer brake lever.
AXS: Believe it or not, we sell A LOT of NGX completes that have a GX AXS upgrade kit mounted to them before delivery. Can’t hate that wireless update…
Cockpit: If you have a cockpit you like let’s get it on the bike. Carbon handlebars are a very common upgrade to this kit.
Seating: Like cockpit, if you have a saddle or seatpost you love its a common change across all the builds.
Ibis Ripmo AF NGX Spec:
Fork
Marzocchi Bomber Z1 Coil, 160mm, 44mm offset, 29”, 110x15mm
Shock
Marzocchi Bomber Air, 210 x 55
Wheels
Blackbird Send Alloy (Send I front, Send II rear) / 29″ / Ibis Hubs
Tires
Maxxis Assegai 29” x 2.5” WT, EXO+ casing, 120tpi
Brakes
SRAM G2 R, 4 piston
Brake Rotors
SRAM Centerline 6 bolt 203mm/180mm
Cranks
SRAM NX Eagle DUB, 30t Alloy Ring
S/M: 170mm, L/XL: 175mm
Bottom Bracket
SRAM DUB BSA
Rear Derailleur
SRAM GX Eagle
Shift Levers
SRAM NX Eagle
Cassette
SRAM XG 1275 Eagle 10-50
Chain
SRAM NX Eagle
Headset
Cane Creek 40 ZS44/ZS56
Grips
Lizard Skin Charger Evo
Handlebar
Ibis 780mm Alloy
Stem
Ibis 31.8mm
S/M: 40mm, L: 50mm, XL: 60mm
Seatpost
KS Rage-i Dropper
S: 125mm, M: 150mm, L/XL: 170mm
Saddle
WTB Silverado 142
Ripmo AF Deore Complete
The Shimano Deore Ripmo AF is the most cost conscious in the lineup. You’ll be hard pressed to find anything with the capacity and fun factor of an Ibis RIpmo AF near this price point.
MSRP: $3,599
Deore Build Highlights
– 12sp Shimano Drivetrain. Excellent shifting across the entire lineup.
– Great Blackbird Send Alloy Wheels
– Shimano 4 piston brakes – some of the most popular on the market.
Deore Build Frequent Swaps
With a couple well placed swaps / upgrades your Deore build can be dialed in without breaking the bank.
Common swaps:
Brakes: Magura and Shimano are the most common changes here. Magura has more modulation while the Shimano come on a bit stronger. TRP brakes are gaining traction for riders who like the Shimano feel but may want a touch more modulation from the longer brake lever.
Cockpit: If you have a cockpit you like let’s get it on the bike. Carbon handlebars are a very common upgrade to this kit.
Seating: Like cockpit, if you have a saddle or seatpost you love its a common change across all the builds.
Ibis Ripmo AF Deore Spec:
Fork
Marzocchi Bomber Z1 Coil, 160mm, 44mm offset, 29”, 110x15mm
Shock
Marzocchi Bomber Air, 210 x 55
Wheels
Blackbird Send Alloy (Send I front, Send II rear) / 29″ / Ibis Hubs
Tires
Maxxis Assegai 29” x 2.5” WT, EXO+ casing, 120tpi
Brakes
Shimano Deore M6120 4 piston
Brake Rotors
Shimano SM-RT66 203/180
Cranks
Shimano Deore M6100, 30t
S/M: 170mm, L/XL: 175mm
Bottom Bracket
Shimano SM BB52
Rear Derailleur
Shimano Deore M6100
Shift Levers
Shimano Deore M6100
Cassette
Shimano Deore M6100 10-51t
Chain
Shimano Deore M6100
Headset
Cane Creek 40 ZS44/ZS56
Grips
Lizard Skin Charger Evo
Handlebar
Ibis 780mm Alloy
Stem
Ibis 31.8mm
S/M: 40mm, L: 50mm, XL: 60mm
Seatpost
KS Rage-i Dropper
S: 125mm, M: 150mm, L/XL: 170mm
Saddle
WTB Silverado 142

Common Upgrades on Ripmo AF
Some of the most common upgrades on the Ripmo AF, both at time of purchase as well as considerations down the line:
Brakes – Particularly on the NGX kit riders often swap to Magura or Shimano or upgrade to Hope, TRP or the higher end Magura and Shimano.
Suspension – Some riders prefer to upgrade to the FOX 38 GRIP2 to provide the high and low speed compression as well as high and low speed rebound options. Or, consider adding a GRIP2 damper to the Marzocchi coil for a unique coil fork with dual compression and rebound controls! Rear shocks have been upgraded to both the Factory FOX Float X2 and Float X for similar reasons.
Carbon Handlebars – carbon handlebars aren’t so much about the weight savings but take advantage of the materials damping effects which minimize the amount of trail input going into your hands. Carbon bars are available in both 31.8 and 35mm diameters.
Chain Guides – when you’re riding hard adding a chain guide helps to retain the chain to the chain ring in the rough stuff.
Oval Chain Rings – want to find any advantage uphill you can? Oval chain rings have drastically grown in popularity. Chat with our team about the details on what makes these rings slightly more efficient and easier on your joints.
Do you know other things you’re interested in? Let us know! We have special savings available for clients who buy bikes on all of the soft goods and bits you need to get on trail with your new Ibis Ripmo AF.
Compare Ibis Ripmo AF Geometry
Open the tab to the right to display our interactive mtb geometry comparison.
You can compare bottom bracket, chainstay, wheelbase, headtube angle, trail, reach and stack as well as learn more about rider’s reach and rider’s stack!
Ripmo AF: Comparative Bikes
What else is on your short list when shopping the Ripmo AF? Well there are two likely paths you’re examining: bikes in aluminum and the carbon Ibis Ripmo.
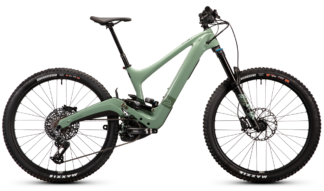
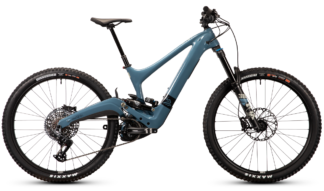
In aluminum the RIpmo AF is hard to beat. There is some availability in Mondraker aluminum bikes like the FOXY – reach out to our team for ETA, model and size availability.
So what if you’re looking at the Carbon Ripmo?
Well, the Ripmo has cutting edge DW Suspension with 147mm of rear travel and can be setup with either a 160mm or a 170mm fork. It is a proven EWS level bike while being acknowledged as one of the most confident and comfortable enduro bikes for pleasure riding.
Currently the list of bikes that are directly comparable to the Ripmo V2S carbon would be the Yeti SB150, Yeti SB140 Lunch Ride (in 29″ wheels) and Mondraker FOXY. Both available from BikeCo.com.
If you’re shopping a slightly smaller chassis the Ibis Ripley AF, Yeti SB120 and Mondraker Raze are worth review.
Check out more bikes on our Bikes & Frames page or Shop In-Stock and In-Production Ripmo AF Below
(note: 2023 product is under construction – if you don’t see it contact us today!)