Posted on Leave a comment

Increase Support & Improve MTB Small Bump Compliance

Products and Tips to Improve MTB Small Bump Compliance

As your riding progresses your settings and preferences are going to change. Faster, more aggressive riding puts different demands on your equipment and balancing your setup with these changes will help you improve your riding experience. You’re likely to find you need additional support from the suspension. This is typically done with increased compression or ramp rate which can compromise some of your small bump compliance. Let’s take a quick look at other components and techniques that can add some of your small bump compliance back as you ride faster.


Faster tends to be smoother

Imagine a boat going slowly riding up a series of waves. Up each face and down the back. Then the next. It has a certain “rock” to it right? Well if that boat is able to increase the speed it can decrease the vertical motion of “rock” by not dipping all the way down into each trough. Like “whoops” in moto – skipping across the top decreases the vertical motion. Same with your mountain bike.

Now, should you just skip out of control across everything? Nope. But momentum is often your friend.

Increase Support and Improve MTB Small Bump Compliance Cornering

Why You Need More Support

How does your setup need to change with that speed?

Well you’re going to need more support. If you’re running soft suspension it’s going to do a couple negative things.

First, it’s going to tend to “pack” and stay deeper in the travel then it needs to be. This will actually create a harsher ride as the PSI has increased while still being too soft for the next concern.

Burying the bike… Really a bummer and frankly can be kinda dangerous especially if the fork is too soft and buries itself into a hole or the front side of a rock you’re trying to roll past. Front end stuffs, bike slows way down or stops, your momentum keeps going and you’re a lawn dart. No fun.

So as your ground speed increases its important to give yourself that additional suspension support. While you might adjust sag a few percent most of this support is going to be through low and high speed compression as well as volume spacing to increase the air ramp rate and support.

Increase Support and Improve MTB Small Bump Compliance Support Image with proper compression

But, I Don’t Want A Bike That Chatters All The Time

No, you don’t want a bike that loses all of it’s small bump compliance.

And, sorry, but for just a second I’m getting on my soapbox: a lot of suspension talks about “small bump compliance” as the travel between full extension (you’re bike’s in the garage) and sag (with you sitting on it). This isn’t small bump compliance to me. This is droop. Sorry I’m a car guy and when the suspension goes away from me, or droops down – well that’s not what I consider absorbing a small bump. It’s falling away until the weight catches up. So, for this, Small Bump is referring to bumps that engage the suspension travel past the sag point in compression, ie you’re riding and hit a small bump and the suspension absorbs it…

OK, back to my point.

So you’ve had to make your suspension stiffer, or less compliant, in order to have it be able to “punch back” at the terrain without diving in and out of the travel. How do you keep your teeth from rattling out?

There’s a handful of places to look at that you can find small bump compliance outside of the suspension.

Rubber is a Damper

Many of the more “grippy” compounds actually are designed to incorporate additional damping. A lot of our racers will run the MaxxGrip front tire to get just even that bit more compliance since their suspension is so aggressive.

Tire sidewalls are playing a bigger and bigger role in fine tuning MTB riding compliance. Heavier sidewalls provide additional protection as well as damping through mass and material properties.

More aggressive sidewall technology provides additional mechanical support assisting the tire’s “air spring” to support your weight. This tends to allow riders to run a lower overall tire pressure providing better tire compliance and grip.

And yes, the air in your tire is a spring. And like your suspension it as it is compressed the pressures rise. The tire’s mass and sidewall properties effectively are the damper on this spring force. A heavier, stiffer sidewall is going to help slow the tire’s air spring better. This will help minimize harsh “run through” or even prevent or minimize rim strikes (which man, you can feel those in the hands!).

Another product that can help with compliance are CushCore tire inserts.

CushCore provide three unique modifications to a tires performance.

First, it’s a mechanical damper for the last bit of tire compression prior to the rim. Think of a jounce bumper in a shock: it’s a compressible item designed to absorb impact prior to it hitting a less compressible, and certainly less ideally compressible rim…

Second it works as a volume spacer in your tire. Similar to suspension adding volume spacers allows a lower starting PSI to more quickly ramp up to the proper supporting PSI.

Third and perhaps most notable and at the same time kind of the hardest to describe is how the CushCore’s contact point lowers the sidewalls leverage ratio in many conditions. That’s to say that by putting pressure on the sidewall, or maybe support is the better term, it shortens the available length of the sidewall which allows takes away some of the mechanical advantage the ground can apply to it. Think of waving a ruler holding onto the far edge, then holding in the middle. Lowering the leverage makes a big difference right?

Learn more about Maxxis tire compounds, sidewalls and tread patterns here

Magura MT7 HC MT7 and MT5 Levers Compared

Top to Bottom: Magura MT7 HC, Magura MT7 and Magura MT5 brake levers. Shop the Magura and Shimano brake lineup here.

Brakes, Braking and Slow is Fast

Stay with me on this one, it’ll make sense. Bigger brakes will help your small bump compliance. Well, bigger, more powerful brakes and a bit of technique.

You’ve probably seen it on trail – the rider heading into a chunky section who gets timid, grabs a handful of brakes, stuffs the suspension 1/3 down into the travel and then is, at best, jostled horribly across the terrain trying to regain control? So two things wrong there.

One, momentum is your friend like we mentioned earlier.

Two, especially with your fork, grabbing a bunch of brake OR staying on the brakes too late just stuffs the bike into it’s suspension. Instead of hitting the chunk at sag with say 80% of the travel left (and at the sag PSI) you’ve gone in at like half travel, cutting down both the amount of travel you have left as well as making the bike way more harsh as it enters chunk. No good!

Sort of like how when you corner there’s a point you need to be off the brakes and let the bike roll in (ya, you can trail brake to a point – but you’re not like smashing brakes while trail braking or braking through the corner) anyhow, so you ideally have a point that you need to get off the brakes and let the bike reset its rake and sag before you go blasting through chunk.

This allows you to take advantage of the more plush suspension further in the fork’s extension, have more travel left to absorb the terrain as well as resetting the headtube angle, and therefor trail measurements as well. All good stuff.

Handlebars, Grips, Gloves and Hands

So frankly, the two tips above are going to provide you the biggest jumps in small bump compliance as you up your compression settings. There are a few places that you can get a bit more feel, and every little bit does help.

Handlebars

Carbon fiber has a unique balance of stiffness while being able to slightly damp vibration input. Really that’s the beauty of carbon bars. Being a bit lighter is great too, particularly high up on a bike where center of gravity makes a big difference, but the real draw is the feel.

OneUp Components Carbon Handlebar Shape

Carbon also can be manufactured in a variety of shapes that would be really difficult in other materials. This allows two advantages. Weight saving and performance tuning. Removing material where it’s not needed such as the Tag T1 Carbon Bar with ovalized bar ends is an example of both.

The bar that probably takes the most advantage of this is the OneUp Components Carbon Handlebar. With it’s unique shape the OneUp bar is designed to improve small bump compliance by eliminating off-axis material in the rise transition.

Handlebar Width = Leverage Rate

Handlebar width is important to how your bike rides.

Obviously you need your hands in a comfortable position that allows you a power position to push the bar into corners and pull the bars over terrain. We’ve touched on that in other blogs over the years.

In regards of small bump compliance you’re looking at the leverage ratio of your bar’s design as well as your final bar width. As you narrow your bar you decrease the leverage ration which increases the bar’s stiffness.

We’ve actually seen handlebar manufacturers try to push a “one size fits all” on some stiffer bars because if you lower the leverage ratio they become like teeth rattling stiff. We don’t all need to run 800mm bars. (at 6’1” I run 785 as a point of reference)

If you’re trimming bars it’s worth a look how stiff the bars start out. If you’re trimming towards the minimum cut widths it might be worth looking at a less stiff bar to start.

Shop our favorite handlebars here!

Grips

Some riders are big fans of the grips with a slight rotation designed into them. We setup some clients on those if they want them – but – we don’t really ride those in the shop.

Personally, I don’t like the idea of the grip rotating and taking away some of the feel when I really clamp down on the handlebars. There’s also a part of me that doesn’t particularly like having more moving bits than needed on my setup.

Gripping

Now I’m not saying you death grip the bar. Far from it. Letting the bar slightly rattle in your hands helps minimize trail feedback. In fact one of the tips from my younger brother years ago on really long descents like San Juan Trail he would pick his spots and push his thumb into his middle finger and literally let the bar bounce in those circles. I never wrapped my head around that really – but he was doing 50 and 100 mile races and keeping your body feeling good was critical.

While we’re on how you grip the bar, it won’t change small bump compliance, but if your brakes or controls are out of position and require you to rock your hands “up” or “down” the trail feedback is much more likely to cause pain when you ride.

Similarly if you ride in gloves that are too big and “bunch” up in your grip position you can expect discomfort in your hands.

Gloves with large contact pads tend to create hand discomfort. Rather than minimizing trail feedback the extra movement thick contact pads either creates hot spots or perhaps has riders gripping a bit too much.

Wrapping It Up

Ok. Eighteen hundred words. That’s a bunch right? So to wrap it up in a quick paragraph:

Increase your compression and ramp as you ride faster to aid support at speed. Remember momentum is often your friend. Don’t slam on a handful of brakes into the terrain features and pack the suspension up. Run tires with appropriate support. Hold on right, not necessarily always tight. Should I have started with all of that and saved you the read? Hahaha… See you on the trails – Nate@BikeCo.com

 

Return to Top of Page

Posted on Leave a comment

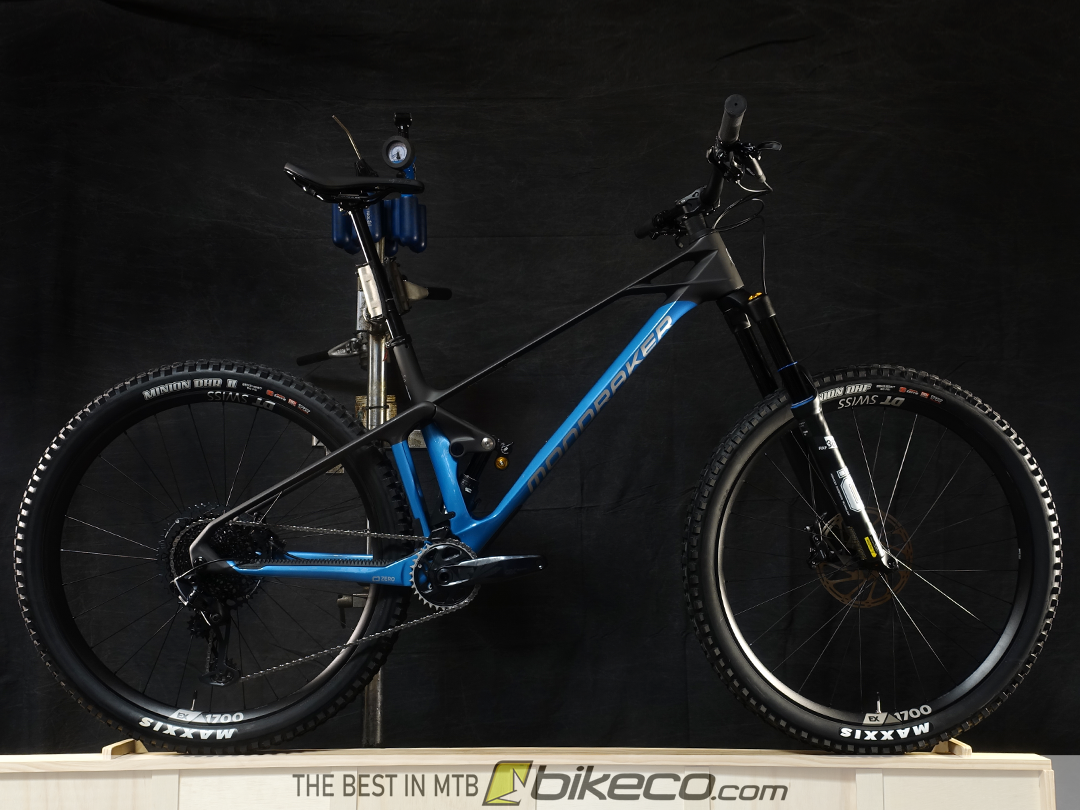
2022 Mondraker FOXY Carbon RR

2022 Mondraker FOXY Carbon RR in stock at BikeCo

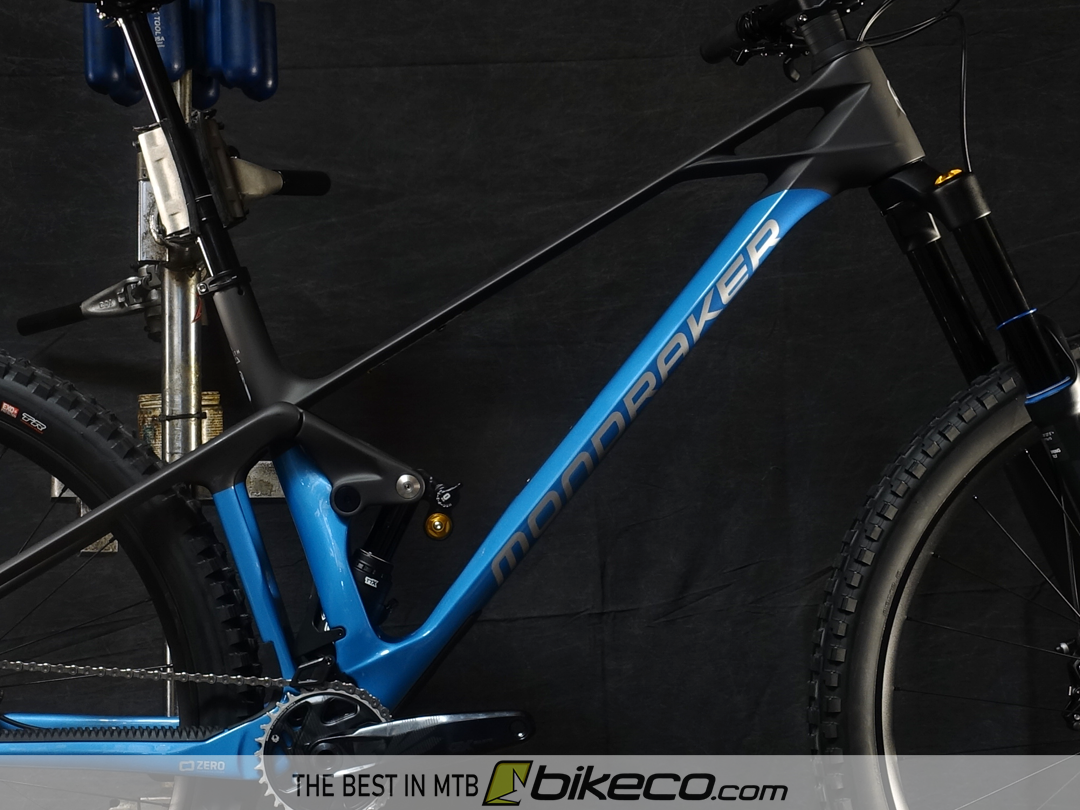
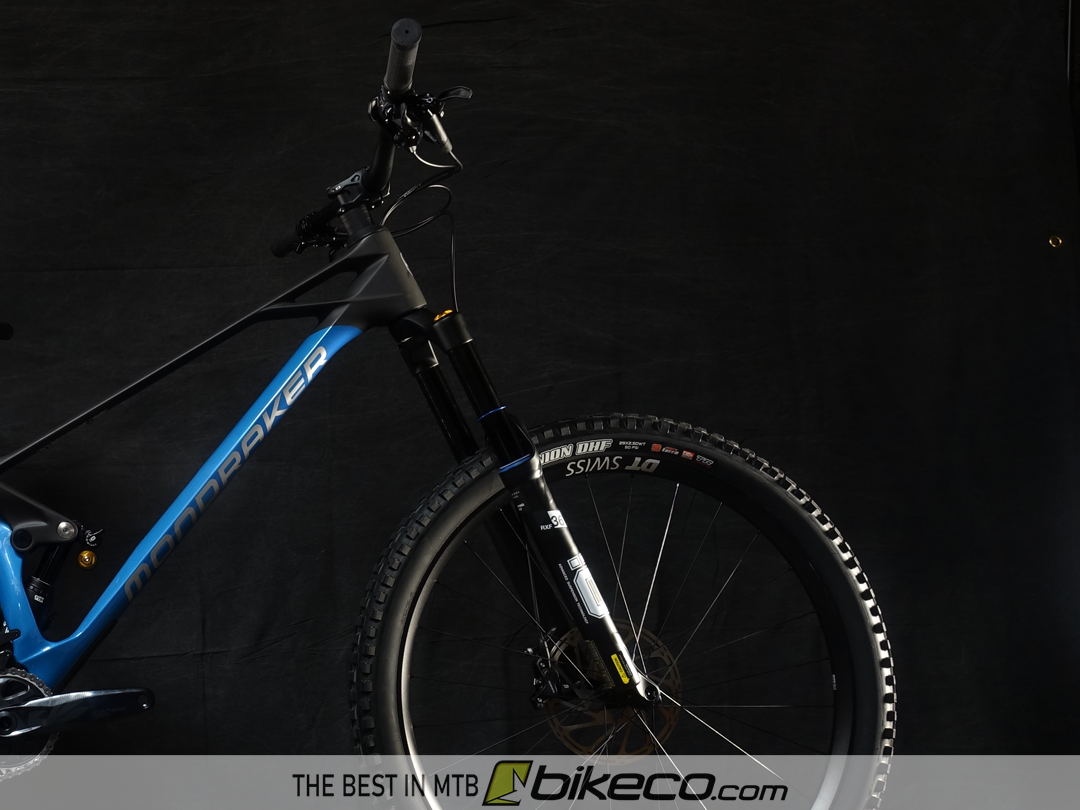
BikeCo is excited to partner with ZeitBike USA, the US Mondraker distributor to bring the top tier of the Spanish MTB and eMTB lineup to the US. Check out some details on the 2022 Mondraker Foxy Carbon RR in the video and images below!

Like all of the brands we carry, as a US Mondraker Dealer BikeCo.com brings our clients access to the best in spec upgrades or swaps, the best tunes, setups and after sales service in MTB.
Featuring 150mm of rear travel and 160mm in the front the Foxy Carbon RR is a bike ready for the rowdy adventure days.

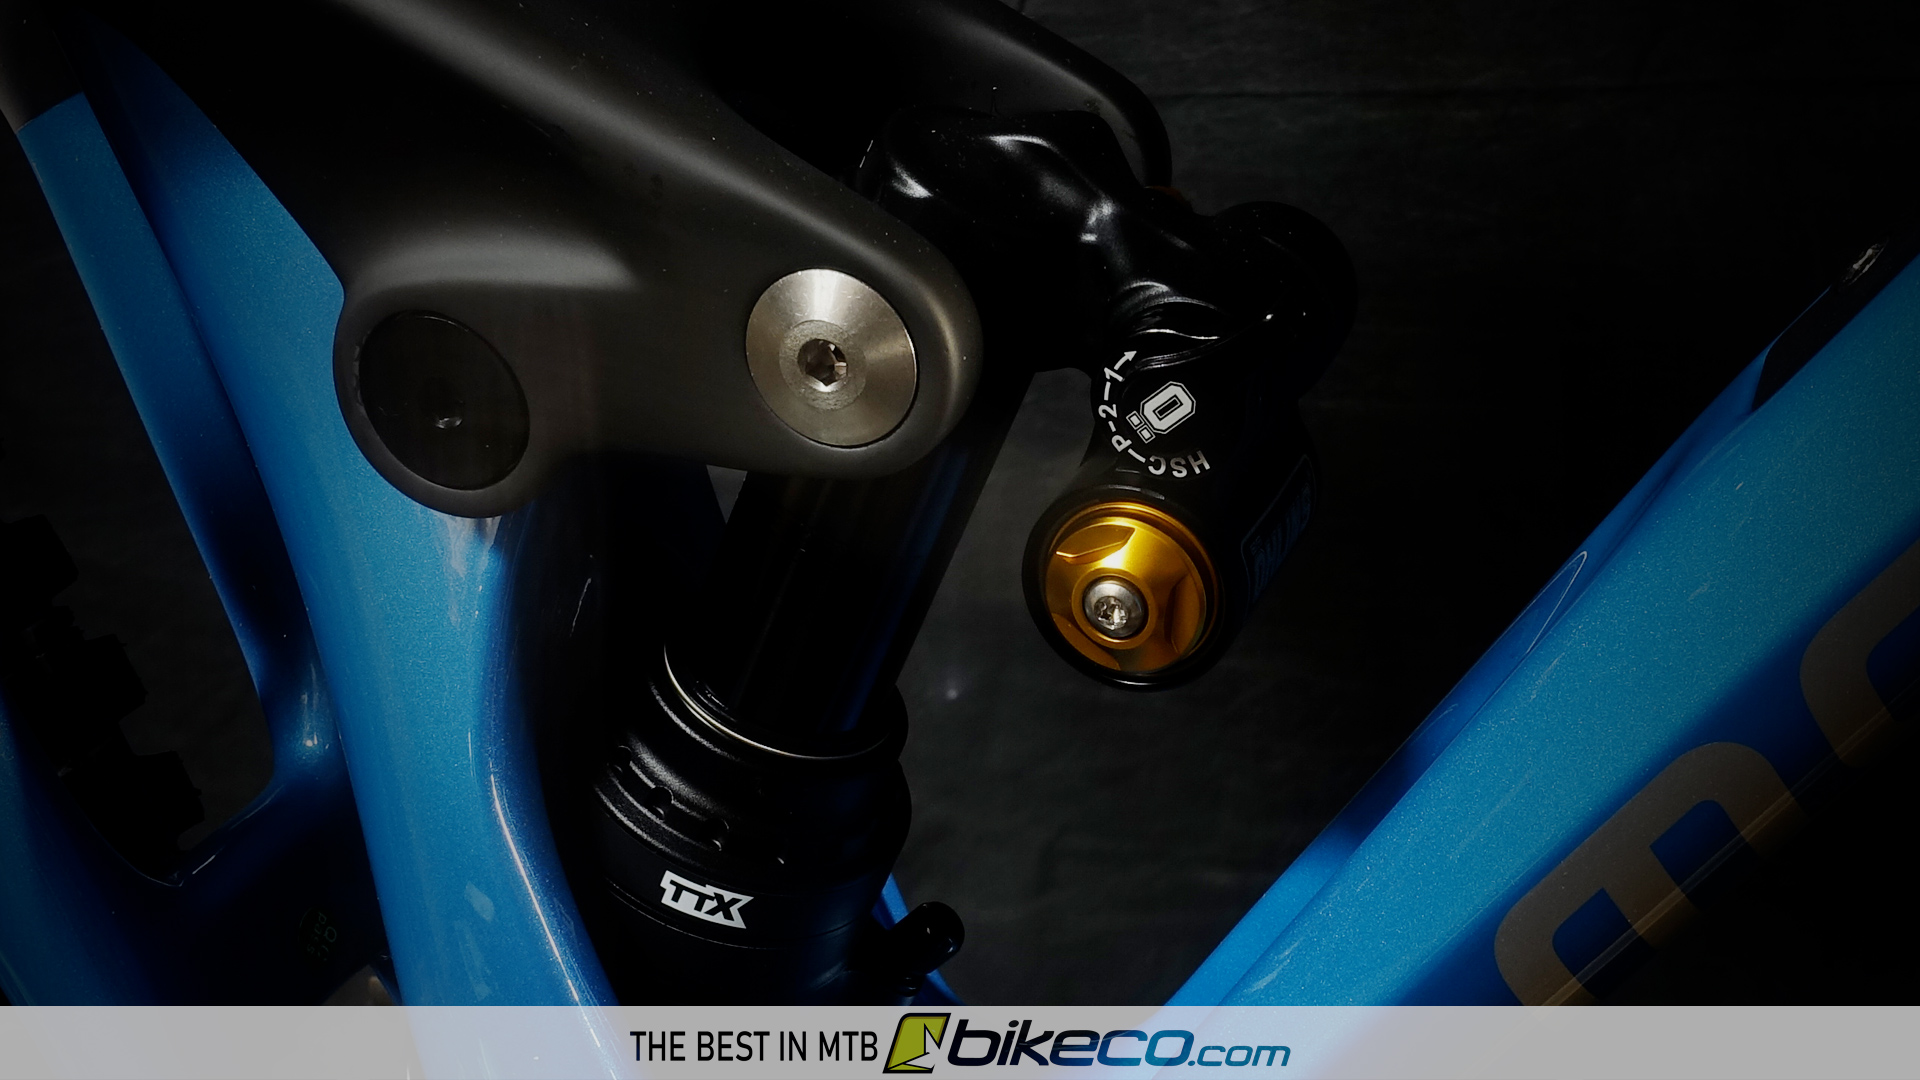
Rear suspension is controlled by the Ohlins TTX 2 air shock with adjustable PSI, Volume Spacing, Rebound, Low Speed and High Speed Compression.

Ohlins TTX 2 Air Shock HSC

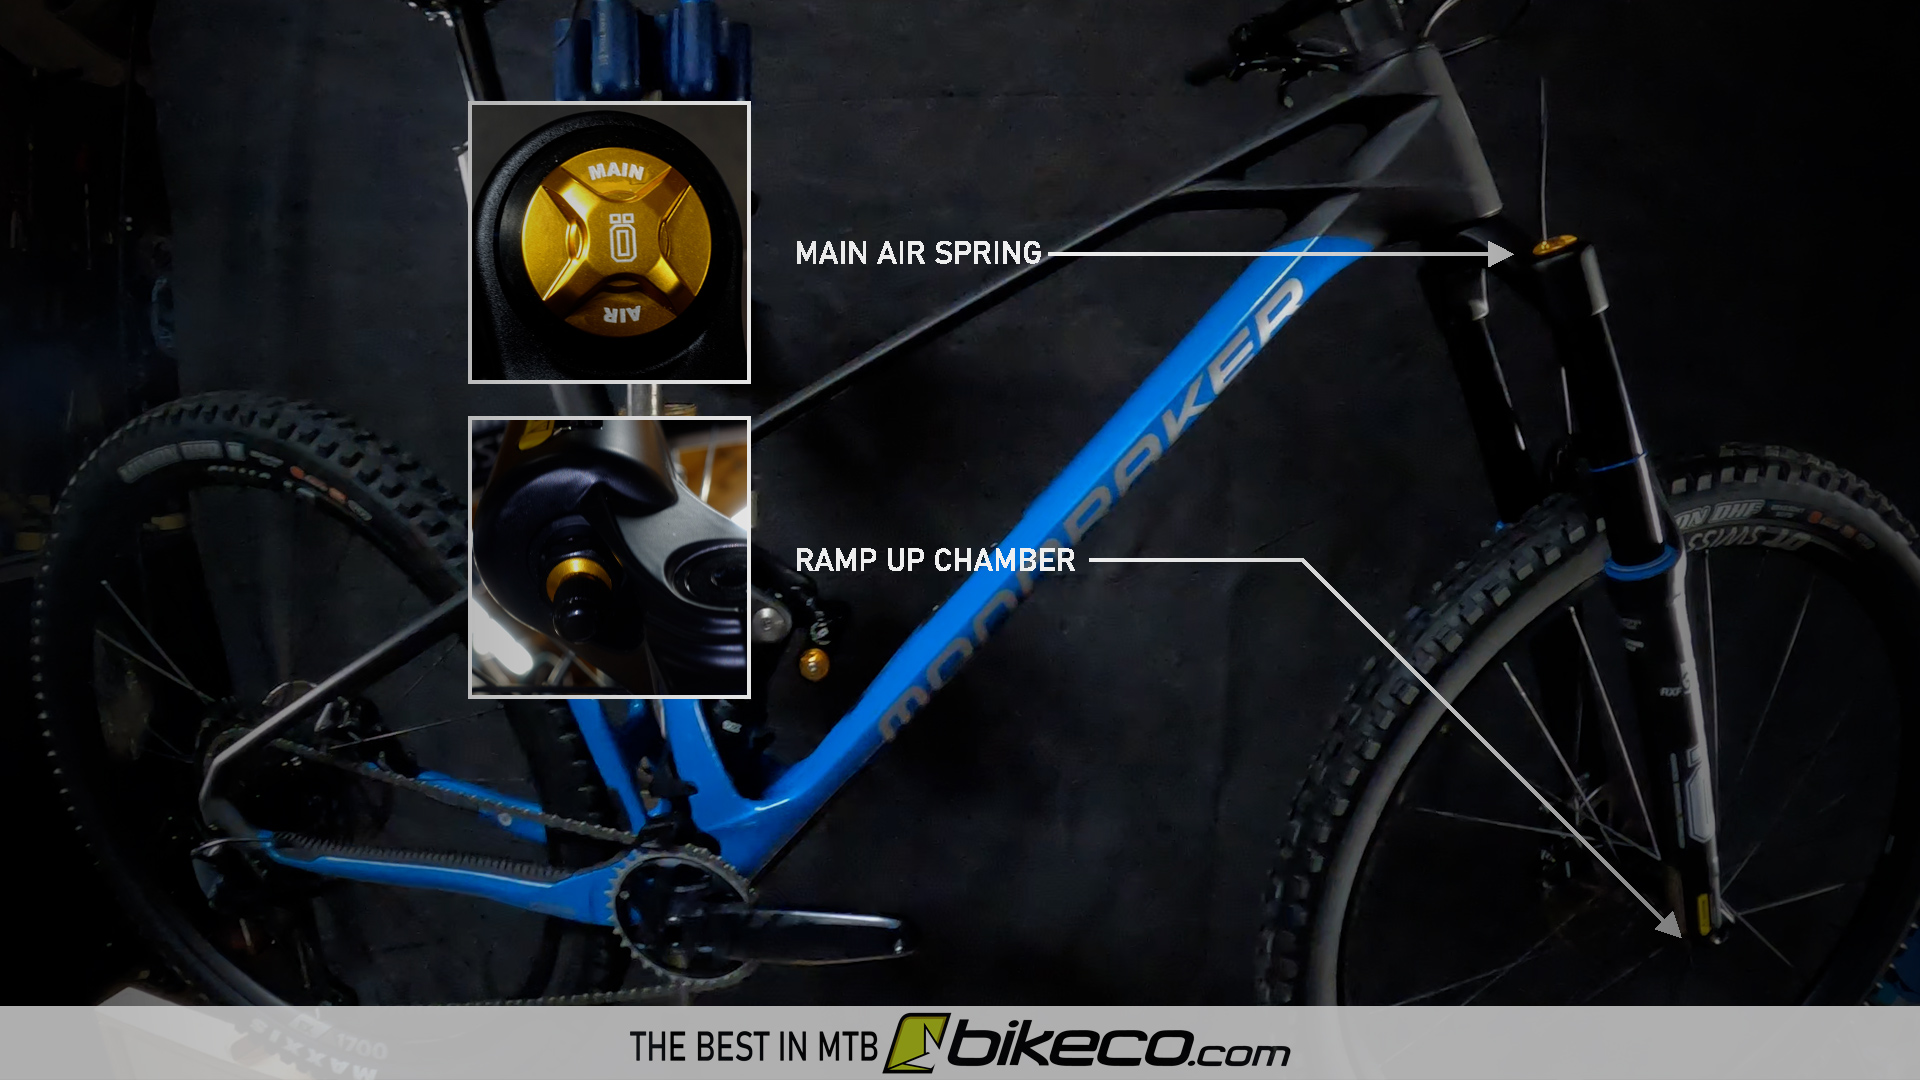
The Ohlins RXF 36 M.2 fork provides riders with a 2 chamber air system, the main chamber as well as the negative, or Ramp Up Chamber.

Riders looking to increase support or bottom out resistance will increase their Ramp Up Chamber pressure similar to adding volume spacers.

Ohlins RXF 36 M2 Air and Ramp Up Chamber Mondraker Dealer BikeCo.com
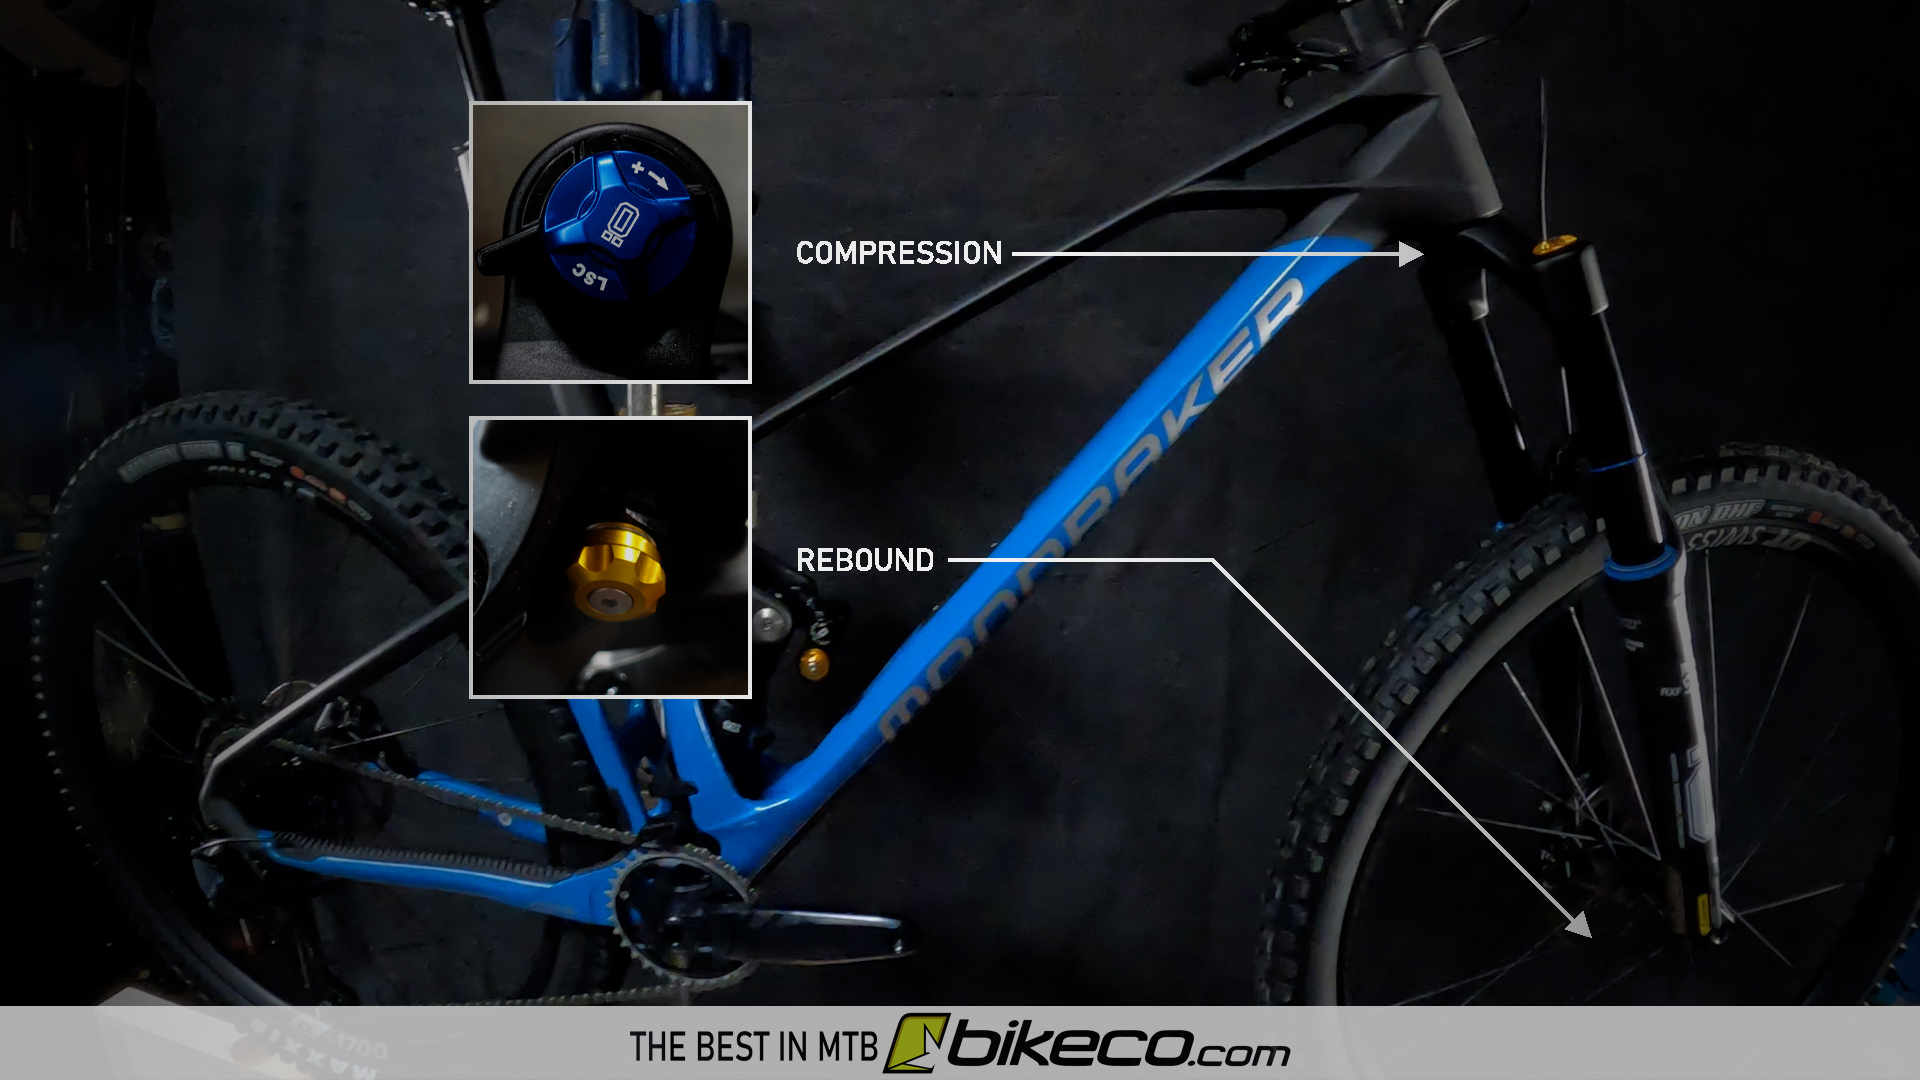
The Ohlins RXF features Rebound, High and Low Speed Compression on the opposite leg.

Ohlins RXF 36 m2 LSC HSC and Rebound 22 Mondraker Dealer

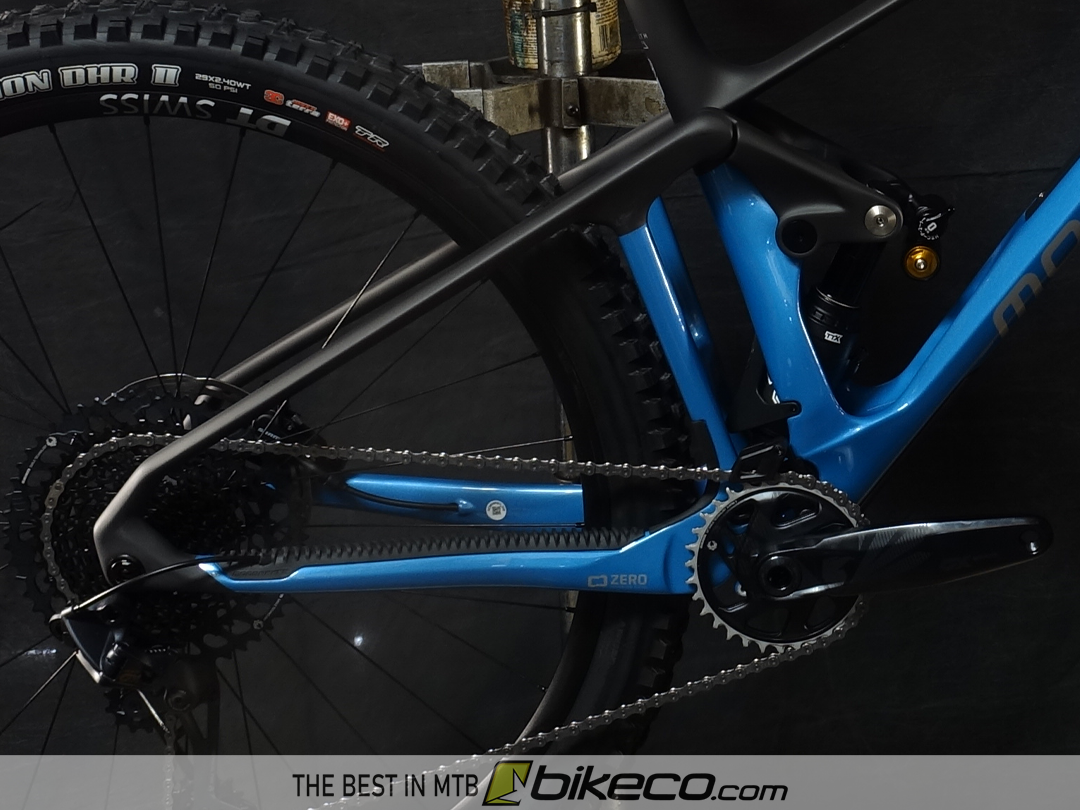
2022 Mondraker FOXY Carbon RR Detail Images

Enjoy a few shots that highlight some of the build details on the 2022 Mondraker FOXY Carbon RR.

This bike features the ZERO Suspension with Ohlins fork and rear shock, Forward Geometry, a 12sp Eagle drivetrain and is exceptionally light thanks to the Mondraker frame design.

2022 Mondraker FOXY Carbon RR in stock at BikeCo
Posted on Leave a comment

POC Standard, SPIN & MIPS Integra Explained

POC Kortal Race MIPS Integra

POC offers a lot of technologies on their MTB helmet lineup. Here we’ll take a quick look comparing the standard comfort foam, SPIN and MIPS Integra technologies.

As we showed in the video the major difference between a standard helmet and the SPIN option is the technology inserted in what we’ll call the “comfort foam” or “comfort pads”.

Rather than standard padding the SPIN (and MIPS Integra) feature an additional technology that improves the slight rotational slip plane designed to lessen impact severity.

Pinching any of these comfort pads you’ll compress the material. However, when you roll the materials between your fingers you’ll note a substantial difference.

The theory is additonal support in the SPIN and MIPS Integra design is designed to actually provide a small slip or rotation, extending the timeline of the deceleration and lowering the spike load of the impact.

Comfort Foam vs SPIN vs MIPS Integra helmet technology

SPIN comfort pad on the left and standard comfort pad on the right.

Below is the inside of a POC Tectal Race SPIN with the Spin comfort pad pulled away.

You can see that the SPIN pad mounts like a standard pad with velcro and sits directly onto the helmet’s internal foam.

MIPS SPIN mounting on foam

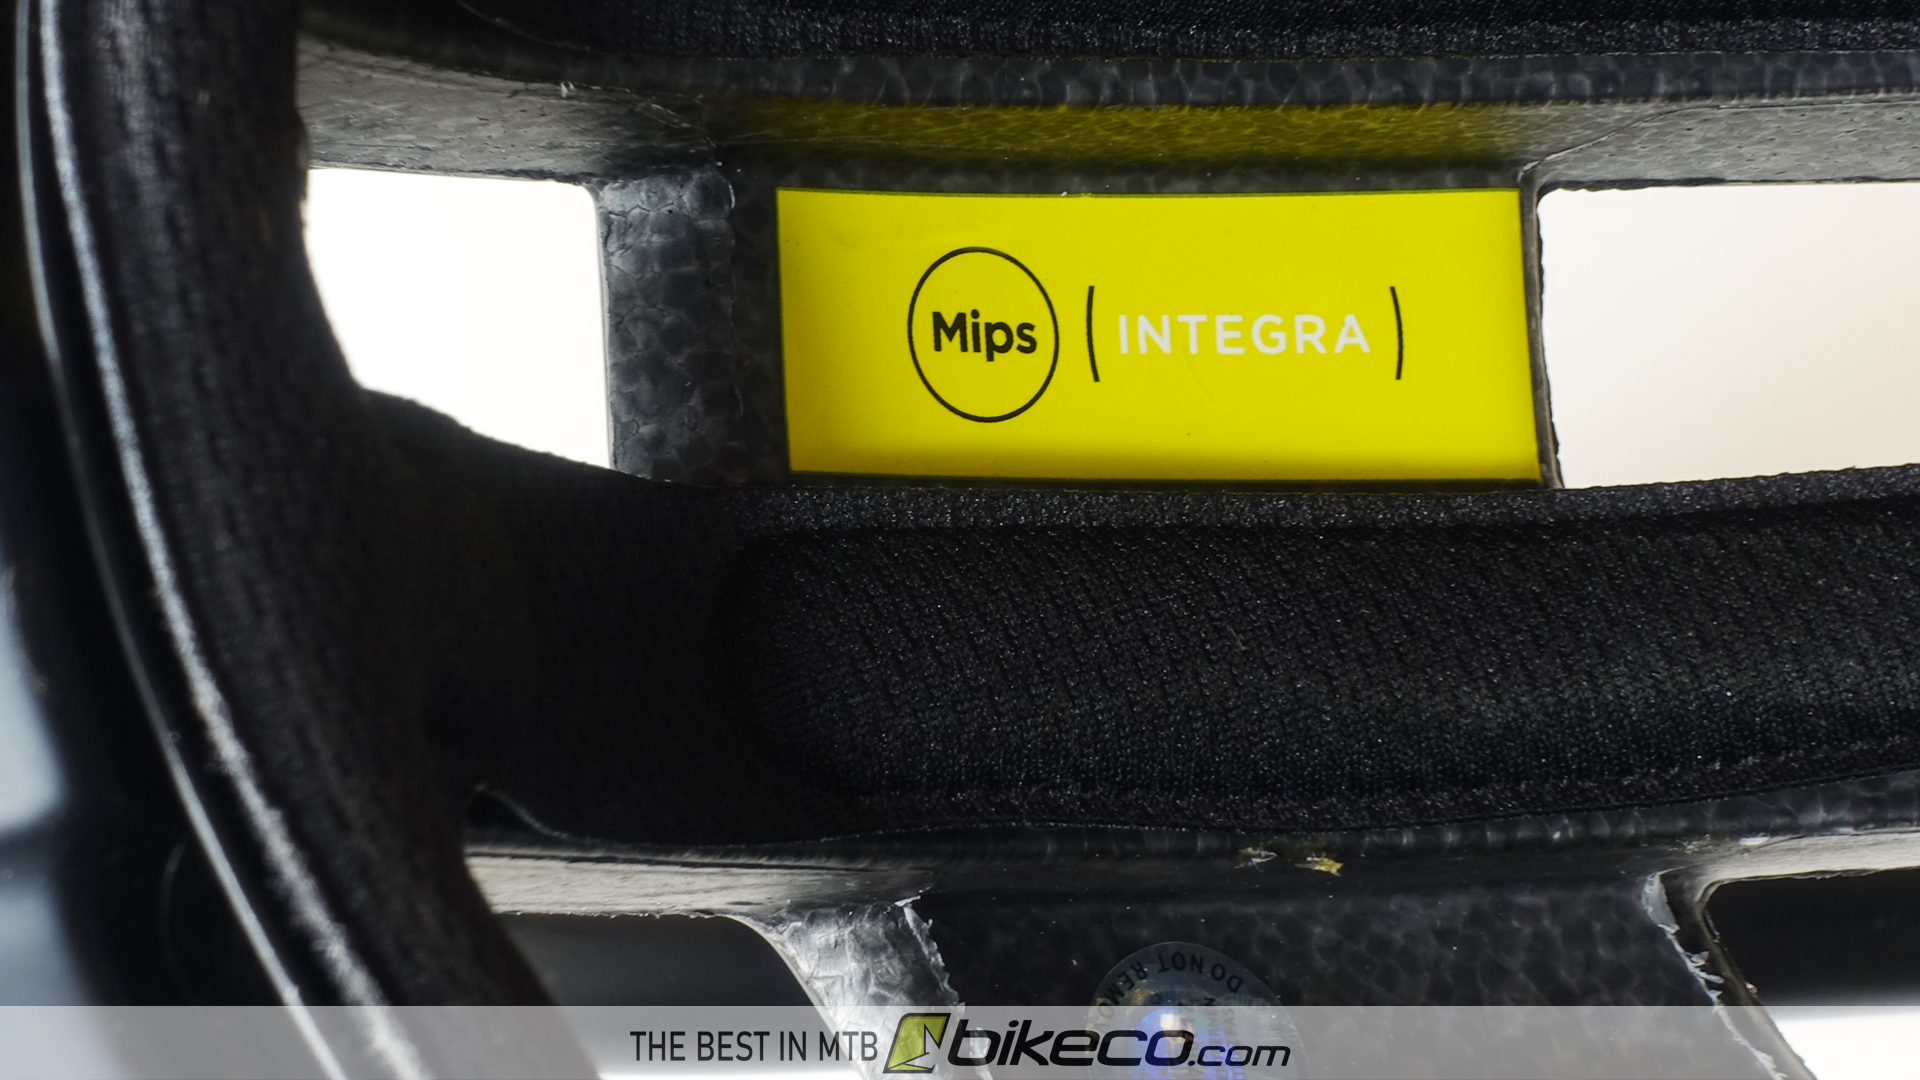
As a comparison the internals of a  MIPS Integra in the Kortal Race is shown below.

We’ve highlighted the edge of the slip plane that the comfort foam sits on.

The MIPS Integra’s comfort pad sits on this slip plane, connected by velcro tabs. The combination of the slip plane and the internal support / damping in the comfort pad gives riders another degree of protection in a crash.

MIPS Integra slip plane highlighted
MIPS Integra System : inside of a POC Kortal Race

If you jumped over from our Kortal Race review (or, even if you didn’t but want to read it!) you can find it here.

We hope this helped illustrate some technologies in the POC lineup. Having the SPIN & MIPS Integra explained is pretty simple, and should help you make the best choice of helmet technologies for your riding. We invite you to check out some other content or products here at BikeCo.com – the best in MTB.
Posted on Leave a comment

Clipless or Flats for MTB?

clipless or flats for mtb? Pedal Comparison

Wondering if clipless or flats are right for you? Let’s take a minute and go through some of the differences and preferences that will help you define Clipless or Flats for MTB.

First let’s look at some pedaling basics that will help you whether you choose to ride clipped in or on platform pedals.

Good Pedaling Practices

Spinning Circles

Spin circles. Seems simple right? Ironically after all the years of riding this probably one of my least applied practices… I’m going to reference a clock face with 12 being straight up, 3 being forward and we’re talking about the drive side crank, clock reference is flipped for non-drive.

Ideally you’re using a combination of muscles and movements when you pedal your bike, not just smashing down in the say 1 to 4 o’clock positions. (I’m so guilty of that).

Now, whether you’re running clipless or flat pedals you can take advantage of spinning better circles. It’s more efficient, it’s easier on your body, it probably looks better (according to my riding buddies who give me a hard time). How does the concept work?

Even though there is clearly a position of the most power you can still “drive” the pedals throughout most of the pedal stroke whether you’re riding flats or clipless. On the bottom of the pedal stroke, like say 4 to 8 o’clock you “drag” your foot back. Think of it like a moonwalk move or scuffing your foot almost. On the top of the circle you’re pushing that “scuffing” until the pedal drops back into the optimum power position.

Does this add a ton to your speed? Nah. But it is more efficient (when I remember to do it) and it fires different muscles that in turn helps ease the load across the rest of your legs.

One of the things new riders imagine is that with clipless pedals you can “pull” up on the opposite of the power down stroke. And, sort of you can, but again, it’s not nearly as efficient as the down stroke but every bit does help.

Footwork Matters

Getting the right foot “down” at the right time makes  a big difference. Learn to corner with your outside foot down. It greatly improves your ability to weight the bike and “drive” it through the corner with your feet. It also improves your ground clearance as you lean the bike over.

Heels Down

Again, this is for either pedal type. Get your heels down when you’re descending. It improves how the bike is weighted and gives you much more control, particularly in steep chutes.

Downsides?

Let’s get these out of the way right off the bat and move on with the day right? Here are the most common fears for each type of pedal.

Clipless: “What if I don’t get out of them?”

Yup. It’ll happen, but, from my experience it is absolutely not in the situation you’d think. I’ve run full speed out of crashes and then thought about, man, I never even mentally made the choice to clip out. It becomes automatic really quickly.

When I found it “more” likely to happen frankly is tired, at the top of a climb, when I would think I clipped one foot out and lean over only to find that I had in fact, clipped the other foot out. Almost always happens when there’s people watching. It’s like Murphy’s law.

Flats: “What if they hit me in the shins?”

Ya. That happens too. The last real good one I had was at the top of a trail bouncing off like a 6″ tall by 2′ long “table” messing around while chatting with friends. I wasn’t paying real attention and just kinda tried to save a foot coming off and then yup, snakebite.

The few times I’ve had bigger get offs with flat pedals I’ve been well clear of the bike pretty fast.

So there are the typical worries. Let’s compare some other aspects.

Comparing Cliplesss & Flats

Where are the real differences in your day to day riding? Let’s take a look.

Efficiency(?)

I started out riding clipless and went to flats the last few years. Honestly I haven’t noticed any efficiency differences – but – I’ve never been renowned for my pedaling prowess.

I’d imagine that clipless pedals are slightly more efficient for the average rider. I haven’t really looked into the weight differences between flats and clipless plus cleats either. If you’re riding XC / Trail and long adventure days that weight will mean more than an hour and a half rip after work.

Technique

Clipless pedals tend to hide technique issues. You can cheat on your bunny hops, you can pull the bike up or yank it around side to side in the air a bit easier if you’re offline, etc.

Here’s the scoop on that though: probably no one is grading your technique at the end of the ride except you right? So if you’re more confident clipped in then go for it.

When I rode clipless I kept a pair of flats around for the occasional rip to work on technique. It’s interesting as I found that where I thought “flats will be great in the gnarly stuff” once I got bouncing around in it I realized “hmm, I miss being attached to the bike a bit more!”. The bottom of our local Car Wreck trail was my big eye opener on that.

Once I moved permanently to flats I found that I had to corner slightly different or my “upper” or inside foot tended to bounce off the pedals. Clipless had kept me hooked in for all those years and it was an eye opener that I had been just floating that foot essentially.

If you ride flats you’re going to need to concentrate more on keeping your feet “planted” on the bike consistently. Whether bunny hopping the obstacles, or ripping through the chatter.

Using your knees as “suspension” to absorb the bike up and drive it down is a great technique to practice whether you’re running flats or not.

Confidence

You know, your riding is really about you. What are you confident on? What causes you concern? Sounds over simplified, but really if you’re thinking about “extra” things when you really should be concentrating on other things that’s no good right?

I’m going to use a recent experience as an example, although not MTB related. I was on the freeway the not too long ago on my motorcycle. Now, I’ve got a lot of years and a ton of miles on motorcycles so admittedly it can seem a bit “autopilot” at times. It was a high speed day but with traffic – nothing too out of the ordinary heading up to the shop from San Diego. Anyhow, when the hills dropped away into Del Mar and I got a cross wind there was a repetitive thumping on the side of my head… Turns out I hadn’t fastened the helmet! Instantly that was all I could think about. I didn’t want to pull over in the construction area and get creamed by a car so I rode on a bit looking for an offramp. I’m big on helmet safety and this was really not a good feeling and I got hyper focused on it. To the point that when I got off the freeway to correct it I ended up pulling over onto a steep grade and nearly dumping the adventure bike on my legs! I had been so mis-focused that I made a mistake I probably never had made in 20+ years of riding moto… Point is, if you’re having to really put tremendous thought into something it will have other consequences.

Are you worried about that technical single track and whether you could get a foot out before you tumbled off the edge? Well, being aware of that is one thing. Hyper focusing on it to the point you are scared isn’t fun or effective.

If you’re confident or even cautiously confident or aware you’re much better off.

Clipless Pedals Explained

Clipless pedals use a cleat to engage with spring loaded “clamps”.

As you saw in the video most clipless pedals are engaged by stepping “in and down”. The forward tab of the cleat fits under the forward bar and then you step down with your heel. As you step down the rear of the cleat’s radius will put pressure on the spring loaded bar (shown as rear in the video, but could be either front or rear depending on design) opening the bars allowing the cleat to pass before the spring clamps the bars in place.

To exit clipless pedals you pivot your heel outboard. This rotates the cleat in the clamps allowing the cleat to disengage. The geometry of the design means that it generally takes less pressure to clip out than to clip in as the spring loaded bar doesn’t need to move the same amount.

It’s pretty simple and your muscle memory will pick up on it quickly.

Differences in Clipless Feel

The main difference in clipless pedals is the amount of “float” they have in the design.

Float can be two different motions: lateral or rotational.

Lateral float is how much extra area there is for the cleat to move inboard or outboard while staying engaged. For instance Time pedals tend to have more lateral float than Shimano pedals.

Rotational float is dependent on cleat design. Most pedals have a similar range of rotational float before the pedal disengages, although some manufacturers may offer cleats that have different shapes providing quicker or later disengagement.

Many pedals offer adjustable spring rates. This adjusts to rider preference for clip in pressure, hold while clipped in, and to a lesser extent the clip out pressure. When I rode Time pedals I like a mid pressure setup. If I ride HT clipless pedals I tended to tighten the spring more to provide a more confident clip out feel (seems sort of counterintuitive I know, but it works).

Shopping Clipless Pedals

As mentioned previously there is a feel difference between clipless pedals.

Riders looking for a very “set in” almost like a ski boot feel gravitate to the Shimano lineup.

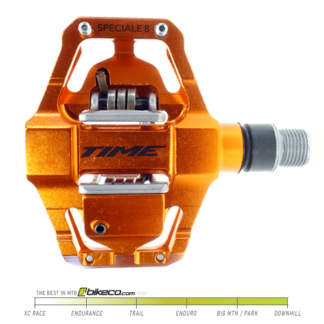
Those who prefer a bit more movement in their pedals tend to shop the Time lineup. The lateral float is felt most during climbing if you are a rider who likes to wiggle around.

Shopping Flat Pedals

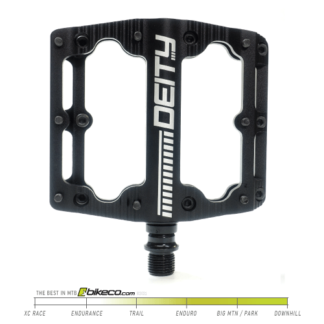
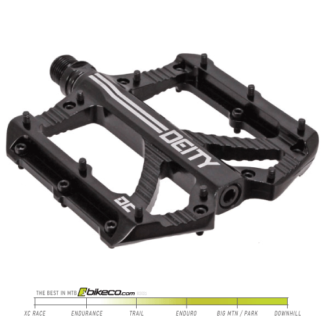
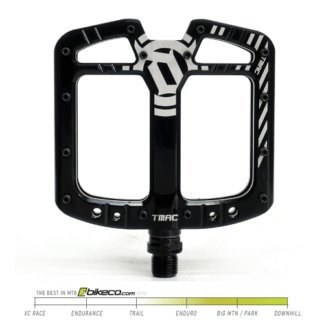
Flat pedals come in a variety of sizes and shapes.

Pedals generally are somewhat “sized” depending on your shoe size. If you’ve got big feet you should shop bigger pedals – makes sense right? (Luckily we list the platform dimensions to help riders compare our selection of platform pedals).

clipless or flats for mtb PNW Loam Pedal Dimensions

Thinner pedals will slightly improve ground clearance. Thicker pedals may tend to have better bearings for heavier riders.

Some riders prefer more mechanical concave to help sit “into” the pedal.

Hell, some riders love the look and color of a model and that’s enough! We only carry proper pedals so you don’t have to worry about falling in love with a garbage brand or model here at BikeCo.com
The Worst of Both Worlds

OK, this is a bit of a soapbox rant based mostly on my opinion. Grain of salt if you want – or agree with me and be right! (hahaha, just kidding)

What about pedals that have clips on one side and flats on the other? Well, they’re the worst of both worlds.

Reasons to commit to one or the other:

Clipless side – if you’re trying to clip in and only one side of the pedal has the assembly what are the mathematical odds that it’s facing the correct way? You might think 50% – but you’re wrong. Murphy’s law comes into play and its almost ALWAYS on the bottom and you have to flip the pedal around with your foot till you get it to step into it.

Flat pedal side – ever seen the road biker clippty clomping around the coffee shop and then WHAM!! slipped on the cleat? Ya. Cleats are metal. Metal on hard surfaces tends to be slippery as hell. Clipless shoes have a large area removed to accommodate mounting cleats and allowing them to move forward to back and side to side. So, your clipless shoe with a cleat in it essentially has a big void of traction right near the contact point of your shoe. That means your choices on the platform pedal side are total shit traction, or you can move way forward on the pedal to get to the shoe’s sole around your midfoot or further back. Which isn’t great for control.

Hopefully you’ve learned about the differences between clipless and flats for MTB – we invite you to shop both types of pedals as well as The Best in MTB here on BikeCo.com!

Return to Top of Page

Posted on Leave a comment

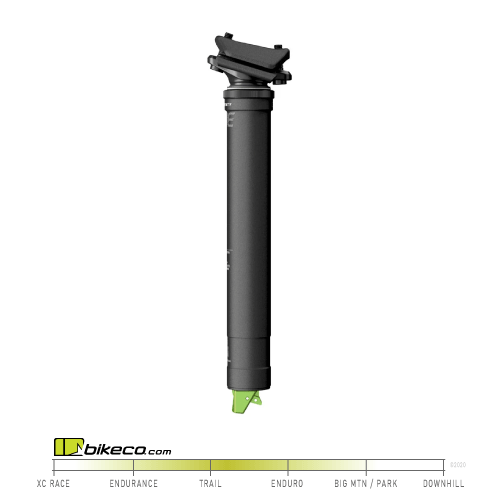
Four Best MTB Dropper Posts

Top Four MTB Dropper Posts

Which are the best MTB dropper posts? The features, reliability, and frankly a bit of bling go into narrowing our list to the best MTB dropper posts on the market.

One thing about the MTB industry – it rarely stands still. MTB Dropper posts have gotten more functional, longer travel with increased service life. The seatposts we’ll examine are class leaders available in a variety of sizes to dial in any rider.

Most riders start their search by determining the size range they’ll need.

What Size Dropper Post Will Fit?

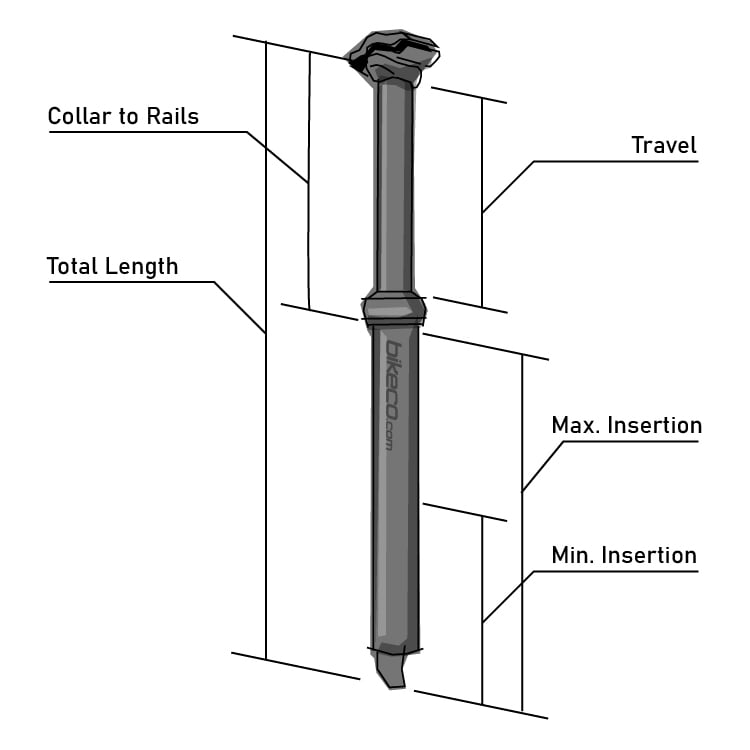
Starting with your inseam measurement you can deduce what size dropper posts will fit your needs.

Subtract the frame collar to pedal surface as well as saddle rail to saddle seating surface from the inseam measurement.  This will get you in the neighborhood to size you dropper.

Remember to leave some wiggle room to go down. Spec’ing a post that is required to sit collar to collar on your bike means if you need it shorter you’re going to have to adjust it in the seatposts’ travel. (either with PNW or OneUp style adjustments or by slightly lowering the saddle each time (less than ideal))

Further down in the post you’ll find dimensions comparing the travel, collar to rails, overall length as well as min and max insertion of our four favorite brands of post.

What are our Top Four MTB Dropper Posts?

This list shows our four favorites, in no particular order. It’s up to you to review sizing and features to decide which of these posts best suits your needs.

FOX Transfer Factory Kashima Dropper Post

It’s not all about the Kashima coating – well – some of it is about how good the Kashima coat looks with your FOX Factory fork and rear shock I suppose for sure!

200mm, 175mm, and 150mm travel options give riders of all sizes options.

The new seat clamp is designed to sit lower allowing riders more travel per size. The revised FOX Transfer is also notably lighter than it’s predecessors. FOX has improved the Transfer’s internals providing longer service life with easier serviceability. Perhaps as notable as the seat clamp is the reduced insertion depth, again, allowing longer travel in smaller frames.

FOX Transfer Seatposts

FOX Factory Transfer Seatpost. New head for lower overall length.

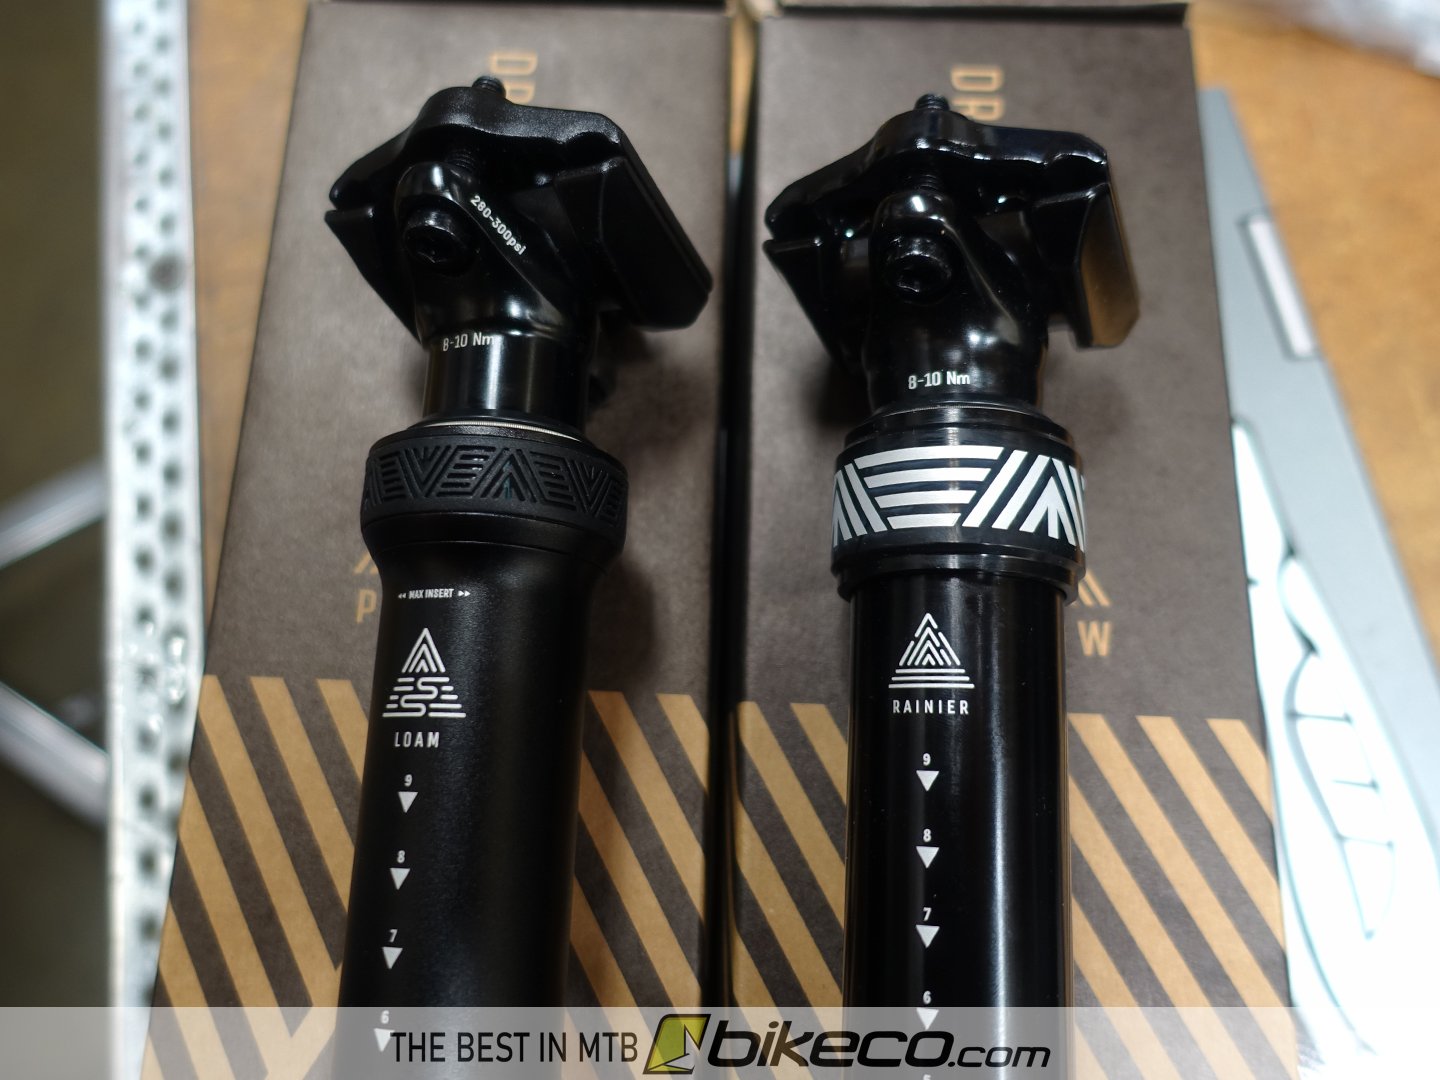
PNW LOAM & Rainier Gen 3 Seatposts

Compare PNW Loam and Rainier Gen 3 Seatposts

PNW Loam & Rainier Gen 3 Posts

PNW’s MTB dropper posts lineup feature some unique design advantages.

First, like the OneUp, the adjustable travel allows riders to maximize dropper travel. Looking for maximum travel? Well with the tool-less adjustability it couldn’t be easier to run the most seatpost your frame will allow.

PNW posts are cost conscious as well. The Loam post features a revised cartridge designed for ease of maintenance while the Rainier Gen 3’s cartridge absolutely shines in cold, wet, conditions.

The PNW travel adjust system provides 5 settings, each reducing travel by 5mm (total of 25mm).

This produces the available popular travel lengths:

200-175mm
175-150mm
150-125mm

Bike Yoke Revive 2.0 Seatpost

The Revive 2.0 MTB dropper seatpost features a unique “reset” capacity.

Utilizing an internal cartridge capable of purging air from the hydraulics with external controls you can eliminate any squish in your seatpost faster than your buddy can get his shoes on.

Simply engage the quarter turn access hardware near the seatpost head, compress the seatpost, and release the bleed hardware. It’s that easy.

The Revive 2.0 is available in long travel options making it popular with riders looking for maximum drop. 213mm and 185mm posts are available.

The Revive 2.0 has a max rider weight of 250lbs.

Bike Yoke Revive Seatposts

Bike Yoke Revive 2.0

OneUp Dropper V2

OneUp Dropper Seatpost V2

OneUp Dropper V2 Seatpost

The OneUp Dropper V2 seatpost is a cost conscious, long travel, adjustable travel option appropriate for a variety of riders.

The Dropper V2 can have it’s travel reduced either 10mm or 20mm below its stock height allowing riders some wiggle room on fine tuning their fit.

The V2 post also has a user replaceable cartridge available for $60 for the home mechanic.

Some of our favorite poits on the V2 dropper are its low overall length and stack meaning longer travel options will fit in smaller frames.

Popular travel sizes are 210mm, which can reduce to 200 or 190mm,  180mm (170,160mm) and 150mm (140,130mm)

Compare Dimensions on our 4 Favorite MTB Dropper Posts

Review Travel, Collar to Saddle Rails, Overall Height as well as Minimum and Maximum insertion of the FOX, PNW, Bike Yoke and OneUp dropper posts.

Seatpost Dimension Diagram
Measurements in MM
Travel Collar to Rails Total Length Max Insertion Min Insertion
FOX Transfer 200 238.9 530.7 291.8 150
FOX Transfer 175 213.2 475.1 261.9 100
FOX Transfer 150 188.2 418.3 230 100
PNW Loam 200* 250* 540 290 145
PNW Loam 170* 220* 480 260 120
PNW Loam 150* 200* 440 240 190
PNW Rainier Gen 3 200* 255* 555 300 180
PNW Rainier Gen 3 170* 225* 493 268 150
Bike Yoke Revive 2.0 213 255 582 327 130
Bike Yoke Revive 2.0 185 227 517 290 130
Bike Yoke Revive 2.0 160 202 467 265 100
OneUp Dropper V2 210* 243* 540 297 150
OneUp Dropper V2 180* 213* 480 267 120
OneUp Dropper V2 150* 183* 420 237 90
* PNW & OneUp posts have adjustable travel options
Posted on Leave a comment

Understanding MTB Suspension Controls

Comparing How Pressure on Air Suspension Is Applied

Understanding MTB Suspension Controls

Air Pressure, Volume Spacing, Rebound and Compression work in concert to fine tune you bike’s performance.  Watch the video and read through the blog to be a step closer to understanding MTB Suspension Controls!

Video: MTB Suspension for Beginners

Click through the tabs below to learn more about the specifics of Air Spring Pressure, Volume Spacing, Compression and Rebound tuning.

PSI / Spring Rate

MTB suspension must accommodate a wide range of rider weight. To achieve this nearly all forks and rear shocks use an adjustable air spring.

By varying air pressure riders set a desired sag, or percentage of travel that the bike “sits into” under neutral loading.

Modifying this sag percentage will change small bump compliance as well as bottom out characteristics.

Learning how to Pre-Charge your suspension pump will help you make finite adjustments to sag.

Typically 15% sag is for a firm setup and 20% sag is considered plush.

Fine Tuning Control: Volume Spacing.
Air springs ramp rate, sometimes called Spring Rate, is based on how air compresses in the containment cylinder. As the air is compressed the PSI increases according to the decreasing volume of the containment. This is done via non-compressible volume spacers in the air chamber.

Opposing Control: Rebound.
Higher spring rate will drive the suspension back to neutral with more force than a lower spring rate. To keep the bike from skipping across trail rebound damping is utilized.

“Helping” Control: Compression.
Compression controls provide hydraulic damping to slow the fork through its travel.

Volume Tuning

As suspension compresses (travel reduces) a piston moves closer to the end of a sealed container. By decreasing the volume of the container the PSI pushing back on the piston is increased.

By adding or removing non-compressible volume spacers riders modify the air spring’s ramp rate which directly changes the amount of support and bottom out feel of the fork or shock.

By removing volume spacers a rider increases the available volume in the suspension. The larger volume compresses less per mm of travel resulting in a lower PSI per mm of travel. This creates less support and is utilizes more travel.

Adding volume spacers decreases the available volume. With less air volume the PSI per mm of travel increases providing more support and greater resistance to bottom out.

Opposing Control: Rebound.
Rebound may need to be adjusted for volume tuning depending on how drastic of a PSI change is being tuned in or out of the suspension.

“Helping” Control: Compression.
Compression provides additional support and bottom out resistance.

Compression

Compression controls provide damping to slow suspension travel as a load is applied and the suspension is compressed. (easy one right?)

When riders have found sag and volume spacing preferences compression controls provide minute adjustments to dial in performance. Adding compression provides more support allowing the suspension to ride taller in its travel which is important when dialing in a bike’s personality in corners, etc.

With too little compression a bike will sit deep in the travel. This compromises cornering and braking force resistance. Headtube angle, bottom bracket height, front to rear weight bias, etc are modified as a bike goes through its travel. Maintaining control of the use of travel is paramount for good performance.

Since compression hydraulically slows the suspension’s use of travel it therefor lowers the air spring’s PSI. Properly setting compression controls will help ease the load on the rebound system by controlling the air spring’s push back onto the rebound circuit.

Too much compression will cause a bike to feel harsh and not use appropriate amounts of travel.

Generally, compression settings are fine tuned after sag and volume spacing have riders “in the ballpark.”

Low speed compression controls mid-stroke as well as support in cornering and against brake dive.

High speed compression helps with bottom out and high shaft speed inputs.

3 positions switches are a type of compression circuit with Open the most plush, Mid providing some additional support and Firm for climbing. If you climb in firm remember to put it back to plush for the downhill or you’re in for a potentially rough ride.

Rebound

Rebound damping controls a suspension’s shaft speed returning to a neutral position. Or, how fast the air spring pushes back as the load changes.

More rebound damping slows the suspension by decreasing the amount of fluid allowed to pass through the hydraulic design.

Less rebound damping allows the suspension to return faster with less hydraulic restriction on the damper.

Rebound setting is based on weight, ground speed, terrain and aggression. Setting the rebound properly means finding the right frequency or feel for your riding.

If your rebound is too fast, or doesn’t have enough clicks of rebound, the bike will tend to skip and suffer poor small bump compliance.

When the rebound is too slow, or you have too many clicks of rebound, the suspension may “pack up” creating a harsh ride as each bump uses progressively more travel forcing the suspension deeper into the travel, which will have higher spring rates.

Opposing: Air Spring PSI / Spring Rate.

“Helping” Control: Low & High Speed Rebound.
Some suspension is designed with 2 rebound circuits. The High Speed Rebound circuit is designed to provide additional control resisting increased PSI late in suspension travel. Typically High Speed Rebound settings are used as the Low Speed Rebound controls edge towards closed. Example: you might not use any clicks of High Speed Rebound until you reach “X” clicks on the low speed.

More on Understanding MTB Suspension Controls

While illustrating what started as a real basic, kind of introduction to understanding mtb suspension controls there were some visualizations of “oh, I knew what that felt like, but when I ‘see’ it it makes even more sense”.

Getting a proper suspension setup involves balancing the available adjustments into windows where each characteristic functions. Quality suspension manufacturers tend to have their adjustments in a ballpark for about 140lb to close to 275lb riders.

What this means is that the 20 some clicks aren’t  all “for you” all the time. (which is one of the big benefits of our BikeCo Pro Tunes where we narrow the performance window for your riding style, goals, weight, ground speed etc meaning each click is controlling a smaller performance window giving you more options but more on that another time).

Your needs will dictate a smaller window of adjustment “works” for you. Then you have to find the sweet spot that all of the adjustments are in a functional state.

It’s kind of like a mixing board with a bunch of slider adjustments. There’s settings that produce a great sound – even, balanced. But if you get one of the dials way out of it’s sweet spot you’re going to have to try to use the other controls to compromise the sound (or bike performance in our case) but it’s never going to be that real true, great sound.

Understanding MTB Suspension Dial Comparison

If you want your suspension to work at it’s best you need to identify the “green” zones for your setup and work to keep Air Pressure, Volume Spacing, Compression and Rebound in high functioning areas.

Really the most influential animation in the video, for me at least, was the visualization of when rebound slows the air spring’s return to neutral creating a momentary impact until the forces trying to compress the suspension equalize and overtake the air pressure.

Let’s look at this a bit further.

Simplified Air Spring (eliminating heat) Equation

Pressure A / Volume A = Pressure B / Volume B

The smaller the volume the more the air compresses and pushes back on the walls and piston head.

It doesn’t matter if its your riding weight, an ACME anvil from a cartoon, a tie down strap or a hydraulic circuit that “keeps” the air spring compressed – when the suspension compresses and lowers the volume the PSI rises.

For the following example we’re going to look at too much rebound, or a setup where the rebound is too slow. Mind you this is happening in instants – but it is happening.

The suspension compresses and begins to return for the next feature.

Ideally the system resets with the air spring returning able in a range to support the next input as evenly as possible.

If there is too much rebound dialed in the suspension isn’t going to return to the ideal extension. This does a few things all kind of instantly.

It may change the roll over angle or approach on the next feature. It also may effect the bike’s geometry. This is particularly a bummer in square edge hits that might try to stop the bike while you go flying over the top.

Even in less consequential terrain you lose the suspension’s float momentarily. Since the air spring is being held compressed more than ideal its PSI is higher than ideal. This means when the suspension reengages it might as well be rigid until the forces applied over take the PSI on the piston and allow it to begin to compress.

As an extreme example imagine the difference between punching a padded wall or missing and putting your fist into the block wall behind it. The pad, or air spring, begins to absorb and dissipate that energy so there isn’t the “hard stop”.

This is also the reason you pump the trail when riding. Pushing the bike down and pulling it up give you a secondary, active, suspension system to minimize the shock loads.

Want the worst of all worlds? Set your bike to ride unbalanced on the air spring and then go ride it dead sailor! It’s going to rattle your teeth out, hurt your hands and skip of trail. Exactly the opposite of the balance we’re looking for when understanding MTB suspension controls!

Comparing How Pressure on Air Suspension Is Applied

In the image above we’ve illustrated what we’re using colors to represent loads (or weight, or pressure depending on what makes it easiest for you to understand).

On the left we show a setup with ideal rebound allowing the air spring to extend into a range equal to the next input load. The air spring will absorb the increasing forces from yellow into the orange range.

On the right we show a slow rebound setup. Slower rebound keeps the air spring compressed, lowering the air volume and thus raising the PSI / spring rate.

This means the energy from yellow to orange is forced back onto the rider until the darker orange of the air spring equals the load applied at which point the air spring will begin to carry the load.

This translates as a harsh feeling through the bars or pedals.

Similarly compression settings ideally work in a range with the air spring to allow a comfortable pickup during the suspension travel. If the compression setting is too aggressive the suspension will suddenly come “off” the air spring’s ramp rate and work only off the hydraulic damper.

This creates a harsh ride and sometimes will actually feel quite “notchy” as the suspension transitions from air to damper and back.

All of this circles back to a basic understanding of the ideal ranges of setup and performance and trying to find that sweet spot where the systems are truly working together and helping fine tune performance throughout the travel.

We thank you for the read and hope you took something away that will help you better understand how to dial in your MTB suspension.

We invite you to check out the other content and the best products in MTB here at BikeCo.com

BIkeCo clients have access to our team to help them fine tune stock or Pro Tune Suspension.
Return to Top of Page