Coil Spring Tuning Basics
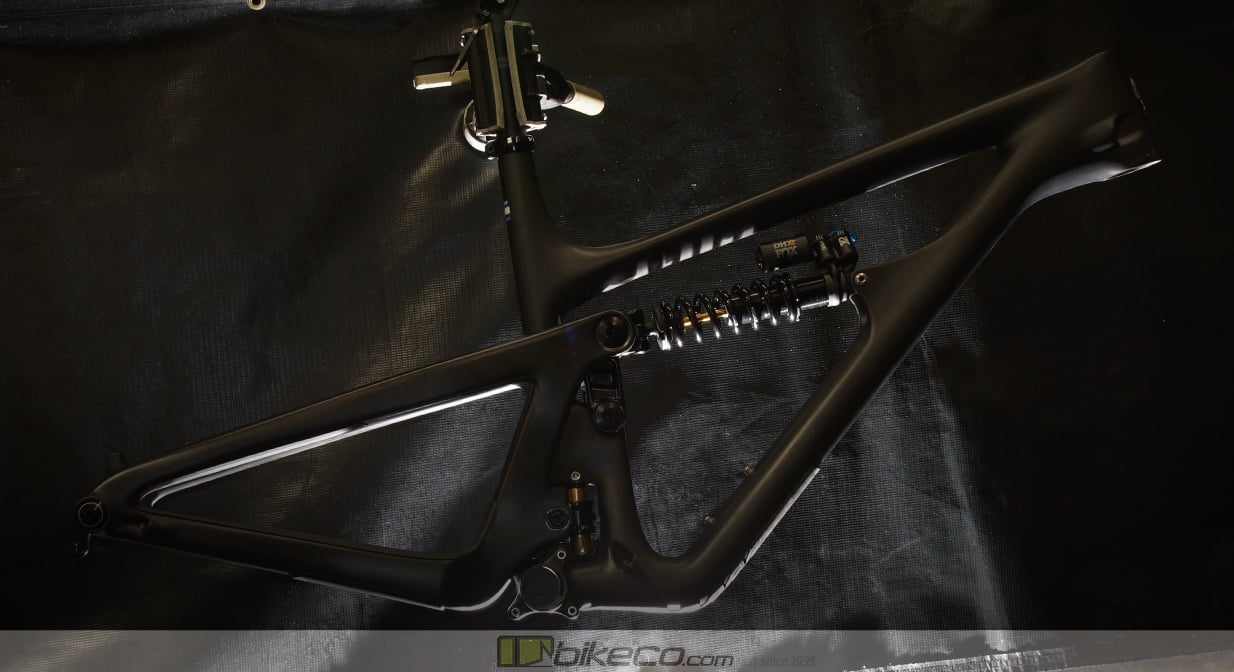
With the launch of the new Yeti SB165 we’ve had a lot of questions. Here we go with some Coil Spring Tuning Basics.
Some very basic principals to start with here.
Coil springs are rated by the weight that creates an inch of spring compression. So a 400lb spring requires 400lbs to compress the first inch and would take 800lbs to compress two inches. However, coil springs are not produced to “exact” standards. That is to say if a coil is offered in say 50lb increments ( example: 350, 400, 450) 400lb spring may actually we anywhere from 376 to 425lbs. That’s a pretty wide range and most quality spring manufactures will have a slightly tighter tolerance, but that’s the concept.
Coil springs are also measured by total length as well as available stroke. Running a coil that is too long or short in either measurement can create problems.
A coil spring provides support based on its diameter, the actual coil’s diameter, how much elasticity the material has, how many active coils it has as well as the angle of the active coils.
Less active coils increases the spring’s resistance to compression. As the spring is compressed the furthest coils contact the wrapped ends. (most MTB springs have closed and ground ends for performance) The furthest active coils will have a lesser distance to the end coils which is why they make contact and, well, work.
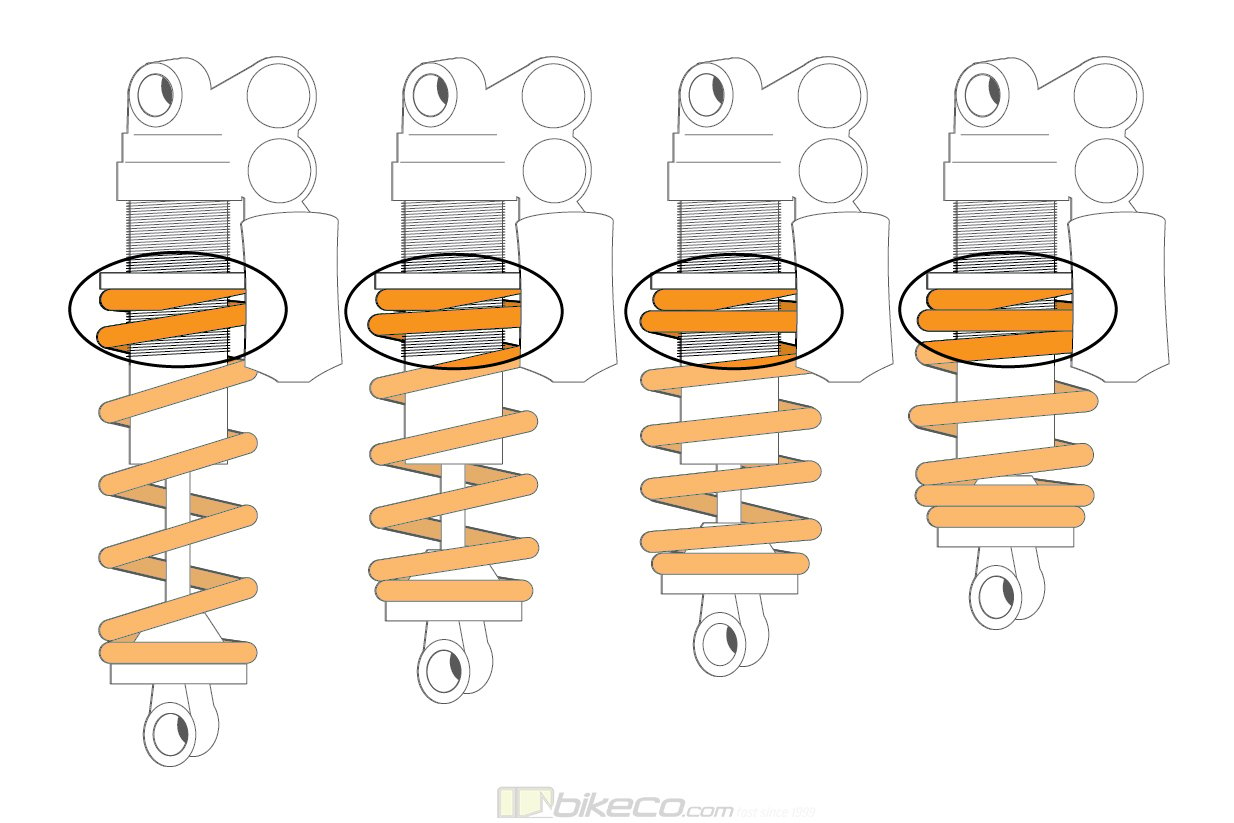
Coils interaction with spring ends or the decrease in active coils is highlighted, left to right, in this illustration as the spring is compressed. Which leads us into the next basic concept tuning coil springs.
Preload
Preload on a coil spring applies additional tension to the spring. It uses the same theory as above by decreasing the distance between the end coils and active coils.
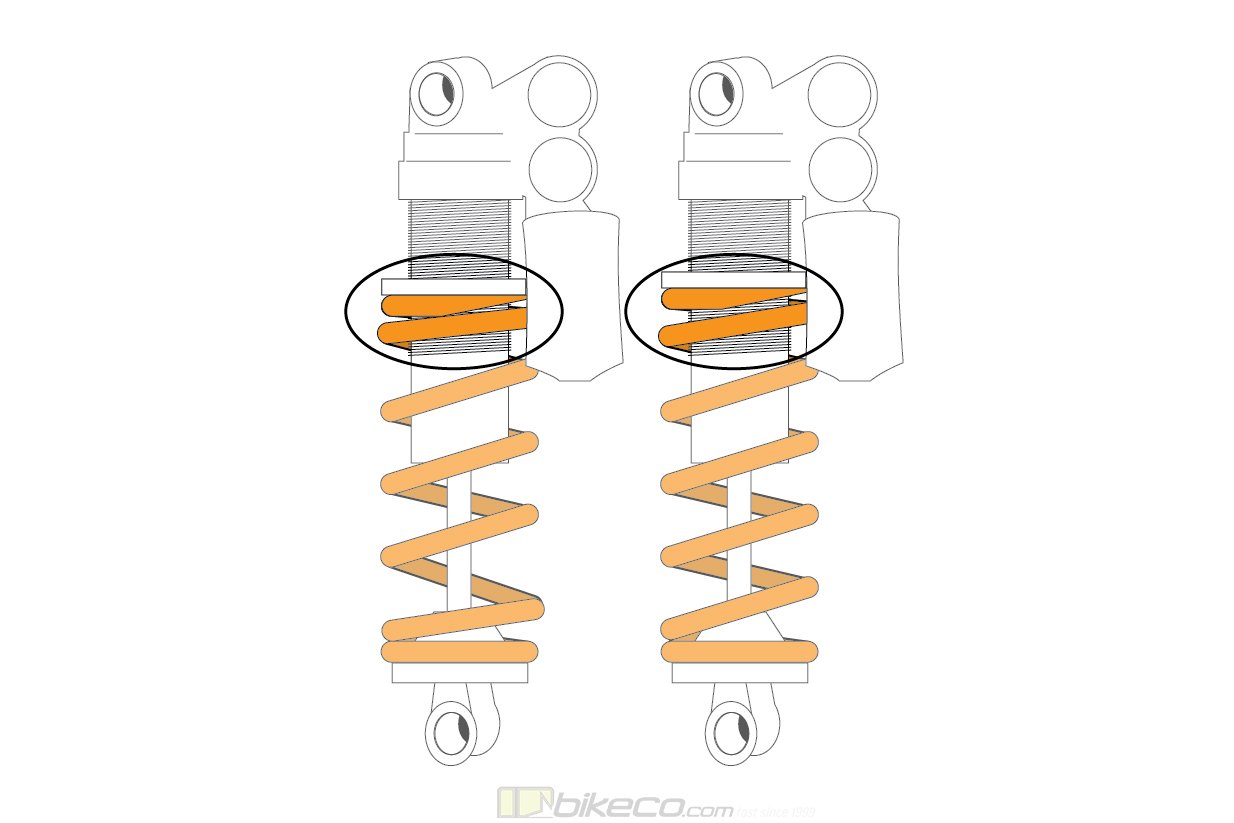
The illustration above shows 2.5mm of preload on the left image. Tighten the upper spring perch to increase Preload. Loosen it to decrease Preload.
As a note – all springs should have at least 1 turn, or 1mm on Fox shocks, of preload to keep the spring in place. Don’t dial in tons of preload turns as it can stress the damper as well as create problems with coil bind if the spring’s freelength to full bind is smaller than the stroke of the damper.
So when do you use preload? Well, again assuming you have a spring with enough travel capacity, you can utilize preload to adjust your sag setting or modify the spring’s resistance.
Wait, you can adjust a steel spring’s resistance? OK, not exactly. You’re shifting how much force is applied at what point in the stroke.
Let’s look at a 450lb spring compared to a 400lb spring with 1mm of preload as well as 3.5mm of preload.
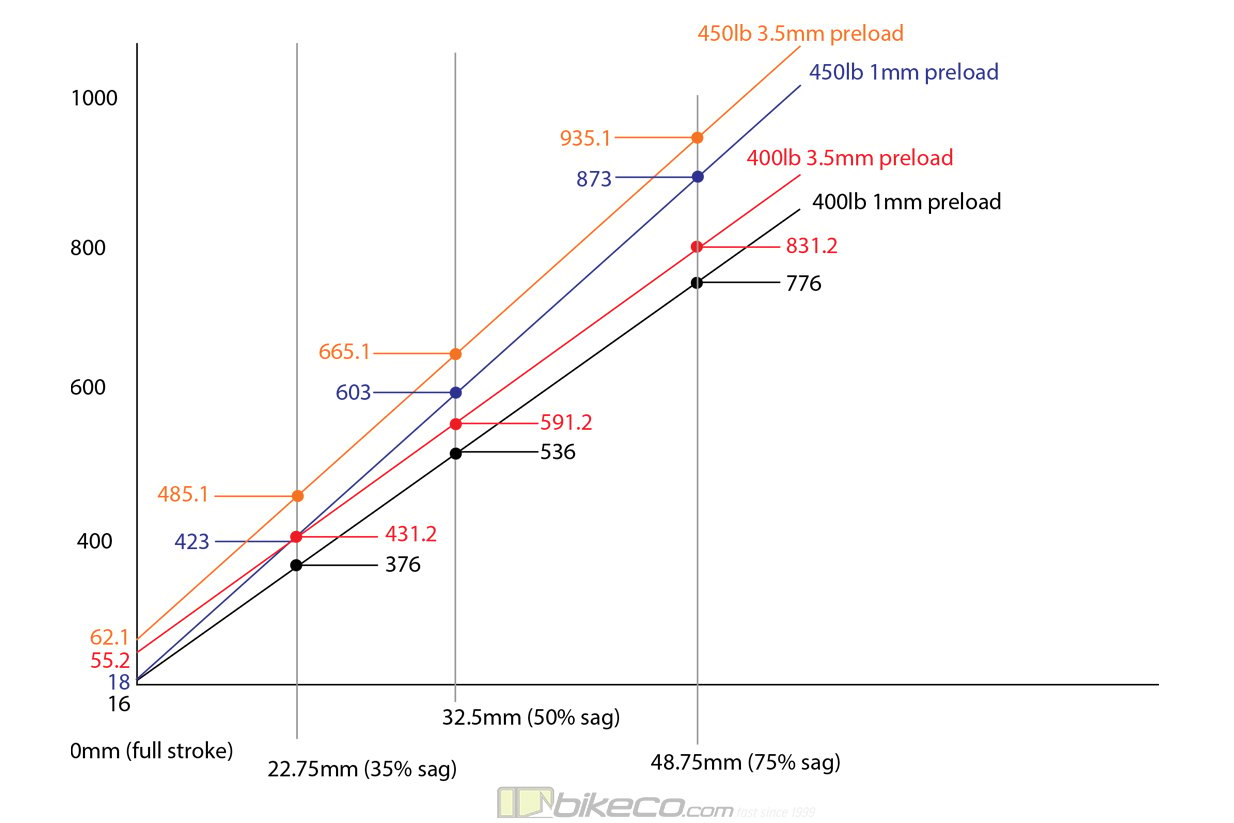
So unlike an air spring a coil produces a linear ratio of force to compression. When we apply preload we have a force at 0mm of travel. Remember, Fox coils require a minimum of 1 turn which produces a small amount of preload.
The black line represents a 400lb spring while the purple line represents a 450lb spring with 1mm of preload. The red and orange illustrate the same progression rate, ie the lines are parallel, but the additional preload forces the line further to the left of the graph.
The higher force allows for a heavier rider to set the sag at the same percentage as a lighter rider using the same spring.
Perhaps more interesting, in fact, to me 100% more interesting, is how we can find a crossover point between two different coils at sag with a relatively minor preload adjustment.
The difference between the red 400lb 3.5mm preload and the purple 450lb 1mm preload at sag is quite minimal. However as more of the shock stroke is used you see a widening digression between the coil’s force. The heavier spring will still ramp harder than the preloaded lighter spring. So while your sag is the same how you run through the travel is not. The lighter spring might be too linear for the compression controls to correct. Or, you may leave travel on the table if the heavier spring ramps too hard in combination with the suspension design.
Got it? Coil Spring Tuning Basics done right? Well, you’ve got what the coil is doing at this point. But there’s some other factors we need to touch on…
Angle Correction Factor
The angle of force applied to the spring changes how much force is transferred from the spring to the suspension. This is the Angle Correction Factor which is the cosine of the angular difference. So, the only instant that your spring is actually returning 100% efficiency is when the linkage is at 90 degrees to the shock.
For instance a 20 degree input angle changes the force by 6%. More input angle change means less “efficiency” from the spring. This isn’t a direct fault of a coil – but there are design considerations for it.
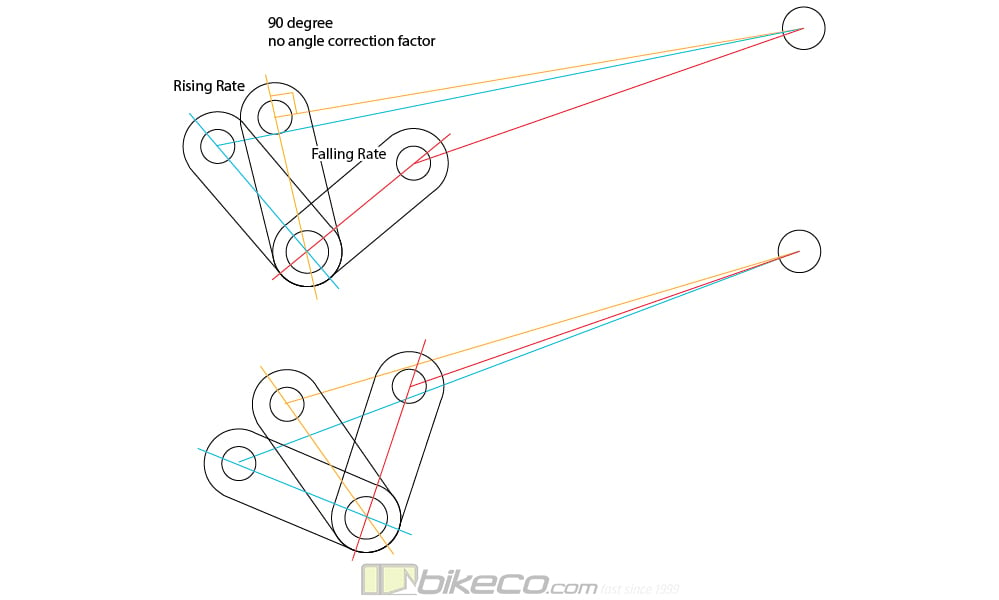
Both images above show rising to falling rate suspension.
The upper image shows a substantial falling rate compared to the bottom. Illustrated by the greater angular change.
The lower image shows a suspension that has a rising rate past the sag setting as illustrated by the acute angle of the gold lines.
What’s this mean on your setup? Well, it’s important to have an idea of the suspension design in order to quantify what’s really happening where. Let’s say you’re debating the 400 versus 450 spring based on the sag crossover point. A setup with a substantial falling rate will benefit from a stiffer spring such as the 450lb with no preload illustrated above. The lower suspension doesn’t lose as much mechanical advantage on the coil and the preloaded 400lb spring would work better.
The ratio that a suspension loses mechanical advantage from the angle correction factor is a big, big reason that some bikes will work excellent with a coil while others become wallow-y garbage.
A bike designed around a coil like the new Yeti SB165 factors the coil’s personality with the suspension’s mechanical design.
Want to learn more about rising and falling, progressive versus linear? You can read more about suspension rates here as well.

Dampening
This is where coils really get good in the modern application. I keep mentioning the Yeti SB165, so I’m going to stay with it… The frame is spec’d with the Fox DHX2 damper. This shock features high and low speed rebound control as well as high and low speed compression. Oh, and a 2 position pedal platform. So you can “lock out” (they’re never true lock outs because that detonates shocks) your 165mm coil travel Enduro / Park slayer for the climbs? Ya. You can.
But more than that you’re able to compensate with these controls for the performance of both the coil system as well as the mechanical suspension design of your bike.
One of the most popular BikeCo Pro Tunes are the Fox DHX2. There are a couple reasons. First our Pro Tune service personalizes the damper settings for your weight, riding style, etc. Second, and equally important really, you have access to our team of suspension experts to help you dial in the shock after the tune! Our team lives MTB. There are few things in our world as satisfying as the “OH MAN, it’s dialed” phone calls with clients.
Tuning the low speed compression helps the coil spring’s efficiency under power without hindering the ultimate small bump compliance. High speed compression compensates for ramp rate. This is particularly good if you’re putting a coil on a bike originally designed for an air shock.
In Conclusion
Well, at least conclusion for this blog – this is an amazing rabbit hole to go down if you’re interested in suspension by the way. I’ve worked with automotive, motorcycle and bicycle suspension and you’re always going to learn something. Coil Spring Tuning Basics? With how much these systems all interact it might seem like there is nothing basic about it!
What did you learn from this? Coil springs aren’t exact. Coil springs can have notable cross over in performance setups. Your suspension system changes how the coil behaves.
What can you take from this? Well, candidly – hold off on the expensive spring at first. We suggest clients start with the inexpensive option first. In fact its very common for our clients to order two springs at the time of purchase. This allows riders to fully understand the setup. Besides, if you decide one is leaps ahead of the other, a coil spring always makes a cool pen holder for your desk at work…
Questions? Like we said these are just coil sprint tuning basics. Reach out to our expert staff for the ultimate buying experience. Our team will ensure you get the best spec, setup, tune and pricing in MTB.
See you on the trail!