

Adjustable Travel on Dropper Posts
Fine tune your MTB fit with these MTB seatposts featuring adjustable travel on dropper posts.
Adjusting adjustable travel? Isn’t that like a double negative? No, not really.
For riders who are looking for the maximum travel on their dropper post the adjustable sizing from OneUp Components and PNW provides a wide range of fit options.
Your adjustable post fit is based on your leg length and frame size. While many riders are content running a size that will have the seatpost collar a touch above the frame collar others want all they can get.
If you’re one of those riders a post with travel adjustment is what you’re looking for.
You can purchase a slightly longer travel post than would normally fit and shim down the travel slightly. (we touch on sizing adjustable posts here)
So why not just stop the post where you want it? Well, most riders want the seatpost to sit at full XC pedaling position so they can quickly get back on the power. Having to adjust it each time is slower and will result in different lengths almost every time. (I’ve seen a DIY “travel stop” with a cable to the saddle – but I’m not sure I’d be looking for another cable looped trying to catch my legs, pants, trees, branches, whatever while I’m descending…)
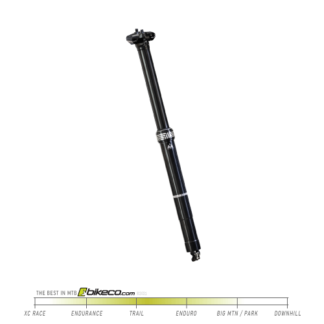
OneUp Dropper V2
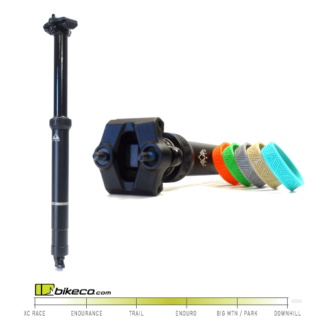
One of the most popular adjustable posts thanks to its compact total size combined with long travel the OneUp Dropper V2 features a toolless travel adjustment.
Watch the video to understand how to quickly adjust your OneUp Dropper V2 travel with the provided dowel spacers.
OneUp Dropper V2 Travel Adjustment
Adjusting the travel on your OneUp Dropper V2 is quick and easy.
First loosen the collar. Typically you can do this with your hands, although sometimes a soft strap wrench is needed to get the collar free.
You’ll need to bump the travel, in the video I do it on the post – it’s much easier with a remote installed, to free the white retainer.
Once the collar and the retainer are out of the way you install the desired amount of spacers for the proper travel adjustment in the three channels around the dropper post shaft.
Ensure that you have the same amount in all three channels before continuing.
Similar to removing the retainer a bump down in travel will help reseat the retainer in place.
Tighten the collar appropriately and test the function.
-
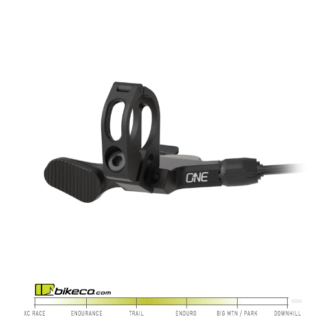
OneUp Dropper Post Remote V2
Currently Out of Stock - Inquire for Details
Read more -
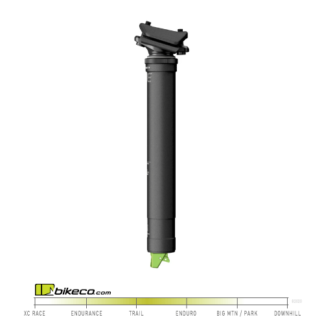
OneUp Dropper V2 Seatpost 31.6 dia, 150mm
Currently Out of Stock - Inquire for Details
Read more -
OneUp Dropper V2 Seatpost 31.6 dia, 180mm
Currently Out of Stock - Inquire for Details
Read more -
OneUp Dropper V2 Seatpost 31.6 dia, 210mm
Currently Out of Stock - Inquire for Details
Read more
PNW Loam & Rainier Gen 3 RAD Seatposts
PNW posts are made to handle the rigors of the Pacific North West – often wet and muddy. The Rainier in particular is designed to compensate for these factors. Both the Loam and Rainier offer toolless adjustable travel to fine tune fit.
Watch the video to understand how to quickly adjust PNW Seatpost Travel.
How To Adjust PNW RAD Seatpost Travel
The PNW Rainer and Loam seatposts feature toolless travel adjustment. Adjusting seatpost top out allows riders to maximize their total seatpost travel with the seatpost installed as deep in the frame as possible.
Start by lowering the seatpost from full extension, but not so low that you can’t loosen the collar and move the adjuster. About halfway is fine.
Loosen the collar. Typically you can do this by hand, but a soft strap wrench might be needed to get it moving.
Carefully move the collar up the seatpost shaft. Do not scratch the seatpost shaft or you’re likely to have issues with the internals seals, etc.
Rotate the seatpost to expose the arc allowing you to get under the lip of the plastic adjuster. Pull the adjuster up to allow it to rotate.
Realign the adjuster’s arrow to the number corresponding to the amount of travel you’d like to limit.
Tighten the seat collar and check the post’s function.
-
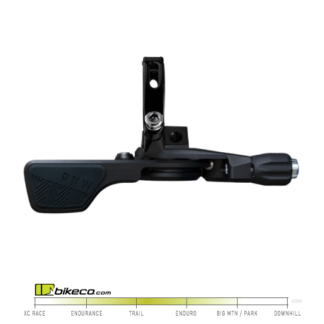
PNW Loam Dropper Lever
Currently Out of Stock - Inquire for Details
Read more -
PNW LOAM Seatpost 31.6 dia, 150mm
Currently Out of Stock - Inquire for Details
Read more -
PNW LOAM Seatpost 31.6 dia, 170mm
Currently Out of Stock - Inquire for Details
Read more -
PNW LOAM Seatpost 31.6 dia, 200mm
Currently Out of Stock - Inquire for Details
Read more -
PNW Rainier Gen 3 Seatpost 31.6 dia 170mm
Currently Out of Stock - Inquire for Details
Read more -
PNW Rainier Gen 3 Seatpost 31.6 dia 200mm
Currently Out of Stock - Inquire for Details
Read more