Description
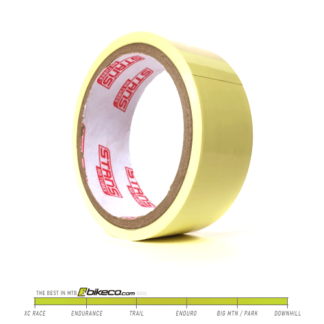
Stan’s Rim Tape
Stan’s Rim Tape is available in a range of widths depending on your rim’s inner width. According to Stan’s tape weighs approximately 5-6g per application. 10 yards will tape (4) 27.5 or 29″ rims.
Tubeless Rim Tape is designed for high tensile strength and resistance to tubeless tire fluids. Rim tape isn’t particularly “sticky” and relies on a certain amount of stretch for adhesion. It is critical to have a clean, dry, residue free rim or tape for installation!

The most common issue installing tubeless tape is not getting enough “stretch” prior to pulling it down on the rim. In the image above you see Tracy getting the tape stretched to tension before he will rotate it onto the rim. This is the single most misunderstood aspect of rim tape – it’s not like fly paper you’re going to get wrapped up in – you need to stretch it.
A wheel trueing stand or a bike stand are greatly helpful when installing tubeless tape.
Check out a couple videos below for some helpful tips on installing Stan’s Rim Tape.
Installing Rim Tape Tips & Tricks
(from Home Mechanic Tips & Tricks on BikeCo.com – see the rest of the write up here)
Inspect & Repair Tubeless Tape
My wheel had two areas where the tape wasn’t making a good seal. Looking at it in depth I noticed that the tape had started to peel some time ago, and I must have just moved it that last little bit the day prior shooting video. I could tell this because the tape’s adhesive side had variable amounts of dirt / debris on it. But, once the spoke hole was exposed it simply wasn’t going to hold air.
The best practice would be to replace the entirety of the tape. In this video however I wanted to try to just correct a section of tape to see how it would work.
I cut out the damaged area of tape. Be careful not to create stress risers in the rim if you trim a section out. (ie don’t cut deep into the material, just try to split the tape)
Whether you’re replacing a small area or the entire tape you must get the rim very clean. Tubeless sealant residue means nothing will stick. I used Muc-Off followed by window cleaner and then let it all sit in the sun for some time. Feel the rim to ensure the “greasy” residue is gone.
When you tape a rim you have to really pull the tape tight as you apply it. The stretch gives the tape some bite. If you simply try to put tape on it won’t stick to anything and is super frustrating.
This also creates an interesting situation if you’re trying to tape only a small section rather than the entire wheel. Namely, you can’t really get the “stretch and bite” on a couple inches of tubeless tape. You really need to start before the damage, stretch and apply the tape, then pass the damaged area by a bit.
In the video you see I put a single addition of tape rather than multiples (I had two failed areas). It would have been harder to do smaller sections and get them to stick.
After you get the tape down push out the excess air out of the sides. Push the tape down firmly across the radius. You can use your thumb or put a rag over your thumb to minimize the friction build up.
Your tape should be well adhered. If it seems flaky do it again. There’s nothing worse than having to take tires on and off over and over (again, this is why it’s probably a good idea to tape the entire wheel in this situation).
This video shows another Stan’s Rim Tape install as well as touches on a popular new option to protect your rim tape (and rim) the CushCore XC.
I started thinking about rim protection a few rides ago. I managed to shove a branch through the center of a tire. Murphy’s law meant it went straight through a spoke hole puncturing the tubeless tape. No quick fix to that one on trail… Before we get into the CushCore XC Install & Ride Review here’s a quick bio and which aspects of my riding suggested rim protection because frankly, I didn’t see myself as a candidate for CushCore.
Riding Bio (R) / Purchasing Bio (P):
R: I’ve been riding long enough that I feel competent in most terrain. I have enough gray hair to know I don’t need to be pushing into the red zone risking crashes. Maximum performance isn’t necessarily my goal, but I don’t want to leave performance on the table either.
P: While traction is game changing for confidence, I’m confident in my particular terrain, and not really out searching for the biggest / burliest lines. I’m not sure I’d pencil in tire protection based on the bio above.
I knew I would be testing this product in a true sense – it might be right for me or it might not.
Balancing tire pressure, tire retention (ie not burping) and sidewall performance have a huge effect on your bike’s personality.

Stan’s Rim Tape Part Numbers
21mm x 10 yards:
Vendor #: AS0030
UPC: 183720000205
RMSTA0152
25mm x 10 yards:
Vendor #: AS0033
UPC: 183720000281
RMSTA0154
27mm x 10 yards:
Vendor #: AS0083
UPC: 847746007227
RMSTA0156
30mm x 10 yards:
Vendor #: AS0133
UPC: 847746020431
RMSTA0160
33mm x 10 yards:
Vendor #: AS0134
UPC: 847746020448
RMSTA0200
36mm x 10 yards:
Vendor #: AS0135
UPC: 847746020455
RMSTA0180
39mm x 10 yards:
Vendor #: AS0144
UPC: 847746026815
RMSTA0181