Posted on Leave a comment

BikeCo Pro Tune Suspension Advantages

BikeCo Pro Tune Advantages

Check out this video to learn more about BikeCo Pro Tune Suspension for FOX forks and FOX shocks from Pro-Rider Cody Kelley and BikeCo’s Joe Binatena!

Keep reading for more details on BikeCo’s proprietary FOX suspension tuning.

BikeCo Pro Tune Suspension Advantages

For years we’ve has been providing riders access to the best performing Fox Suspension through our proprietary Pro Tunes designed by BikeCo.com owner Joe Binatena.

BikeCo Pro Tune Suspension is designed to maximize damper performance to your riding specifics. Rear shocks are built chassis specific, we don’t offer a Pro Tune shock for every bike, but do for Ibis, Yeti, Mondraker, Specialized, Santa Cruz, Intense, YT, Giant and more.

BikeCo Pro Tune Suspension Advantages

BikeCo Pro Tune Suspension

There are many aspects to BikeCo.com that separate us from the competition. One cornerstone the competition simply can’t imitate is our BikeCo Pro Tune Suspension. Available on FOX forks and rear shocks these individual tunes narrow the adjustment window from the stock “works for everyone” to a more finite setup based on your size, riding style, bike, terrain, speed and aspirations.

Pro Tune Suspension: What’s Changed?

BikeCo Pro Tuned Forks

Well, without giving out all the ingredients to the secrets we can look at some aspects that help BikeCo Pro Tune Suspension outperform the stock setups.

The fork’s upper and lower mechanical fit is improved on Pro Tune Forks. Reducing the slide friction between the stanchions and fork lowers helps minimize sticktion in both compression and rebound for better bump compliance and damper setup.

Proprietary lubes based on rider details provide better internal oiling while accounting for heat generated by ground speeds and terrain.

Another major aspect of BikeCo Pro Tune Suspension is the improved damper bleeds. After many years working on a wide range of suspension with the fastest racers in MTB our team has developed bleed techniques, tools and lube additives. Eliminating air trapped in the dampers as well as off-gas of settling hydraulic fluid takes longer and involves additional tooling – but the results are well worth it!

The last aspect of BikeCo Pro Tuned Forks we’ll get into (like I said, can’t give you all the secrets) is the support from our team. Everyone on-staff rides. All of us are familiar with suspension setup advantages and disadvantages. And we all have access to the suspension tuners if there’s a question over our heads. As your riding advances adjustments to the PSI, rebound, compression and volume spacing will help continue to fine tune the bike. Our team is here to help you better understand all of those adjustments and how they work together.

BikeCo Rear Shock Pro Tunes

Like our fork services BikeCo Rear Shock Pro Tunes utilize proprietary lubes and additive packages. These are designed to improve the shock’s consistency during heat variations.

Also, like Pro Tune Forks, our rear shock damper bleeds are more precise which improves the damper’s consistency. Any air that cavitates a hydraulic system compromises the fluid flow by producing a compressible pocket as well as having different heat properties from the hydraulic fluid – ie – that cool air bubble is going to behave differently mid-way down the hill as it heats up and increases in PSI pushing against the fluid on both sides.

Improving how the compression and rebound dampers behave allow us a wider range of rider setup options in PSI and volume spacing.

Again, FOX makes a great “works for everyone” product, but chances are your bike’s not being ridden by a 145lb who’s tip toe-ing across the trail and a 300lb rider smashing through every bit of chunk they can find. So, if you have the opportunity to fine tune your suspension for your specifics it makes a lot of sense to right?

Our team’s expertise balancing air pressure, volume spacing, compression as well as rebound settings goes a long way in dialing in a bike’s performance.

Things You Won’t Find in Pro Tune Suspension

If you do something well, for any length of time, you’ll see some imitation. Well with the years of expertise you can see how far along their own journey some of the other tuners are. You can also see how far out in the weeds some are!

Highlights of things you won’t see our team do: there was a fork years ago that had basically a fast food straw and some zip ties trying to extend the fluid volume between ports. That one, well, ya. Wow. Another more recent rear shock came in after another tuner worked on it. Upon disassembly there were a handful of bent shims. Rather than designing a shim stack to achieve the goals these were simply “lighter” shims I assume to improve bump compliance. Well, the stack bent and that was that for basically any damping control. But, the shims were oil slick color – so that counts right? No? Ya, I didn’t think so…

What You Feel with Pro Tune Suspension

Alright, you hung in through the description of the non-secret ingredients. But what will you actually feel on trail with Pro Tune Forks and Rear Shocks?

If I tell you you’d have a more plush feel with better support you’d say that’s what every suspension ad for ten years has promised right? Well, BikeCo Pro Tune Suspension has the individualized balance to make that happen.

First, let’s look at something that has created more than a little bit of confusion over the years. The difference between what you and I likely mean when we say “small bump compliance” and what a lot of the engineers in the industry mean.

If you’re like us, when you think of small bump compliance you’re picturing the trail chatter that begins to compress your suspension past the point of sag. Makes sense right? Like the sag point would be your “zero” and the beginning of travel past that would be the “small bumps”?

Most suspension designers disagree. That’s why your last four forks all with “improved small bump compliance” feel similar. Generally they are assigning the “small bump compliance” area of travel to the section between full extension and sag.

The way these designers have marketed improved small bump compliance is by utilizing more aggressive ramp rates through volume or compression settings. So the suspension IS “lighter” until it has to pick your weight up. And then, from there, it’s going to frankly be harsher. Which, is the “more support in the mid-stroke”.

We see it a little different.

When our team is chatting with clients we reference Small Bump Compliance as the area of initial compression past the point of sag. We feel that this is what clients are referring to when they tell us about small bump issues and we agree.

Understanding that riders want support to minimize brake dive as well as to provide additional support in fast corners without creating hand numbing abuse over the small stuff has driven our tune philosophy.

Narrowing the rebound and compression damper’s performance window also gives each click a more finite adjustment window. This makes your suspension more precise and easier to tune to your ideals.

Improving the fork’s upper and lower fitment eliminates a good deal of sticktion allowing riders to run a higher main PSI which improves support while minimizing brake dive. A softer feeling fork at a higher PSI.

Improving the compression circuits also allows more finite tuning with both the hydraulic dampers as well as volume tuning options to change ramp rate. Pro Tune riders tend to find they are able to run more clicks of compression in order to dial in mid and end stroke support without losing suppleness and traction.

Once again coming back to the support from our team – our staff is trained to help you define how tire sidewalls, rim width and volume, rim protection options, tire PSI, brake setup and other attributes will critically effect your suspension’s performance.
Are Pro Tunes only for Racers?

Absolutely not! This is one of the compromises of naming something I suppose. But BikeCo Pro Tune Services might have even more impact for less experienced riders.

That’s because with suspension designed to work in a more finite window as well as having access to our team to help you tune and adjust the tune as your riding improves you can concentrate on riding techniques, reading terrain and worry less about the myriad of adjustments required to dial in your bike.


Read more about BikeCo Pro Tunes below!

Pro Tune Design Factors

Pro Tune’s shift performance windows taking into account CHASSIS, RIDER SIZE, EXPERIENCE, DISCIPLINE, TERRAIN, STYLE as well as RIDING GOALS.

Rider Size:

Different size different setups, easy right? Stock suspension is designed for a wide range or riders. Suspension is significantly over compressed for even average size riders “out of the box”.

As a result Pro Tune suspension is an eye opener for lighter riders. Compression controls are shifted to be effective. One click of low speed compression is no longer the equivalent of a lock out!

Experience:

As your riding progresses your suspension needs change. A pro racer will pump hard into a hole in a steep chute to keep the bike at maximum speed, while an advanced rider may pull up or air over it, and a more novice rider may plow into it altogether on the brakes. These all require different tunes and setups.

Discipline:

BikeCo Pro Tune Suspension covers riders from cross country, trail, endure, park to downhill. Each style has unique requirements and cross over points. Ramp rates and compression settings are particularly important. An XC racer may not want to sacrifice a firm lockout while an Enduro racer could utilize a lockout more as a “trail” compression setting.

Terrain:

Type and size of terrain that a rider is comfortable in make a difference in final setup. Riders in flatter terrain appreciate more “pop” in their setup. On the contrary the same level of “pop” maybe disconcerting to a rider blasting chunky chutes as they bounce down trail!

Style:

Are you a basher? Smooth as silk? Somewhere in the middle? Pro Tunes have you covered across the board. Even riders in the same terrain, with similar ground speeds as well as size may have quite varied setups based on style. Personally I have tried to rider smoother as I’ve aged. Even being heavier than our racers I prefer a lighter compression tune since I’m not longer smashing into holes at full speed!

Riding Goals:

Where are you going with your riding? Working hard to improve skillset? Let’s get a tune setup to ensure it takes you where you plan to go. Racing? Improving speed? More confidence? Of course we’ve got you covered.

Pro Tune Advantages Novice Riders

Rider Goals for Tuned MTB and eMTB Suspension

Common Tune Goals CONFIDENCE, PREDICTABILITY, TUNE-ABILITY

Confidence:

Pushing your riding to the next level is always easier when you’re confident in your equipment. Confident riders concentrate on riding technique as well as improved trail vision.

Better small bump compliance, traction, and support from Pro Tune Suspension improve confidence.

Predictability:

Tied in with confidence, the more predictable your suspension is the less you’re concentrated on components and the more you’re trail aware.

Proprietary oil blends as well as personally tuned oil flow rates produce suspension much less susceptible to heat (or cold) temperature saturation or issue.

Tune-Ability:

Pro Tune suspension shifts performance bands to maximize external control availability. Particularly high and low speed compression controls become more useful.

Light rider? BikeCo Pro Tune’s are designed to allow lighter riders to fine tune additional support through compression without creating an overly harsh platform.

Going to the bike park? In this situation add a click or two of low speed compression to support the front end through high speed berms or steeper chutes.

Pro Tune Advantages Experienced Racers

Some Pro Tune Modifications

Some of the modifications for suspension improvement include FITMENT, OIL FLOW / PERFORMANCE and VOLUME SPACING.

Fitment:

Aligning the upper and lower fork legs drastically minimizes sticktion. Less sticktion without a doubt means better small bump compliance.

Oil Flow / Performance:

Pro Tune suspension uses a variety of proprietary oil blends to maximize additive packages depending on use. Rider size, ground speed and aggressiveness are reviewed to determine the best oil package as well as modifications required to adjust the ideal flow rate.

Minimizing the stress on the oil improves its service life expectancy. Less stressed oil is less apt to create performance issues due to temperature.

Volume Spacing:

Changing the characteristics of air spring performance effects ramp rate, travel usage as well as PSI at sag. Different leverage ratio suspensions require different ramp characteristics.

Pro Tune Advantages for Racers

Notable Improvements with BikeCo Pro Tune

What are some of the most notable improvements? Let’s glance at  SMALL BUMP COMPLIANCE, RAMP RATE, HEAT SATURATION and SUPPORT x 2.

Small Bump Compliance:

Better small bump compliance equals improved traction. Most stock dampers are over compressed. Improving the oil flow characteristics, fitment, as well as sag PSI allow maximum traction through small bump compliance.

Critical in cornering, braking and holding lines traction gains are notable from the beginner to expert rider. The difference between the beginner and expert rider’s ground speed means that the setup as well as tune will be different to balance a comfort level on traction and ground speed.

Ramp Rate:

Tuning ramp rate to a particular suspension system’s leverage ratio and rider size allows a more predictable trail feel through the travel.

Using too much or too little travel? In that case along with compression controls ramp rate is available to fine tune air spring progression through volume spacing.

Heat Saturation:

Changes in oil temperature notable effect damper performance. A shock may start a downhill run feeling plush but at the bottom may be so harsh a rider has a hard time holding onto the bars.

Improving the flow for specific riders means BikeCo Pro Tune Suspension doesn’t over stress oil properties. Controlling the oil flow through additive package blends, shim stacks, etc balancing rider size, speed and aggression are critical to Pro Tune performance.

Support:

Pro Tune suspension is designed to maximize small bump compliance without compromising air spring pressure or sag percentage. This provides a more supportive platform, particularly under braking, reducing dive. Modifications to the system also improve low speed compression controls allowing riders to fine tune performance on trail. Dropping into your favorite steep trail? Add a click or two of low speed compression to keep your bike riding taller in the travel. Feel like the bike is a bit low in high speed berms? Same thing. A click or two of compression will help stand the bike up without sacrificing too much small bump compliance.

Support x 2:

To get the most out of your Pro Tune Suspension with BikeCo’s team. Staff will reach out to each rider assessing on trail performance and setup needs. Our expert team will explain the basics of your setup along with common tricks to dial in your bike. A series of phone calls after pickup allows our team to get inside your head on trail to make finite adjustments as required.

Warranty:

Pro Tune Suspension offers disposition re-tunes for 30 days. (example, from time to time we have riders who are much faster than they let on and require a more aggressive tune). We stand behind all suspension service for 90 days.

Ready to go? Have additional questions? Reach out to our staff today by phone, email or chat. Check out other BikeCo Service Rates Here


Return to Top of Page

Posted on Leave a comment

MTB Helmets: Ride the Best & Replace them Yearly…

MTB Helmets Replace Them Yearly

Never a review we want to do – but, here’s a life example of why with MTB Helmets you ride the best quality and replace them yearly…

If you watched the video you know I had quite the week. Really feeling blessed and lucky that it wasn’t worse. It felt like a lot of things quickly were out of my hands in this incident.

That said, there were decisions made that helped edge that luck onto my side. Particularly helmet selection.

There are a handful of top tier MTB helmets out there. They tend to fit a bit different and it’s important to find the one that will work for you. We offer a variety of helmet models from different manufacturers. I’d ride any of the enduro level offerings we have if they fit my head well.

I’ve been riding the POC Kortal Race for about a year now and really like the fit, ventilation and light weight feel.

Since last Friday I have an even greater appreciation of the POC helmet performance.

While not the fastest or most ridiculous of crashes over the years I’ve been riding, headfirst into the side of the trail in a chute, along with the intense pain after was clearly the scariest.

Had the Kortal Race not been up to the task I’m 100% sure my injuries would be been much, much worse.

This crash wasn’t at the edge of control, it wasn’t having a fit of Canon Courage or anything along those lines – it was just an unfortunate series of events overall.

The raised edges of the chute, particularly with the outcropping, meant there wasn’t any sliding or tumbling to absorb the energy. Nearly all of my forward momentum is stopped in about a tenth of a second. The whole thing took less than a second from impact to being laid up on the trail.

At the time I had tremendous neck and shoulder pain. While I surmised I had hit my head based on seeing the visor down trail I had no idea how bad it was until I was released from the hospital that afternoon and took as selfie to send to my sister.

POC Kortal Race Helmet after crash forehead split

Once I saw my forehead and then the helmet I really had an appreciation for POC’s craft and commitment.

In my case the helmet took a huge amount of load by breaking the foam internals throughout the chassis. I have no idea how bad this could have been with an inferior design or an older helmet with aged foam.

It always perturbs me when we deliver absolute banger bikes and ask half jokingly whether I’m going to see you out there on a five year old helmet – to be told: Yes. I’ll replace it one of these days.

One of these days should be yearly to ensure the best performance when you need it. And as Friday re-illustrated you never know when you’re going to need it…

Overall it was a really scary day. I was laid out with neck and shoulder pain that really didn’t allow me to move (in fact finding out I hadn’t broken anything seemed to surprise not only me but most of the team involved!) With the level and location of the pain as well as the location on the trails it took a compliment of people to safely get me out. There was a battery of tests, IVs and such. I was essentially immobile for a couple days (although I’ve made awesome strides this week and am getting back to normal much quicker than I ever thought).

But you know what there wasn’t? I didn’t have a brain bleed in the CT. I didn’t have headaches. No nausea. Lights and sounds don’t bother me anymore than they did before (hey, I have a two year old and some of those toys are torture…)

None of this sport is designed to be scare-marketing to readers – but I had an experience that I know could have been much worse without knowing what I know. I wanted to share that with readers.

MANY many thanks are going out on this one BTW:

BikeCo Owner Joe Binatena for turning me onto the 1 helmet a year plan when I started riding about 17 years ago…

Everyone at POC – what a product keep doing what you do.

Leif, Mondo and Emilio – man it would have sucked riding alone that morning!

Thanks to all the first responders who hiked up or down to me from OCFA, Camp Pendleton Fire, State Parks, the OCFA Helicopter Team.

Thanks to the entire Trauma Team at Mission Hospital.

Everyone treated me with care and gave me confidence that my care was in the best hands possible. And actually it shocked me how many of them ride MTB!

Posted on Leave a comment

Ibis Oso with X0 Transmission AXS Custom Build

Custom Ibis Oso Complete with Chris King NOX and Transmission

Check out some pictures of this banger custom eMTB. Ibis Oso with X0 Transmission AXS drivetrain, Magura brakes, Handbuilt King/Nox wheels and more. Built by the team here at BikeCo.com.

Ibis Oso with Magura MT7 brakes NOX Rims and Transmission

Magura MT7 with HC3 levers paired to 223mm Galfer Shark rotors provide the stopping power.

The HC3 lever is adjustable which allows for riders to fine tune the leverage ratio. This adjustment shifts the length between the lever pivot, the lever “action” arm and your finger tip. Want the power to come on a little quicker? Drive the adjustment further towards your finger tip. Looking for more modulation? Reverse the adjustment.

The HC3 is the most adjustable lever on the market. It allows riders to utilize the larger diameter rotors, great for eMTB setups like this Oso, without being jumpy.

Custom Ibis Oso Complete SRAM X0 Transmission

Ibis Oso with X0 Transmission

Yes, this Ibis Oso with XO Transmission takes advantage of wireless shifting. But there’s many more advantages to the X0 Bosch Transmission AXS Groupset on an eMTB setup.

Between the additional weight as well as the mileage and technical climbing eMTB drivetrains are under more stress than we’ve seen before. This tends to lead to wear issues and replacement at a more frequent basis than riders might be used to on their MTB setups.

With the SRAM X0 Transmission riders are purchasing the strongest and longest lasting drivetrain built. Period. The most notable changes on the SRAM Transmission include the unique Flattop chain (which, just plain looks cool) as well as updates to the rear derailleur.

The Transmission derailleur is a robust piece utilizing a double shear mounting on the SRAM UDH capable rear end. With a precision initial installation the Transmission derailleur is ready to go for a long time without requiring much from a rider.

With eMTB riders climbing technical tracks it’s also great that IF you manage to damage the derailleur you can replace individual bits on the derailleur. They’re built to take a hell of a beating, so this may never happen to you…

Questions on which Transmission kit is right for your project? Chat with our team and we’ll get you the right bits to take you trail experience to the next level.

Ibis Oso Cockpit with OneUp eBars and Magura Brakes 2

OneUp Components E-Bar: Simplified Controls

A clean cockpit is provided by both the Transmission wireless pod as well as OneUp’s Carbon E-Bar.

The 35mm Carbon E-Bar allows clean control wiring for the motor. Bosch and Shimano systems can take advantage of this.

The ANVL Swage Stem is used to compliment the E-Bar’s wiring.

Shop #thebestinMTB with our selection of Handlebars and Stems

Ibis Oso Cockpit with OneUp eBars and Magura Brakes

Another look at the cockpit on this custom Ibis Oso.

Deity Lockjaw Grips, the new Wolf Tooth ReMote Pro and Chris King Headset provide nice touches across the board.

Heavier bikes, like eMTB builds, as well as bikes that tend to be ridden a lot and hard, like eMTB bikes, benefit from top tier headsets like Chris King or the Cane Creek 110 options.

Custom Ibis Oso Build by BikeCo Pro Tuned FOX 38

Ground level looking at the Headtube and fork crown.

You can peak at the SQ Labs saddle and get a detail look at the NOX Kitsuma Enduro rim shape.

Ibis Oso with Magura MT7 brakes NOX Rims and Transmission 2

eMTB Carbon Wheel Option

Another angle with more of the NOX Kitsuma Enduro rim.

With a relatively wide internal width the Kitsuma provides a lot of tire volume to maximize grip. This is important climbing and descending the Oso to take advantage of its traction.

Chris King hubs with DT Swiss spokes and nipples are laced to the carbon Kitsuma rims. Our expert wheel builders have a good understanding of rider requirements prior to build. This allows fine tuning of both product as well as actual build setup. In turn this produces a rim that balances incredible service life with excellent, personally tuned, performance.

Chris King Hubs with SRAM Transmission Cassette and Magura MT7 brakes on Ibis Oso

Here is the Chris King rear hub with the SRAM Transmission cassette.

We’ve learned an important aspect on SRAM Transmission installation is ensuring the mounting surface is free of any finishing buildup from the frame. Our team checks the UDH area for any anomalies so our clients have the best on trail performance.

Custom Ibis Oso Build with AXS Transmission and NOX Carbon Rims

One last look at this custom Ibis Oso build.

This rider has spec’d DH tires front and rear. DH sidewalls have a weight penalty, but provide notably improved damping. With the heavier eMTB bikes and especially with aggressive riders this is important.

Riders find extra support from the suspension critical to performance. Finding the additional damping in cockpit (like the OneUp Carbon Handlebar) and tires is critical!

Shop eMTB at BikeCo.com

In the market for a class leading eMTB? Check out our selection of Ibis Oso, Mondraker Crafty, Nukeproof MegaWatt and Yeti 160e bikes here!

Ready to go but have a couple more questions? No problems, chat with our team today!

I Have Questions on an Ibis Oso, Contact Me

  • Please contact me by:

  • Question on sizing? No problem we can dial you in.
  • Question on availability? Spec? Compatibility?
    Our team will be in contact ASAP!


  • Hidden
  • Hidden
  • Hidden
  • This field is for validation purposes and should be left unchanged.
Posted on Leave a comment

Tips & Tricks: 3 Tips to Mount MTB Tubeless Tires with a Handpump

Tips and Tricks Handpump Mounting MTB Tubeless Tires

Whether you’re on a trip, or helping someone out at the trailhead (or helping yourself occasionally…) some quick tips will help you successfully to Mount MTB Tubeless Tires with a Handpump. Check out this quick video from BikeCo.com or glance through the short write up below.

Mount MTB Tubeless Tires with a Handpump

Tip One: How Much Air How Fast?

The first tip to mounting a tire easily, whether with a handpump or a compressor, is to ensure the most volume of air is pushed easily into the tire.

For this I love valve stems that have a removable core.

By removing the core I greatly increase the volume of air I can get quickly into the tire. This will notably help to bead the tire onto the rim.

Mount MTB Tubeless Tires with a Handpump First Tip Remove Valve Core

Tip Two: Grip.

The next step is to get a grip that allows you to easily hold the pump head onto the valve while having your hand wrapped around the tire.

Mount MTB Tubeless Tires with a Handpump Grip the Pump and Tire

Position your hand so two fingers can hold the pump head while you wrap your thumb onto the top of the tire. With this grip you’ll have a good grip for the next step.

Mount MTB Tubeless Tires with a Handpump Bounce and Squeeze

Tip Three: Bounce and Rotate.

While pumping bounce the tire and squeeze with your hand.

The bouncing and squeeze will help reduce the volume inside the tire. This also increases the PSI and to help bead the tire.

This method tends to work quickly. If you’re struggling take a look and make sure there’s nothing obviously wrong.

Quick list of things that are SUPER annoying if you’ve tried this for a while… Are both beads of the tire on the same side of the air valve (so your pumping goes straight into the atmosphere)? Is a bead sitting on the valve?

Depending on the tire it may help to rotate as you bounce it. This provides a bit more pressure in different spots of the tire.

Hopefully this quick video and writeup help you Mount MTB Tubeless Tires with a Handpump!

Stay on the site and shop #thebestinMTB (and eMTB) including our unbeatable selection of tires.

Posted on Leave a comment

Nukeproof Ride Review: Mega 290 & Reactor 290

Nukeproof Ride Review Mega 290 and Reactor 290. Reactor and Mega with Riders looking at bikes on fire road in cloud.

Mike, Tracy and I had a chance to take out two of the most popular bikes in the Nukeproof lineup.

While we didn’t have the most cooperative SoCal June weather we defined what we liked about the spec and how the Nukeproof Mega 290 and Reactor 290 ride on trail.

Mega 290 & Reactor 290: Nukeproof Ride Review

Nukeproof Mega 290 Carbon bike Review on The Luge

In this Nukeproof review we’ll glance at the spec of both the Mega 290 Factory and the Reactor 290 Elite builds.

Where do the bikes stack up in the BikeCo lineup? What are some variants we’d see on our personal bikes?

Later we’ll get into HOW the bikes ride and the overall Nukeproof trail personality.

Nukeproof Build Kits

Learn more about the Nukeproof Factory and Elite Build Kits with these tabs or keep reading for more about the Reactor 290 and the Mega 290’s trail personality.

Nukeproof Mega 290 Carbon Factory Spec Highlights

The Nukeproof Mega 290 Carbon Factory build is essentially an XT bike with FOX Factory Suspension.

The Mega 290 has 160mm of rear travel paired to a 170mm fork and is a confident Enduro or All Mountain bike.

The FOX Factory fork and shock both provide adjustment through PSI, volume spacing, high and low speed rebound as well as high and low speed compression settings. This gives the bike a wide range of tuning options for any rider size.

Shimano’s XT drivetrain and brakes with 203mm rotors front and rear perform as you’d expect.

Spec’d with Double Down tires front and rear it’s set for aggressive riding from the get-go.

DT Swiss EX1700 wheels provide a great platform to mount an Enduro / All Mountain appropriate tire selection from around 2.3″ or 2.4″ to 2.5″ or 2.6″ if you prefer.

Nukeproof Mega Carbon 290 Factory build climbing trail in low cloud cover.

Mega 290 Factory Build Thoughts

While the three of us tend to build very different bikes for our personal quivers we actually had a lot of parallel thoughts on the Mega 290 Factory build.

This is a bike that’s spec’d nicely from the factory. We each had a short list of what we’d probably change if we were going to make this bike our own and really we only had a single build “issue”: the saddle. It’s slippery! Now, you can see in the images we were riding in a low cloud which probably made everything a little more slippery – but everyone noted that the saddle would be the first thing off the bike for any of us.

Mega 290 Factory Spec Upgrades

So what are some personal upgrade or swap ideas for the Nukeproof? Well take this with a grain of salt as the three of us have more years riding then we’d like to admit as well as enough gray hair to be really particular (note Mike’s jersey…), so our upgrades or swaps would all be pretty personal preference things.

Each of us have a preferred brake setup that would go on the bike but as far as spec brakes the Shimano XT are absolutely workable.

All of us have a go to cockpit. Most likely we’d all gravitate to higher rise carbon bars and I would have to have my preferred grip too.

Tracy likes the Double Down tires front and rear. I might go to my EXO+ setup or at least the EXO+ in the front with a DHF for maybe a touch faster rolling setup.

Mike’s finally entry on this was a GX AXS derailluer, he rides wireless drivetrains and was convincing us how lowering the work load on my thumbs would improve my climbing (not much could make my climbing too much worse compared to these guys haha)

If you want to go through the notes on a Nukeproof Elite build (basically an SLX bike) click over to the Reactor 290 tab for more details.

Nukeproof Reactor 290 Elite Spec Review. Reactor 290 climbing on trail in low cloud.

Nukeproof Reactor 290 Carbon Elite Build Highlights

The Reactor 290 Elite build features Shimano SLX drivetrain and brakes as well as FOX Performance Elite suspension giving it a very credible setup. The Reactor is a 130mm travel frame paired to a 150mm fork for a nice Trail and Light / Medium Terrain Enduro bike.

The Performance Elite suspension features the more advanced dampers with improved compression control similar to the FOX Factory options, just without the Kashima coating.

Shimano’s SLX bits feature excellent performance in a bit more cost-conscious at a small weight penalty compared to the XT spec of the Factory builds.

Nukeproof Reactor 290 Elite on trail surrounded by green bushes.

Reactor 290 Elite Spec Review

Our conversation on the Reactor 290 Elite spec had a handful of tangents.

Before we get too deep into what we would have done to “make it ours” so to speak let’s take a glance at the SLX buyer’s opinion.

This is a nice SLX spec. If you didn’t have an established go to for say, like almost every bit on your bike there’s little on this bike that really glares at you. Except the slippery seat. It’s slippery.

Beyond the tires, brakes, cockpit setup preference changes (like we touched on with the Mega 290 Factory build in the other tab) the only other bits that stand out for consideration of upgrade are the wheels and maybe the seatpost.

We started debating about if you were to throw a little bit more cash at this bike where would it go?

Wheels play a big part in a bikes personality so we tossed around ideas on well if we did this, or that to this bike but when we looked at the price consideration it put us into the neighborhood of the Factory build with improved wheels as well as the XT drivetrain and brakes.

And frankly – that’s how models should be spec’d. I like that Nukeproof has a relatively closely grouped build price point and that you can see the value in all of the available models.

Devil’s advocate though: how mean would the Elite look with some carbon hoops on it and new hubs?

Nukeproof Reactor 290 Elite Ride Review bike on trail going downhill

So how did each of the Nukeproof bikes ride on trail?

Well as you’d expect, even though the Mega is a 160/170 bike and the Reactor a 130/150, they had some brand personality similarities when we compared notes.

Nukeproof Trail Personality

Nukeproof Sizing

Mike, Tracy and I are sort of close in height. Well, close enough that I can’t really think of who’s the tallest or shortest.

Each of our current personal bikes is a Large, albeit mine is a Mondraker Foxy so it’s a LONG large.

I’ve always been kind of between sizes at 6’1″ with long legs and arms. Lately I’ve been riding longer bikes and think it has been helping my lower back some – so I went with the XL Nukeproof Mega for our test ride.

Mike tends to ride Large although some bikes he may adjust depending on top tube length to keep him in a better position for his neck and back.

Tracy and I have traded bikes a lot over the years and generally we’re super close in setup. I think most of his personal bikes have been Large lately.

Once I jumped on it I had no doubts it was the right size. I never felt “lost” in it at all. In fact I kind of struggled to see how a 20mm shorter reach would have worked either. So I started giving Tracy a hard time about his Large selection. By the end of the ride he agreed that the XL would have been a nicer fit.

Mike rode the L Reactor 290 and seemed like he enjoyed the fit as its closer to his current quiver of bikes although the reach is a little shorter on the Nukeproof compared to other brands.

With almost all size bikes having room for longer dropper posts these days fit has become height as well as leg length and determining where you are on the “average” comparison of that.

I come in on the X-Large for height and the XX-Large for leg length according to Nukeproof. The XXL was going to be much to long for me but the XL was a good fit.

For taller riders, it makes sense that Nukeproof offers an XXL if the XL is a comfortable fit for me.

Nukeproof Mega and Reactor Trail Review Bikes at the top of The Luge in the cloud

Nukeproof: On Trail

All of us enjoyed the miles on the Nukeproof Trail / Enduro models. Mike has actually ridden both of these bikes as well as the Giga and is a great resource for our team on the overall Nukeproof personality as well as the variations in their lineup.

Nukeproof Personality

As a disclaimer: we didn’t get the greatest conditions to really test these bikes.

But between the three of us, with a lot of years of doing this, there were a handful of things we agreed on about the Nukeproof trail performance.

Planted / Balanced Traction.

The bikes have a notable even balance on the front and rear wheels. In just about any reasonable riding position it was very easy to feel both wheels working together. You had to get way, way too far off the back to get the front end light. And I was uncomfortable getting far enough forward on the bars to have the rear wheel feel light (with one exception I’ll get into later hahaha…)

Along the same lines as being “planted” the bikes had an appropriate front to rear wheel feel climbing and descending.

I found the Mega 290 was a very forgiving bike to ride which became important on the descent as conditions turned more sloppy than any of us frequently ride.

Overall the Nukeproof rode most similarly to Ibis models we work with.

It might have had a little more “up and down” pedaling variation than my Yeti or Mondraker – but like the Ibis bike’s this motion directly equates to rear wheel traction so I didn’t find the bike sluggish to accelerate. It was well behaved even up some of the slippery climbing sections when the wheel was clawing up and over rocks or terrain shifts.

The Mega and Reactor had a little less “pop” than you might expect from a Yeti or Mondraker on trail. Some of that is from the suspension’s design but some of it is from the shock and fork setup as well.

I suspect with time I could have put more “pop” back into the Mega to have it ride closer to my preferred quicker out of corners, pumpy style bikes (but that style also tends to break free from traction faster too – so it’s really a personal setup preference at that point – read on for my detail notes and why understanding a review is helped by understanding the reviewer…)

Lively at Any Speed

Another aspect that’s important for bike performance, does the bike require a certain speed to come alive? Class leading bikes have good handling characteristics whether you’re riding at consumer, expert or even race paces.

The Nukeproof felt good in the range of speeds I was able to get it into. Some bikes struggle with sluggish handling at lower speeds or get nervous at high speeds. Bikes like Nukeproof, Ibis, Mondraker and Yeti put a lot of effort into their testing to ensure the bikes are playful and fun for the widest range of riders.

The Mega felt like it had more in the tank than I got close to giving it, but never felt like that school bus on a figure eight track that some “bigger” bikes parallel at lower speeds.

Nukeproof Reactor 290 Elite build review on trail downhill

Nukeproof Reactor 290: On Trail

Mike’s notes carry a lot of weight as he puts many miles on a variety of bikes. From Nukeproof, Ibis, Mondraker or Yeti he’s very familiar. So it was interesting to listen as he fit the Reactor 290 between other BikeCo models.

“The Reactor rides a like a little bigger than pretty burly built Ripley. You know the Ripley with the bigger fork and shock that we’ve done in the past.

I’d say maybe closer to the Ripmo even. Not quite as big as the Ripmo travel wise but the Reactor is closer to a ‘fast’ Ripmo setup more than a big ‘Ripley’ probably.

The Nukeproof suspension feels similar to the Ibis although it would take me a little bit to get the Nukeproof as precise as the bikes’ I’m comparing since I’ve had more time on them.

On the Reactor I felt confident that the bike would turn in and hold a line. It felt pretty good over the chunkier stuff but we were kind of going slower today because of conditions too.

For me, this is a very well equipped bike at the price.  The Elite build I rode had the Fox Grip 2 damper on it which is all you really need or want.
We see many “DTC” bikes come into the shop and the client needs to spend more money to get the bike in a rideable condition.  You could ride one of these off the floor and it is ready to go.  Comfortable and super competent for the price point”
Nukeproof Mega 290 Carbon Factory Review dropping into the Luge

Nukeproof Mega 290: On Trail

Tracy and I have ridden a lot of bikes, in a lot of terrain over the years. Generally we both gravitate to a similar model capacity even if we ride different brands. So it made sense that both of us wanted to test the Mega 290 out of the Nukeproof lineup.

Overall we had pretty similar trail notes. I’m going to go deeper into my thoughts a little later as there’s A LOT of things that you feel and have to take into account on a demo ride and I think it’s important to be transparent and realistic – you can get an idea of how the Nukeproof bikes behave from this review but there is so much range of adjustment available as well. Anyway – back to the quick takes on the Mega 290 On Trail.

Tracy had some good insight

“The bike didn’t feel twitchy or nervous. Even as the trail got slick I felt like I could hold the lines I wanted.

It pedaled like I would expect for a 160/170mm bike. It wasn’t a slow pedaling bike at all. Could be tough to tell given how sticky the ground was too. But with the road ride before the dirt I felt like it compared well with other bikes its size.

I never felt the bike get nervous at speed. Couldn’t tell with today’s conditions but it might have that Yeti personality where it loves more and more speed.”

I agreed with all of his notes after the ride especially the speed capacity. I was able to get the bike up to a lively pace in a couple of the areas that weren’t as soupy and the bike never gave me any indication that it wouldn’t like a little more.

Both of us noted that the Mega was quite notable at holding lines in both the dry and wet conditions. You’d roll the Mega into a corner, get that lean angle going and that bike just carved in.

With the setup I noted the bike would take a lot of weight input from your feet while keeping the front end planted.

Nukeproof Mega 290 Factory Review Test Riding

Quick Conclusions: Nukeproof Riding Review

So what’s the quick take on the Nukeproof Mega 290 or the Nukeproof Reactor 290?

Well drawn from the combined notes we had really positive notes overall on both the bike’s spec and value as well as the on trail personalities.

Nukeproof Mega 290 Carbon Factory Review. Bike turning on trail.

The Mega and Reactor both feel well planted, confident and forgiving on trail. These aren’t bikes with knife edge personalities and even a pretty basic setup provided a really enjoyable ride.

Nukeproof bikes overall feel like they have a bit of “monster truck” in them, similar to Ibis bikes, and ride comfortably feeling maybe slightly “bigger” than they are.

I know I put the Mega into situations that it was well behaved in without requiring over the top theatrics or heroics from me as a rider.

Wondering how the Nukeproof might fit into your personal riding? Chat with a member of our sales team. They’re all versed with the class leading brands BikeCo works with: Ibis, Mondraker, Nukeproof and Yeti. Our staff is trained on where these brand’s personality is as well as what tuning options are available to modify a bike to your desired requirements.

Remember: class leading bikes, ones with not only the “right” geo (which has converged somewhat over the years) but also the RIGHT suspension and balance have a setup range. And it can be hard to really understand it from a demo ride.

Since I’ve bitched for so long about those doing reviews being more transparent about “what” and “how” they ride you can keep reading for more details on my ride and how experience allows a better understanding of what a bike is about and where it fits.

But first enjoy some pics of Mike and Tracy from our Nukeproof Ride Review on the Luge!

Reviewing the Reviewer

I’ve been pushing for a long time that reviewers give more personal insight to their experiences that go into a published review. So to wrap up this Nukeproof Ride Review I’d like to provide insight to what I thought, what my exact notes were, what I ride and how I come up with some of my conclusions during a review.

There are a handful of things that experience will help you quickly define and if you know how those are about to effect your ride you can more accurately speak to a bike MODEL and not a SETUP so to speak.

What Did I Notice in Setup?

Some of my notes on while I setup the Mega 290 would help me better understand what the bike WAS doing on trail and what it COULD do as well.

Mega 290 Ride Review Notes on Setup

Factory Suspension

Both the fork and shock were low on volume spacers for my preference. This means I used the compression settings to increase support that would be more finely tuned by increasing the ramp rate.

It’s a demo bike – the odds it would have a perfect package are low. Knowing that I was running more compression meant that I would forgive a little bit of potential harsh small bump compliance in the rear as well as initial support into corners.

Cockpit

First, I have bad hands and hate grips with outboard collars. It hurts my hands, messes with my ulnar nerve and causes numbness and pain up my arms. This bike had grips I didn’t like but I would try to run my hands further inboard than I usually do.

Bars were aluminum and 25mm rise with not a lot of stem spacers. I generally like to have larger rise handlebars and carbon (it makes a big difference in my hand and arm condition to ride with carbon bars)
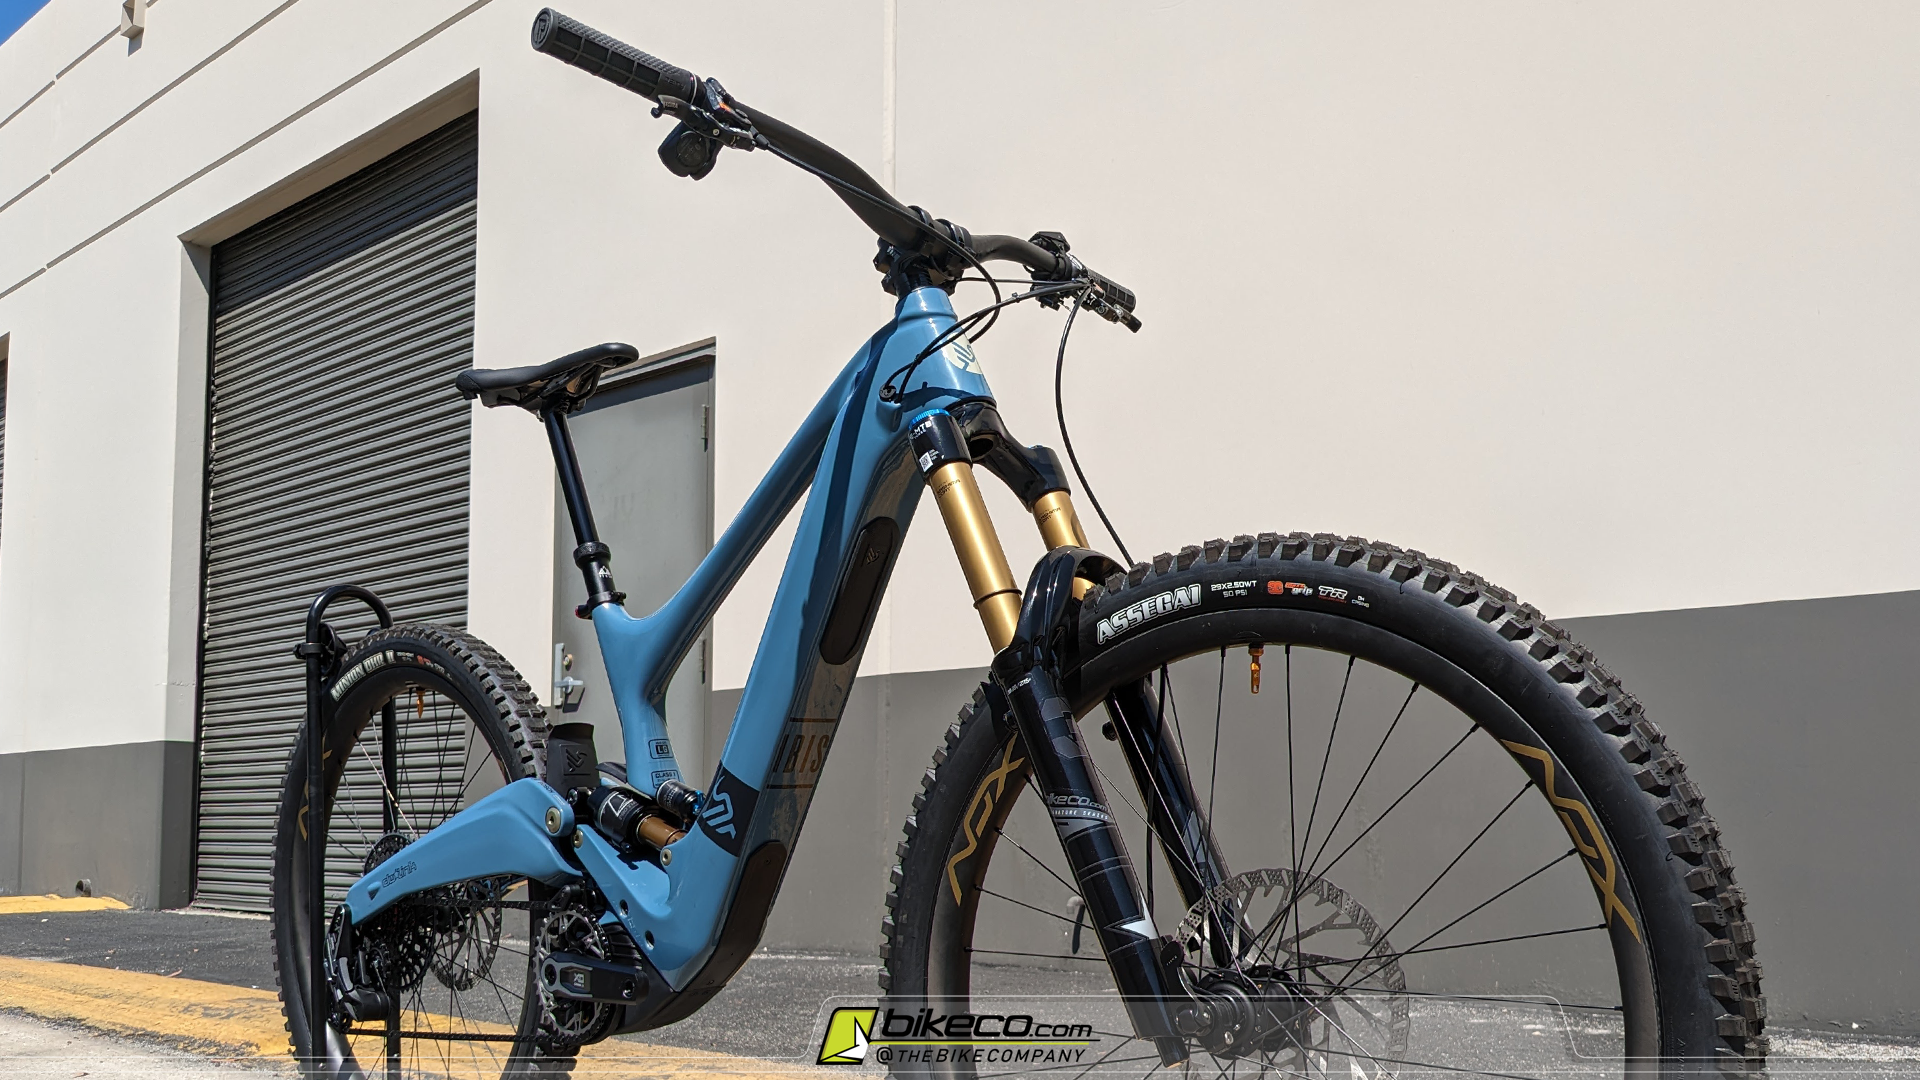
Tires

Double Down Assegai front and Double Down DHR rear. An aggressive setup but appropriate for the bike. I typically run EXO+ DHF / DHR pairing so I knew that tire package would be a bit heavier than I’m used to.

Setup Forgiveness Based on Spec

Will it ride Harsh?

So based on the volume spacers, compression settings, grips and bars I knew I would potentially have to forgive some front end “harshness”. In other words, it would not be a fair fork test for sure if that’s what we were testing!

Luckily the fork was freshly serviced and overall it felt good. I think the oil and seals being new helped this a lot (and actually made me think I really need to service my 38)

Can I Get It In Control?

Hand height is important to me for a couple reasons. First, I have back issues which mean I kind of need my bike setup in a certain way to minimize that. This is a personal issue and varies from rider to rider. If you’ve got enough gray hair you’ll probably understand and if you have the gray hair and don’t understand it I’m jealous for sure!

Second you gain or lose a lot of control by having hands in a position you can get power applied. This applies to both your hand height as well as width. Just like riding too wide of bars having your stack too high or low can numb the handling reducing your ability to have quick adjustments with minimal input.

I did notice that the Mega liked to be leaned in to corners more than my usual setups that I tend to understeer slightly and lean which snaps them into corners a touch faster. I’d still give the Mega passing grades on this because my hands were low combined with the fork setup not having the precise feel I’m used to after all the years of Pro Tune forks and a specific setup.

Acceleration

Some would say climbing. I don’t climb well enough to speak to it! So, for me to feel a bike’s efficiency I’m looking at how it handles burst acceleration. Heavier tires are going to change that around which I noticed on the road climb to the Luge but not as much once we got in the super tacky and then super slippery dirt…

Geo Differences

My personal bike is a Mondraker Foxy RR with a 170mm fork. So all and all most of the geo between what “I’m used to” and what I was testing was relatively close (especially when you factor the published Mondraker numbers are from a 160mm fork so mine has a slightly slacker headtube, higher bb and longer wheelbase).

The exception that I saw was on wheelbase. My Mondraker is setup with the shorter chainstay and shorter wheelbase. The published wheelbase is 1253mm – given the longer fork I’ve added a couple mm to that but I’ve never really bothered to calculate it out.

On the Mega XL the wheelbase is 1275mm which would give it a touch more planted feel and change a little bit of the direction change personality.

On the road when I put a twitch through the front end I could feel the front end was a bit more planted than my bike. I couldn’t decide if that was the MaxxGrip tire or the longer front center.

During the descent I could feel that the Mega XL was “longer” in the first few corners but that quickly went away once I had four or five turns down.

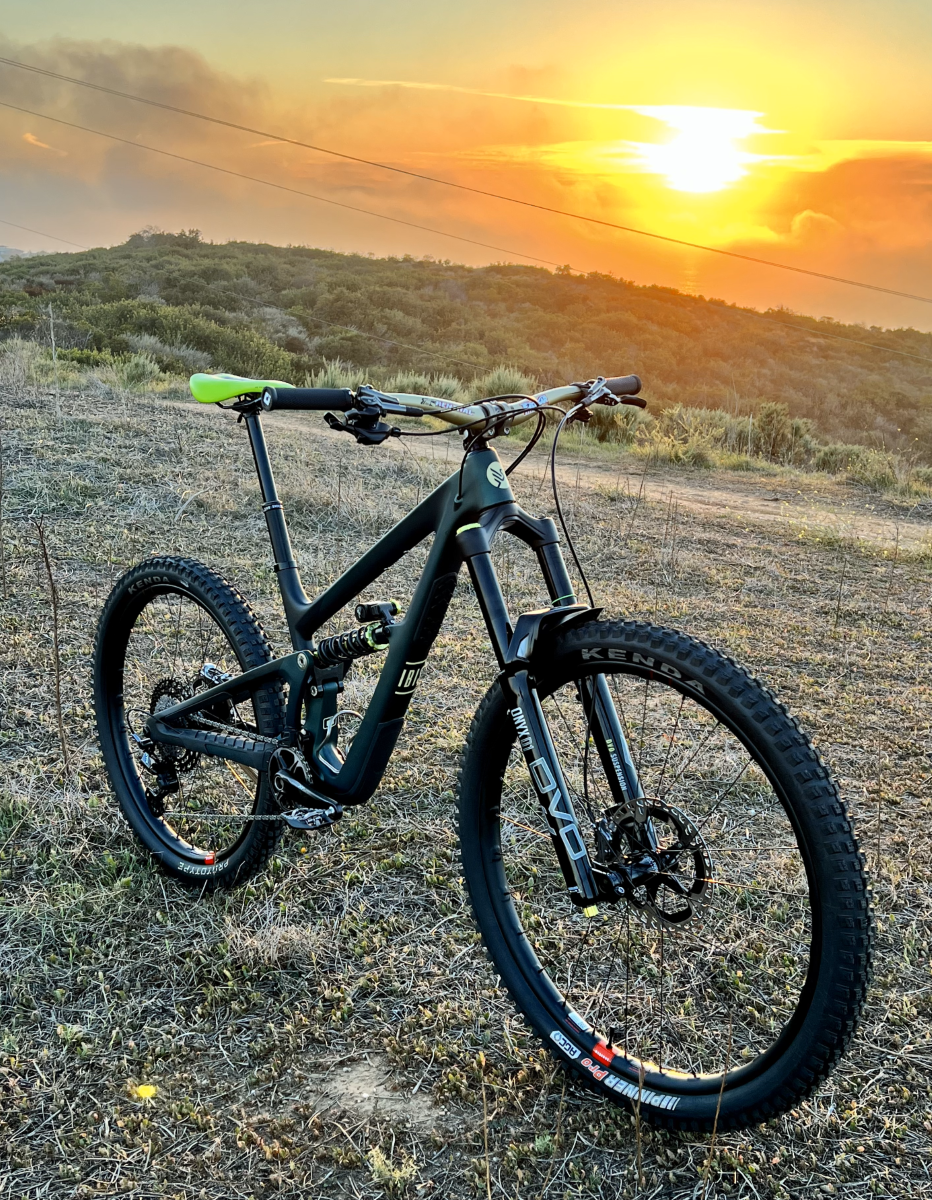
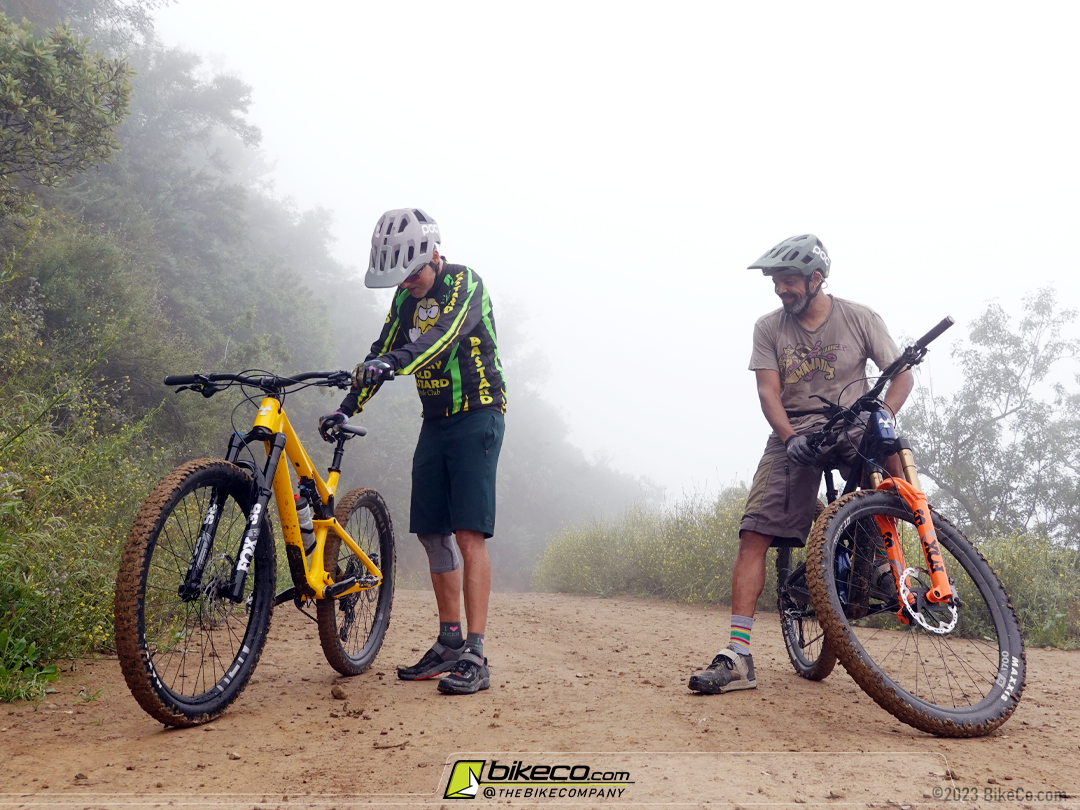
Finally – let’s take a quick look at the conditions we rode in.

Between some morning rain and being in the cloud the conditions were pretty variable. We got in some sections that were hero dirt levels of excellence – no brakes just ride in, lean as much as you want and rip through it.

Then, well, it got sloppy…

Nukeproof Mega 290 Factory Review by bikeco

Being SoCal locals none of the three of us really ride in sloppy stuff. So the details of the ride have to go back to the conditions were we have experience and kind of look the other way in conditions that are outside of the norm for us.

For instance some riders are always looking to fall in love with a demo or review bike. That’s not always going to happen (even for a bike you’ll love) and breaking down the experience can be important.

Here’s a good example of this for me:
First Ride Demo on the Mondraker FOXY
(didn’t love it but saw potential)
Extended “First” Ride when I bought one
(starting to love it – testing some stuff out, riding is ‘work’ you know!)
Extended Ride Review
(loved it by then)

Sorry for the sidebar, but the point is that you’re not always going to “love” a bike at this level at first sight. They’re technical pieces and you should treat it like that and go through what you’re really looking for out of the bike to make sure you get a bike that will get there with you. BikeCo’s staff is unbeatable at this…

Like overall – it was fun to get out with Mike and Tracy on the Nukeproof, but by the end of the ride I was kind of “blah” about having messy muddy everything to clean up, I was cold and I had a fall that dampened my spirits (and for a split second or two really scared me).

OK, not to dwell on crashes but this one was pretty funny and not that bad. If you’re familiar with the Luge picture the deep pocket turns before the trail “turns left” down the canyon with the right hand exposure. I think it’s three or five like left, right, left, right, left. Anyhow, I went in too hot as the flatter section of trail wasn’t too slippery, but as soon as it rolled into the steeper stuff it got sloppy. First corner I lost the bike, back end comes around and I’m sliding down, still up on the bike, but both wheels full drift. Into the next corner where the front end climbed up the rise and now the back wheel is in the trough, front wheel almost in the bushes still up. Still sliding. About then I see there’s really only one more turn before that left, which if I miss I’m going off the side, so my heart kinda thumps. Still at a full slide 90 degrees from the ideal direction I decide to smack my leg into the side of the trail to try to slow down and get off the back of the bike. Never fully fell just kinds slide all over and bury my leg in mud. Anyhow – I get down trail to take some more pics of Mike and Tracy and Mike’s like “ya, did you see those tracks through the corner? What a mess” or something along those lines. Then looks at me and puts together that those were all my “tracks” across the nearly the entire trail width…

When demo-ing or reviewing a bike you have to kind of put that aside to have a critical look at the bike, the setup and the spec to decide what you’re really feeling or not. I suggest that riders try to find 3 things they like, 3 things they didn’t really like and 3 things they’re neutral about to help your sales team understand if you’re on the right type / model of bike, size, spec and how the setup was.

Overall I can confidently say the Nukeproof Ride Review of the Mega 290: it’s a bike that rides planted, comfortable at speed, well behaved and consistent without knife edge performance. My experience says that for me, I would prefer ramping the suspension up to add some more “pop” to the bike to give it a little more when pumping the trail through terrain or in corners. The Mega rode “bigger” than either of my last two bikes the Mondraker or a Yeti SB130 Lunch Ride – but it should as it is a longer travel frame than either of those options.

I think it compares best to the Ibis Ripmo, maybe even a Ripmo with a 170mm fork.

Overall a fun Enduro bike comfortable and confident in terrain and speeds you’d expect!

Chat with our team today about the Nukeproof lineup or shop Nukeproof below:

Posted on Leave a comment

Custom Yeti ARC Hardtail

Custom Yeti ARC with Onyx NOX wheels build

Enjoy some detail photos of this custom Yeti ARC Hardtail build by BikeCo.com

This Yeti ARC highlights the trail capacity of the hardtail ARC maintaining a nimble feel with instant torque utilizing a single speed drivetrain coupled to the instant engagement Onyx Vesper hubs tied to NOX Composite Farmlow carbon rims.

Our team takes great pride in producing dream bikes – whether they’re full custom spec bikes like this single speed ARC or a factory build with the perfect cockpit, the right brakes, whatever you need to make it yours.

Keep reading for more details on the spec of this build to get ideas for your next dream bike.

Single Speed Yeti ARC with Onyx Hubs

Cranks: Race Face Era Carbon
Chainring: RaceFace DM
Chain Tensioner: Rohloff XC/SS Twin Pulley
Chain: KMC X11 Silver
Bottom Bracket: Chris King ThreadFit 30
Cassette: Reverse XD Single Speed Kit 14t
Pedals: Shimano XTR SPD XC PD-M9100

Custom Yeti ARC Hardtail by BikeCo

Hubs: Onyx Vesper
Rims: NOX Farlow Enduro Layup
Front Tire: Maxxis Forekaster 3C MaxxTerra EXO
Rear Tire: Maxxis Rekon 3C MaxxTerra EXO
Fork: FOX Factory 34 GRIP2 with Shiny Orange Lowers

RaceFace Next-R Carbon bars on Yeti ARC

Handlebar: RaceFace NEXT R 35x800mm 20mm rise
Stem: RaceFace Turbine R Stem 35mm
Brakes: Magura MT7 Next with HCW Lever
Rotors: Magura Storm HC
Seatpost Remote: PNW Loam Lever
Grips: PNW Loam Grip

Custom Yeti ARC Hardtail by BikeCo

Saddle: Ergon SM Comp
Seatpost: PNW Rainier Gen 3

Shop other Yeti ARC builds at BikeCo.com

Posted on Leave a comment

Custom Nukeproof Giga 290 Build with SRAM X0 Transmission

Custom Nukeproof Giga SRAM X0 Transmission Build by BikeCo

Enjoy some detail shots of a banging custom Nukeproof Giga 290 Build featuring the new SRAM X0 Transmission drivetrain.

The new SRAM Transmission drivetrain is the strongest and longest lasting design on the market.

When we were spec’ing this Nukeproof Giga Custom with the client an important aspect to the build was minimizing service replacements down the line: so the t-type Transmission wireless drivetrain was a must have.

Hope’s latest Tech 4 brakes build on their famous power modulation by bringing up the total power on par with other class leading MTB brakes.

The Hope V4 calipers are designed for the most aggressive riding with 4 large pistons per caliper and slightly larger pad surface compared to the Hope E4 calipers.

Looking backwards we see the Nukeproof Giga’s low slung shock mount and linkage.

Further back are Hope 2 piece rotors mounted to Hope Pro 5 hubs

Cockpit spec includes the OneUp 35mm Carbon Handlebars, Deity Grips and 5Dev Titanium Stem.

The OneUp Carbon Handlebars are popular designed to provide a touch of compliance allowing you to stay fresher longer into your descents.

Click through a few more pics of this Custom Nukeproof Giga build

Other highlights on this build include Chris King headset and bottom bracket, MRP AMg V2 Carbon Chainguide, SQ Labs 612R Carbon Rail Saddle, 213mm BikeYoke Revive V2 dropper with Wolf Tooth Remote Pro and Assegai 2.5 3C MaxxGrip EXO + front tire with a DHR 3C MaxxGrip EXO+ rear tire.

Looking for a custom bike build? You’re in the right place. BikeCo.com has specialized in custom builds from class leading Trail and Enduro brands like Ibis, Mondraker, Nukeproof and Yeti for years.

Chat with our team to find the perfect build at the best pricing available.

Shop Nukeproof Bikes on BikeCo.com

Posted on Leave a comment

Will SRAM Transmission Fit on My Bike?

We’ve got a lot of questions on what bikes are compatible with the new T-Series SRAM Transmission Drivetrains.

So, Will SRAM Transmission Fit on My Bike?

It’s pretty easy to tell:

Does your bike have a UDH rear derailleur hanger and is it designed with a 55mm chainline?
(at this junction I havne’t seen a UDH bike, not 55mm – so basically – is your bike UDH?)

Here’s a quick look at the details that allow the SRAM Transmission to really stand out as the next generation in drivetrains, particularly with it’s automated setup.

SRAM UDH

Will SRAM Transmission Fit on my bike?

So when you heard SRAM was making derailleur hangers what was your thought?

Until I heard chatter about the Transmission system I was kind of like, great, another standard eh?

But as the advancements of the new SRAM Transmission and T-Series components came out it made a lot more sense.

Above on the Left is the hub mating surface of the new Derailleur and on the right is the surface of the UDH.

This is really the piece that allows the SRAM Transmission to take its performance to the next level: Bikes designed with the UDH provide SRAM a dedicated measurement and contact point with the hub, and therefor with the cassette.

SRAM Transmission UDH connects Derailleur directly with hub and cassette in contact

In this illustration you see how the SRAM Transmission Derailleur directly contacts the hub while also accepting the bike’s axle.

This is the importance of bikes being designed around the SRAM UDH in order for Transmission to function.

The 55mm Chainline

The latest in the ever evolving standards of MTB right? I know, part of me wants to make fun of it but the majority of me has a lot of appreciation that this sport values your dollars and continues to innovate – even if it means seemingly continual change! (I swear the next remade 1980s or early 90’s movie or TV commercial I see is gonna make me puke – at least in MTB its always doing something new…)

The wider chainline allows the Transmission system to work, provides a slightly stiffer and more robust rear triangle and requires specific cranks.

You can see the axle difference below between the SRAM GX DUB 52mm and 55mm DUB Wide cranks.

SRAM 55mm chainline versus 52mm chainline GX Cranks

So – what if your bike doesn’t have a UDH? Well non-UDH boost bikes can run the previous SRAM AXS technology available in GX, X01 and XX1 configurations.

In fact, the SRAM AXS system will still mount on a UDH bike as well if you want very specific cranks, chains, etc outside of the T-Series range.

Quick Differences between Transmission and AXS

Transmission provides automated setup and tuning as well as notable improvements to component strength and longevity.

SRAM AXS has an automatic trim tool but does require a bit of setup prior.

If you’re building a new bike most riders shopping wireless shifting will gravitate the new Transmission series as it is more robust and has some interesting design upgrades such as replaceable bash plates as well as other considerations to minimize potential damage in an extreme scenario.

If you’re updating or upgrading your current bike it tends to depend on budget (you’ll need new cranks with specific chain rings with the Transmission system), how important auto-setup is and whether your bike is UDH or not.

Whether you choose Transmission or the previous AXS you’re getting the best in wireless shifting available in MTB or eMTB.

Questions on wireless shifting options? Give us a call, email or use the chat and we’ll get you the right parts for your project.

Shop BikeCo’s favorite drivetrain kits below

Return to Top of Page

Contact Me Regarding Wireless Shifting Kits

  • Please contact me by:

  • Question on availability? Spec? Compatibility?
    Our team will be in contact within 24 hours!


  • Hidden
  • Hidden
  • Hidden
  • This field is for validation purposes and should be left unchanged.

Posted on Leave a comment

Buy Nukeproof at BikeCo.com

nukeproof giga 290 elite build bikeco so cal dealer 2

We’re excited to introduce Nukeproof at BikeCo.com! With a lineup of MTB from down-country / trail riding through to EWS level Enduro bikes like the Reactor 290, Mega 290 and Giga 290 as well as their mullet eMTB MegaWatt 297 the brand has majority of BikeCo riders terrain covered!

We invite you to shop in-stock and available Nukeproof bikes here at The Bike Company.

Let’s dive into why you’ll want to shop and buy your Nukeproof from the experts at BikeCo:

nukeproof mega 290 elite build at The Bike Company

above: Nukeproof Mega 290 Elite

Why Shop Nukeproof at BikeCo.com?

Our goal is to provide each client a tailored experience. Our expert staff is here to help you find the answers to your questions, large or small, to ensure you’re getting the right bike for your riding.

Our site provides easy access to comparative data allowing you to view geo details between various models and sizes from MTB leaders like Ibis, Mondraker and Yeti with the Nukeproof bikes.

buy Nukeproof at bikeco compare geometry and work with experts

above: BikeCo’s Interactive Geo Comparison

buy Nukeproof at bikeco suspension expertise

above: Insight on Suspension

You can learn more about the Nukeproof geometry and suspension on any of the specific bike pages or on the Nukeproof Complete homepage (scroll to the bottom)

Our years as a leading Suspension house allow us to understand what it takes to dial in class leaders like the Nukeproof bikes as well as taking it to the next level with our proprietary BikeCo Pro Tunes on the FOX forks and shocks.

nukeproof megawatt 297 factory build bikeco so cal dealer 2

above: Nukeproof MegaWatt 297 a 170mm travel eMTB Mullet!

In the long run I suppose more important than why you’ll want to shop Nukeproof:

Why you want to Buy Nukeproof at BikeCo.com

There’s a long list of reasons to purchase your new Nukeproof from the experts at BikeCo.com.

First: we’re MUCH more than a freight forwarder… Bikes at this level require a certain level of build for the best service life and riding experience.

BikeCo’s expert team assemble, setup, test ride each bike before it leaves the shop.

We go through the pivots. Ensure the suspension is functioning and setup in a rider range for the client. Make sure the shifting is crisp. Check wheel tensions, torques. The list can go on but the take-away is this: your bike is setup, test ridden, a tune sheet produced as a starting point for you – and since we’ve been doing it since 1999 this is all at a level that our competition simply can’t match.

With thorough build and test setup techniques we’re able to minimize any issues that can be common at lesser dealers on a new bike. Our goal is to have your bike ready to go when you take delivery – and, in the unlikely scenario there is an issue we’re here to take care of it quickly. We’re available 6 days a week by phone, email or webchat and will help you through a solution or get the needed bits for you fast.

nukeproof mega 290 elite build at The Bike Company so cal nukeproof dealer

above: Nukeproof Mega 290 – 160mm travel 29er

Spec Upgrades & Swaps at time of Purchase

Another BIG reason you’ll want to buy Nukeproof from BikeCo: we’re not locking you into every factory spec’d part.

We provide our clients with the Best in MTB. Looking for different brakes? No issue, we’ll help you understand the differences in personality and walk you through brake upgrades and swaps.

Same with wheels (VERY popular on the Nukeproof Elite builds as well as common carbon upgrades to the Factory and Elite builds), cockpits, seating, wireless shifting? Sure thing. Let’s get you dialed.

buy Nukeproof at bikeco part upgrades and swaps available

above: Common upgrades and swaps to the Nukeproof lineup

Small parts make a big difference in your bike’s personality.

Rather than having a garage full of bits our team is here to help you define which parts will make large performance changes on your Mega 290, Reactor 290, MegaWatt 297 or Giga 290.

Pro Level Builds Require Less Service!

Having a bike build and setup by our expert team has long term advantages.

Our frame prep techniques ensure that the suspension linkage and pivots are ideally set for a aggressive riding.

Bikes setup to shift properly from the start tend to require less upkeep. That’s ensuring alignment, torque, interaction, etc.

Even pre-assembled stock wheels are gone through and will stay round and true much longer (I have a lot of personal experience with this! Our guys keep me from making stop signs out of wheels nearly as often as I would otherwise)

The BIGGEST reason you’ll want to Buy from BikeCo.com?

Unbeatable After Sales Service

Your experience with BikeCo doesn’t stop when you take delivery of your new rig. Our team will provide you with a basic suspension setup sheet based on your size and riding specifics.

If you have any questions on initial setup or build we’re 100% available for you. Even better, with more than 20 years of experience we know how to ensure your bike goes from “good” to “man, this is dialed.”

Our team will reach out several times over the first few weeks of ownership to ask for your input on the bike. Any notes you have are great, but they also have a list of “loaded” questions to help us best determine small setup changes that will make a big difference for you on trail.

From initial setup mods like tire pressures, suspension setup to larger changes as your riding speed and terrain advance.

Our team is here to help you make sense of the interwoven setup bits like tire pressures, tire sidewalls, potential tire inserts, handlebar location, suspension air pressures, volume spacing, rebound and compression. Don’t worry we’ve got you covered.

nukeproof giga 290 elite build bikeco california nukeproof dealer

above: Nukeproof Giga 290 – 170mm travel 29er

Our goal is to keep clients excited to ride their bikes. This is in part because we ride and understand how important that is but also the majority of our clients are repeat bike buyers and refer us to their friends and riding buddies.

In order to maintain that our team pushes to ensure that every client has access to a level of expertise that is the top tier available – frankly far above the industry standard.

Bikes at this level require a different level of commitment. To spec them, to build them, to set them up and delivery you a banger – that’s why BikeCo is here and that’s why you’ll want to buy Nukeproof at BikeCo.com!

Questions on the Nukeproof lineup? The advantages of working with us? Let us know – use the contact form below, webchat, call 949-470-1099 or email CustomerService@BikeCo.com today

Don’t see what you’re looking for?


Contact Me Regarding This Product

  • Please contact me by:

  • Question on availability? Spec? Compatibility?
    Our team will be in contact within 24 hours!


  • Hidden
  • Hidden
  • Hidden
  • This field is for validation purposes and should be left unchanged.


Return to top of page

Posted on Leave a comment

Night Riding: New Adventures on Familiar Trails!

MTB Night Riding New Adventures on Familiar Trails

With the upcoming time change and winter closing in the day light hours riders have a couple options for weekday rides. (or, if you’re like me and ah, socially challenged let’s say less busy riding windows!) One is to get up early, although sometimes that light window is short too. The other is to find trails that allow night riding and check out why so many of us credit night riding for improving our riding as well as being a great adventure.

First, let me admit, 10-12 years ago I really did “night” rides pretty frequently. Now, mid forties, my “night rides” tend to be “rides in the evening in the dark”, home and in bed at my normal time! But the adventure and riding is still great…

MTB Night Riding: What do I need?

One of the beauties of MTB night riding is it really doesn’t take much more than you probably have for adventure riding days anyhow.

What’s on my quick list? Well let’s take a quick look.

Night Riding Tips and Setup from BikeCo details in write up below

MTB Night Riding Lights

It had been several years since I’d been night riding a lot. Amazingly, or – rather not amazingly I suppose, lights have gotten less expensive, much lighter / smaller and WAY brighter.

I feel like the modern lights in “low” are brighter than my previous lights on “high”. It’s a much more confident feel both up and downhill with the greater lumens at your fingertips.

Two Lights: Helmet & Handlebar

You’re going to have a better experience with a pair of lights. There are a handful of reasons for this.

Top of the list: Riding with two lights at different heights and different angles provides more definition of the trail. With a single light shadows are cast that don’t always easily define what it is you’re looking at. Having a second point of light provides better definition of what’s in front of you – especially downhill.

Night Riding Tips and Setup from BikeCo Two Light Advantage

When descending I prefer a more powerful headlight and slightly less, or maybe equal handlebar light.

The brighter headlamp provides improved vision when you’re looking “down” trail. Your helmet’s light has a better angle for casting definition in most conditions as well.

Setting Up Lights for MTB Night Riding

Getting your lights “right” takes a little bit of trial and error.

Some things to consider include the angle, total light output, trail and speed.

You’ll need to be able to see far enough down trail to ride at a fun pace. Often, especially if you’re climbing first, you’ll find your lights are aimed a little “low”. This is why you see lights mounted further “back” on helmets than you might expect. In order to get the light cast far enough ahead most mounts require being towards the top of the helmet. This also helps with weight balance.

More is more, until it’s too much… You don’t want to “wash out” the trail too much. So you might not run at full power, or you might aim slightly “high” or “low” and maintain the ideal view area with slightly less powerful light.

I remove the visor on my helmets – you don’t have to do this, but, with the light mounted further back the visor can create an extra shadow to deal with. If the visor comes off easy I just pop it off for night rides.

Helmet Headlight

Generally I suggest this to be the more powerful light – but – if you have a really large light you probably don’t want that weight on your head. You can get a lot of lumens in a compact package these days so it isn’t typically an issue either way.

Climbing: When climbing I use the headlight in the low setting to provide enough light at climbing speeds while saving some battery.

Descending: I run the helmet light at or near full power. While you might find this can “wash” your vision if it crosses with a bright handlebar light but there are advantages of having the extra lumens when you’re looking downtrail before the handlebar has crossed into that direction.

Handlebar Light

My personal setup is currently “same-same” both in the 1200 or 1300 lumen range. Recently I rode with an old friend who showed up with a huge lamp with extra batteries mounted to his bar. Part of me was super jealous of ALL the light. But, given that we’re doing usually just quick loops on a trail we’re familiar with I still prefer the small package lights. Having “same-same”, or at least the same mounting technology also makes it easy if you need to swap them back and forth.

Climbing: I tend to climb without my handlebar light on. I figure this saves some power and gives you a bit more of the “I’m out here” feeling which I like.

Descending: like your helmet light it may take a bit to find a good setup. I’m messing with these new lights trying to balance power, cast and wash out. I don’t have a real “here’s where you should be” feel yet on it. With SO much more light than what I’d been familiar with I’ve been trying different things to see if using a brighter setting, aimed “lower” gives enough light cast while improving the definition. I think my next ride I’ll try mounting the light under the bar to see if I can get a “steeper” angle on it and see what that does to the cast effect.

The long and short of it – familiarize yourself with the lights and their capability. Then find what you feel works best for you!

Other Night Riding Go-Tos

MTB Night Riding Tips and Tricks Warm and Comfortable

Night riding can take a lot of different forms – and you’ll see many of them out on your local trails.

While there are the guys smashing out the full cardio attack it’s much more of an “event” ride for most riders.

So, how do you stay comfortable on these rides? Well, by staying comfortable…

MTB Night Riding Comfort Tips

Rider Type 1: (my brother) Don’t sweat, cause, sweat will make you cold. I can’t argue with the logic here at all. If you’re this rider it’s also likely you’re in the faster part of the group – which – means you’ll end up waiting more… So you need to have enough gear with you to ensure you’ll stay warm at the check in points.

Rider Type 2: (me) You’re going to sweat. Maybe a lot. Maybe even if it’s cold! I bring an extra jersey so at the top of the climb I can get out of the wet, gross, clingy thing before I descend and force a bunch of cold air through it onto my skin! Really makes a huge psychological difference and reset for me.

Extra Clothes? I’m somewhere in the middle of true minimalist and over packing survivalist. You really have to assess where you’re comfort level is. If it’s real cold I’ll pack an extra layer – and I’m happy to carry it even if I never use it because, knowing I had it in case of a mechanical or whatever brings me some peace.

Extra Tools? See above right? During the day I’ve gotten bad – I carry plenty of water and maybe a multi-tool. If I have to walk out I chalk it up to part of the adventure I suppose. At night I do bring more spares as I don’t like the idea of hiking if I can avoid it in the dark… (I’ve gone solo a couple miles up on the San Juan shuttle back in the day – and the lack of being able to get on the bike and “go” even if it was in the wrong direction wasn’t a great feeling I suppose)

Extra Protection? I seldom wear body armor these days. Most of my loops are on the mellow side and I ride solo a lot so I’m not typically pushing into a “yard-sale” level of get off. But, at night, the body armor definitely comes out.

Body Armor / Knee & Elbow Warmers!

While I’m not pushing night riding hard enough to have frequent crashes the element of surprise does come up more when you can’t clearly see everything. So a pair of compression fit knee and elbow pads puts just enough extra between me and the trail so I feel better.

Also – even if you don’t “crash” at night you have more moments where the bike might be tossing around under you. Knee guards with a bit of protection, especially on the insight of your knee, can take a big bike slap from a gnarly bruise you have to deal with to a simple “thud”.

Best of all at night, particularly this time of year, the modern “slim” body armor with compression fit provides a nice warm option. I figure why wear knee or arm “warmers” when I can get that as well as some additional protection with my G-Form Rugged 2 knee or Sam Hill Lite Elbow pads…

MTB Night Riding: It Makes You Better

There are a lot of reasons I get out to night ride. Adventure (bet most your co-worker’s don’t have a more fun story to tell about that night right?). Social (good to get out with the guys and blow off some steam after work). Cause it’s hard to schedule all the fun in so little daylight (enough said eh).

But night riding also will improve your MTB skills.

You’ll learn to let the bike “float”. At night you can’t see every single thing your bikes’ going to come across. So you learn to let the bike eat up the stuff you maybe didn’t see while you stay focused down trail to deal with the upcoming terrain. These are confident bikes these days – put your confidence in them a bit and your riding will improve.

Don’t fight for the “exact” line. Your lines are gonna change up at night. It will help you better deal with the unexpected. Example? Well, there’s a couple corners on our ride that tend to be dusted with a loose dirt / rock “crust”. During the day it’s not too hard to see and kind of change a tire width one way or the other to stay on the high grip area. At night? Well, you learn to let go of the brake and catch the bike when the traction comes back! Again, kind of goes back to learning to let the bike work and not being OCD in charge of every second of your ride.

When you take this confidence to your day riding you’ll find you’re more competent at higher speeds.

Night Riding with BikeCo on The Luge

Other Night Riding Tips (that I remember)

It’s been a few years so this list isn’t necessarily comprehensive – but I’m getting it back quick…

Want some tips to help you have more fun on your MTB night ride? Here are a few that I find make a big difference.

Don’t look people in the eye. With your light on at least… sucks to get blinded by your buddy!

Bike Setup:

Your bike is likely to “feel harsh”. You’re riding slower which usually requires less compression and slower rebound. If you’re like me, just remember that on your ride. I’m not going to adjust my bike for a “slower” ride because I have 100% faith that I will forget I did that and hate my next “fast” ride. I can deal with a bike feeling “harsh” better than I can deal with having a slow setup the next time I drop in fast and turn myself into a lawn dart or bury the bike in a big hole I usually blast over…

Can you adjust your suspension? Sure. If it’s really, really cold you might consider that too – but – for me personally, it’s going to be very unusual for me to make those adjustments.

Well I could lower my tire PSI right? In fact, good on you for reading so much about where a lot of compliance is on these modern bikes here on BikeCo.com! But, I personally wouldn’t lower the PSI either. You’re likely to have some, ah, adventurous line choices at night. This stresses sidewalls, etc. Running a lower PSI to compensate for the suspension being a bit “fast” increases your likelihood of a pinch flat or cutting a tire on a bottom out. Which, we mentioned above – hiking at night isn’t as fun…

Wear Eye Protection

This is partly a reminder to myself. I’m pretty bad about this recently. At night though, whether it’s psychosomatic because you can “see” the dust in the air with the powerful riding lights or if its’ real – I feel like you get more stuff in your eyes at night. Also – with the occasional off-line adventure you don’t want to be in the bushes or whatever without protection on your eyes.

I’ve had a bit of an eye opening experience here recently – I got this far with only a couple cheap puns! I didn’t have any clear lens around before one of our recent rides. But, in my laptop bag I had a trusty pair of blue light glasses. Well – those became part of my night riding gear that night. And I really liked it. So, I reached out to my eye doctor to ask if it was just a reaction to my “new toy” or if it had some logic.

What I asked:

Quick question if you want to answer for a blog I’m throwing together (if you  want we will quote you and link your site – if you’re busy or have no interest or not sure absolutely no hard feelings either)

Would blue light glasses improve night riding?
I wore a pair of computer glasses a couple nights ago and I swear it cut a lot of the glare out of the lights we use – which are super high output LED , about 1500 lumens at full tilt boogie.

Is there any science you might know of that would make this more than in my head?

From Charles at Modern Eyewear Optometry:

“Blue blocker glasses are traditionally used for reducing strain and possible protection while on electronic devices.

I do prescribe them also for migraine  and light sensitive patients who wear them all day and do really well with them.

You may have just come up with another excellent use of them! Cycling night lights are bright! And LED! So for sure blue blockers could help cut out some of the high energy wavelengths of the spectrum that interfere with vision while riding. If you felt it helped you see better I would continue to use them. I would add that everyone has different prescription and what may work for you may not work for others.

Do some research on the visible spectrum of light and how different tints cut out reflections and glare.

I personally like light yellow tints for evening dusk riding and clear anti reflective for night rides. But again everyone is different.

I’m a big fan of Rudy Project, which is one brand we offer at the office. That’s what I wear for riding. I believe they also have some info in their sight on optics of tints etc.

Hope that helps! Let me know if you have more questions.

Here’s a good site from trustworthy docs:

https://www.allaboutvision.com/cvs/blue-light.htm

Optics are rad!


One Last Note on LED and Blue Light

I started down this rabbit hole, but I’ve been swamped with a bunch of other things. BUT, I’m wondering if the blue light lens have something special because of how “white” light is actually produced from an LED. (and, I never liked yellow lens outdoors if makes all the bushes, etc feel off to me)

Anyhow – you can check out the Wikipedia LED entry if you wanna take over this rabbit hole on blue light riding glasses for these powerful modern LED lights!

Seeing what you see…

It’s different at night – enjoy the view!