Box Bike Assembly from BikeCo.com

Your new bike from BikeCo.com is on the way, what should you expect? Here’s a video and quick write up on some of the step you’ll have to get your dream bike ready for its first ride.

When you work with The Bike Company we aren’t just putting a new shipping label on a box. Every bike, from full customs, semi-customs, box builds with upgrades to standard factory kits is built, setup and test ridden by our staff to ensure you get #thebestinMTB (and eMTB).

Box Bike Assembly

Let’s touch on some common questions that new riders might find getting the bike out of the box and assembled.

Unboxing a Shipped Bike

You’ll want to start with a clear work area. Ideally you’re going to want to keep everything within arms reach for an easy assembly.

Your bike has been packaged to minimize any risk of damage during shipping. If you note any issues with the box please take some pictures prior to opening the package.

Go slow and take your time to avoid damaging your new bike’s finish!
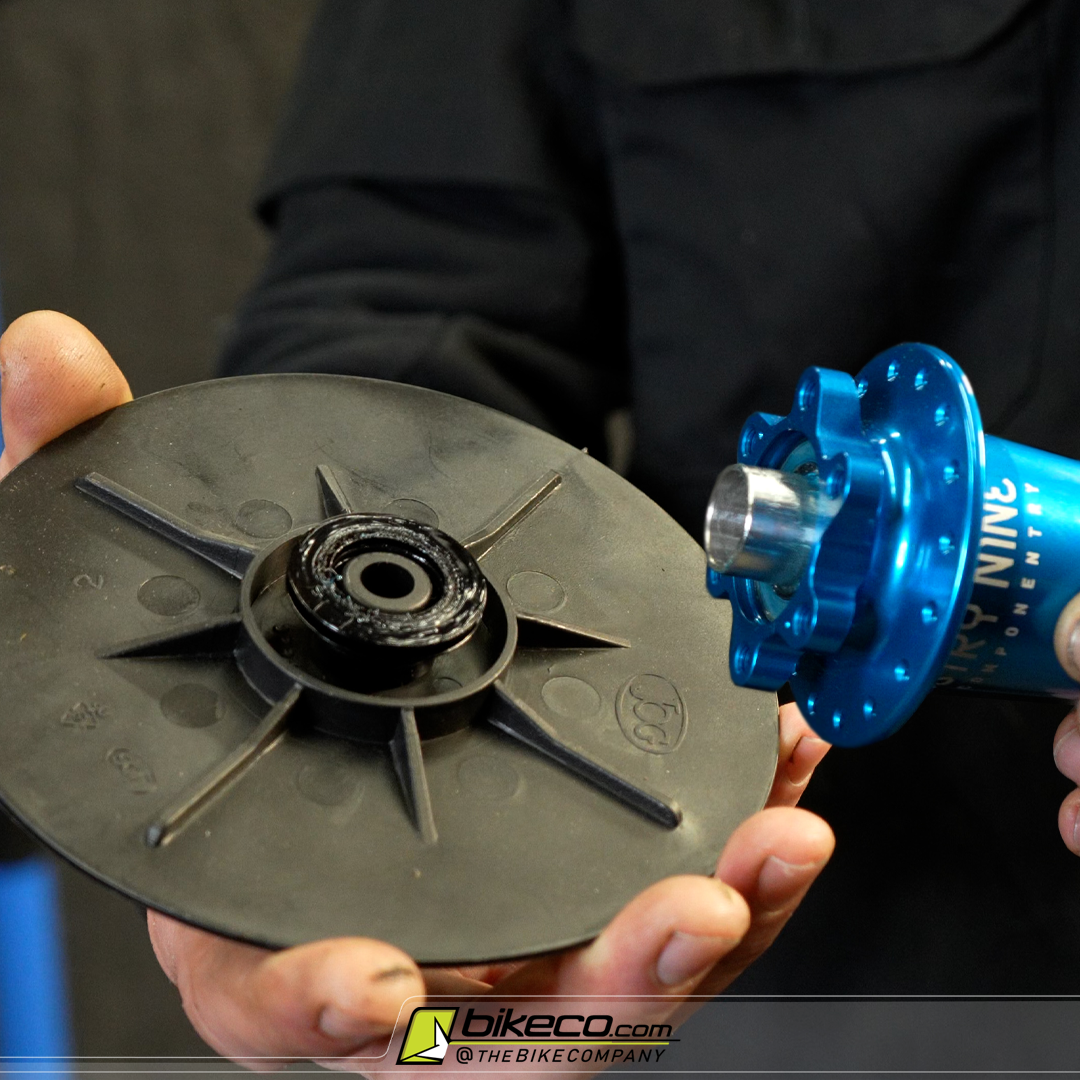
Box Bike Build Common Question: Hub Spacer Missing?

Common Questions During Unboxing

Wheel Spacers

Don’t misplace (or worse throw away) your hub spacers. Hub spacers often stay attached to their plastic protective discs. Few things are more annoying than having to go fish through a trashcan looking for these spacers while building your new rig.

Fork Spacers & Cockpit

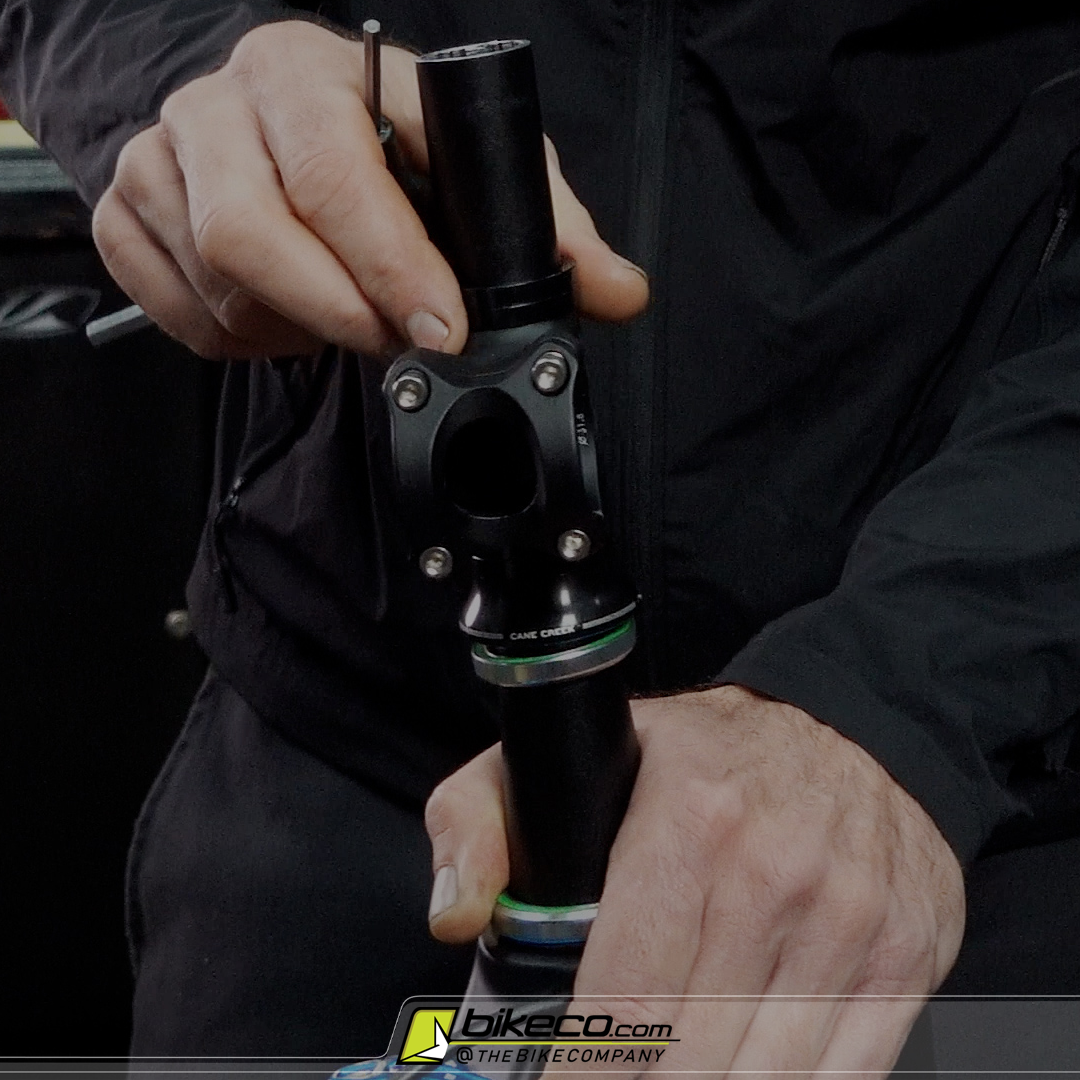
We’ve shipped the bike with the cockpit setup based on your riding details as well as with the headset bits in the proper order. If you’re going to stack all the individual pieces out take a quick photo so you can reference the location of everything.
Box Bike Build Common Question cockpit setup

Hang the Fork

When you hang the fork assemble the headset, install the spacers that were below the stem, install the stem and then install the spacers that were above the stem and stem cap. This will be the setup our team has test ridden based on your height, wingspan, etc.
Box Bike Build Common Question Handlebar angle

Install the Handlebar and Controls

Your handlebar is shipped with the rear derailleur and rear brake (if setup standard) installed on the bar.

Hanging the front brake and adjustable seatpost on the bar is easiest before you mount the bar into the stem. Make sure you’ve got the cockpit setup so the brake, shifting and seatpost lines hang cleanly (the video has a good example of this).

Once you have the controls on the bar snug the bar and stem interface.

You’ll want to hang the bar in the stem ensuring it’s centered to the bike and set to an appropriate sweep angle.

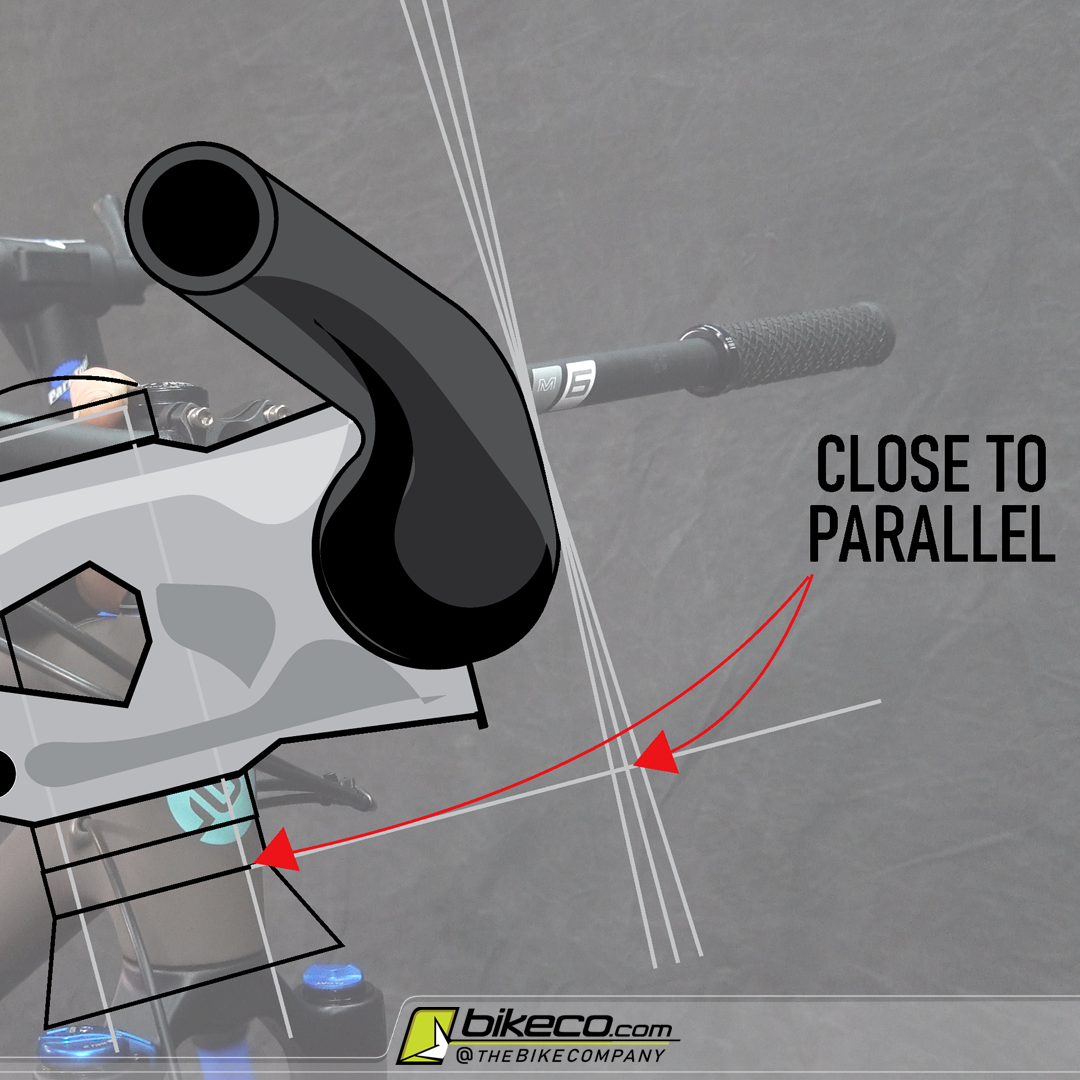
Looking down the side of the bars you’ll want the angle of the bar’s initial rise, from the center section as it thins, to set parallel or very near parallel to the fork’s stanchions, maybe leaned a slight bit forward of the stanchions.

If your handlebar is rotated too far back it creates slow or sluggish performance. If you roll the bar too far forward you’ll find the bike is nervous or twitchy. It’s a small window of adjustment for this overall. If you have questions on this let us know!

When you have your bar and stem torqued align the front brake with the rear brake as well as the seatpost remote with the shifter angle. This will give you a nice ergonomic start.

Ensure that your controls are torqued and won’t rotate or spin, particularly the grips!

Hang the Derailleur (non-Transmission bikes)

Non-Transmission bikes are shipped with the derailleur loose to minimize shipping issues. You’ll need to mount the derailleur to the hanger.

This is a pretty simple process, however, for new riders there is a single detail that can cause problems.

You’ll need to ensure that the derailleur’s b-tension bolt contacts the derailleur’s rotating tab, which then contacts the tab on the hanger. It’s an easy step, but if you forget and the tab rotates too far forward when you mount the derailleur there won’t be any chain tension.
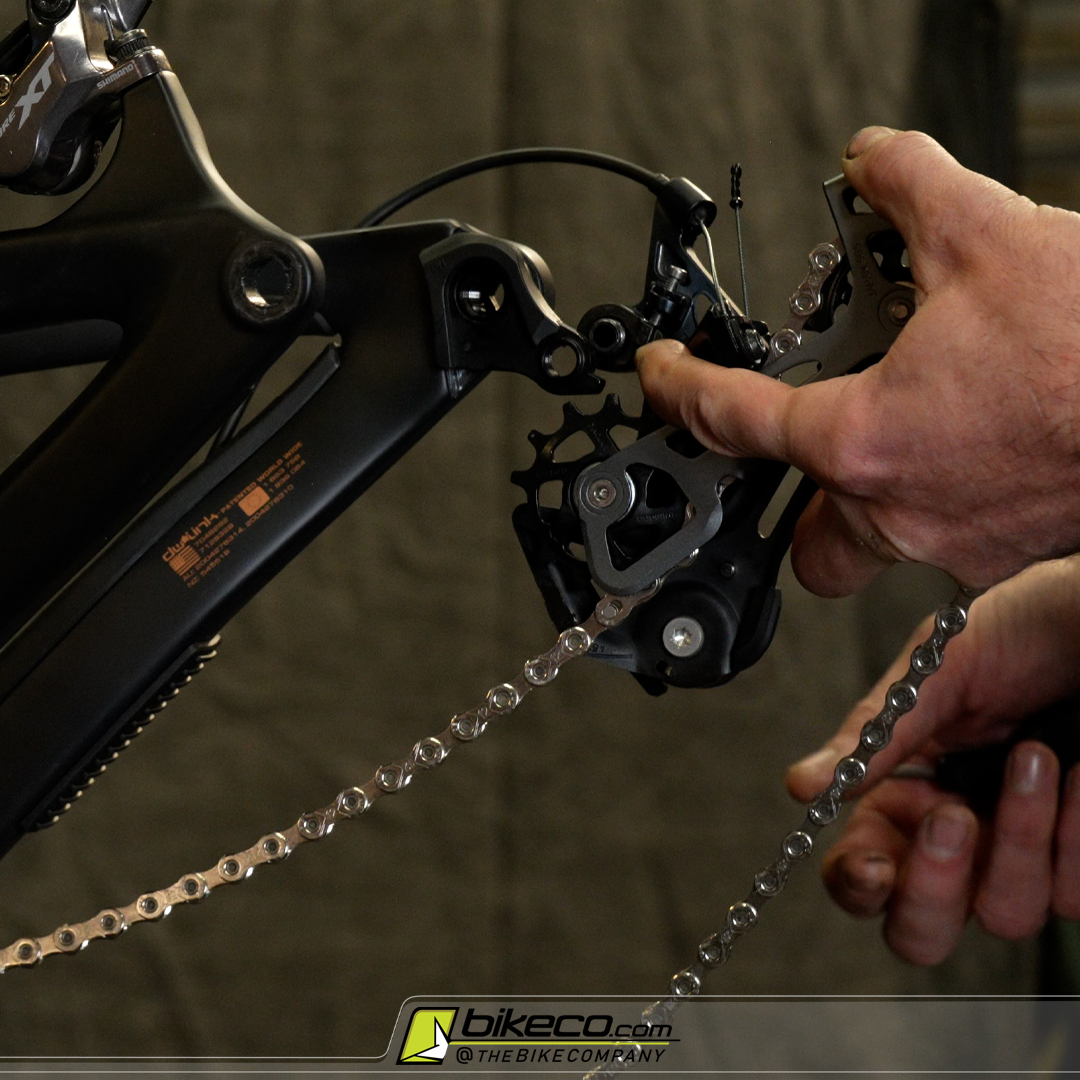
Box Bike Build Common Question hanging a derailleur
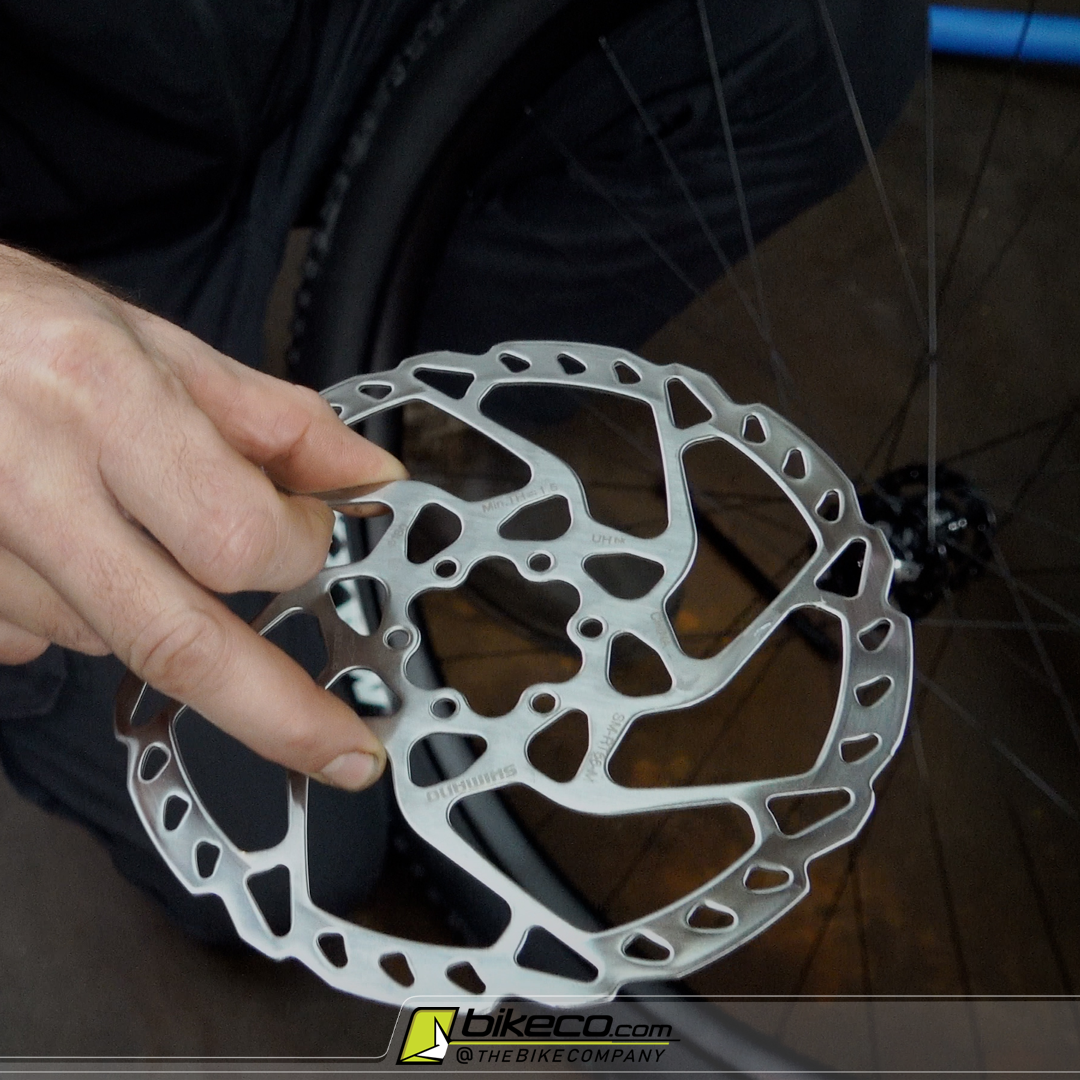
Box Bike Build Common Question how to hold a rotor

Install the Brake Rotors

Make sure your hands are clean and you only hold the rotor by the inner spider! Rotors and pads are very easy to contaminate and any level of grease or oil will create an awful lot of extra work or may even ruin new pads.

Holding the rotor by the inner spider mount the rotor with the text facing out. Tighten the rotor bolts to torque in a star pattern like mounting a car tire.

Inflate your Tires

Typically we ship the bikes with tubeless sealant installed (it would be rare, like air freight or another anomaly that would have us ship them dry). The tires have been inflated and the tires have mounted to the rims so you should be able to bring them up to pressure with a handpump or compressor without issue.

It’s probably a good practice to inflate the tires and “thump” them against the ground while rotating the wheel to splash tubeless sealant across the inside of the entire radius of the tire. When you do the rear wheel put a hand on the cassette to minimize the chance of knocking it free (DT Swiss hubs can have the cassette pulled off without tooling and occasionally will come off when setting a tire!).

Install the Wheels

Hang the front and rear wheel and torque the axles appropriately. It’s easiest to hang the rear wheel with the derailleur set to the smallest cog on the cassette. This gives you the most play with the chain and eases wheel installation.

SRAM derailleurs should be set in the “open” mode to ease this step. Shimano derailleurs should have the clutch disengaged.
Once the rear wheel is installed reset the SRAM derailleur to “ride” or engage the Shimano clutch.

Align the Brakes

You’ll probably need to make some minute adjustments to the caliper after unboxing a shipped bike.

An easy way to do this is to use the box, or another light-colored large material behind the caliper. This lets you more easily see the brake pad to rotor spacing to align the brakes. As I’ve aged I found this suggestion by Joe works much better than trying to use a flashlight “down” the caliper.
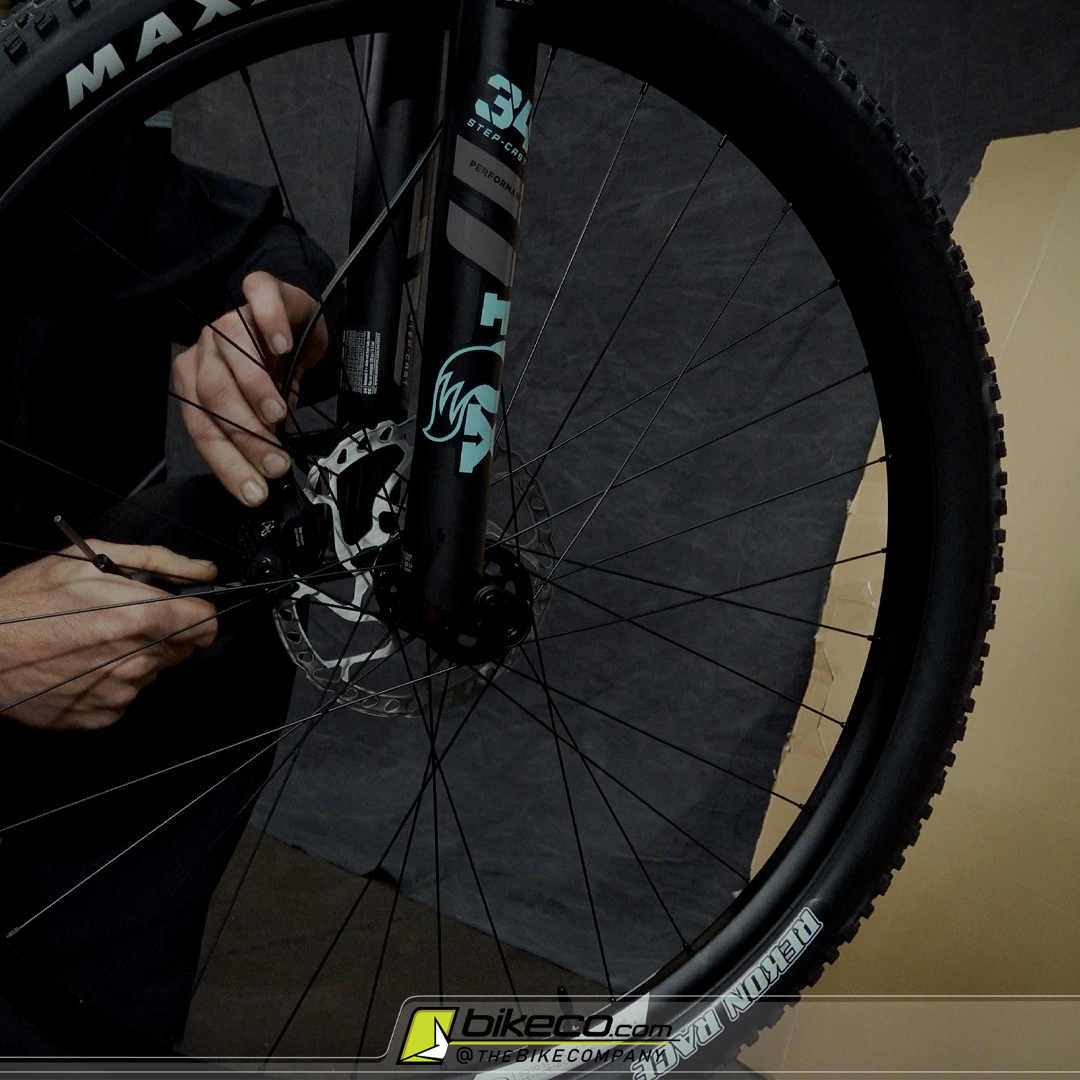
Box Bike Build Common Question Brake Alignment

Check the Shifting

Unlike the brakes it’s very rare for a derailleur to need any adjustment after shipping. We have other content available if you do need to make small adjustments – but it’s not a common issue. Your bike should shift easily out of the box – before you start making wholesale adjustments check the derailleur and wheel installation or give us a buzz!
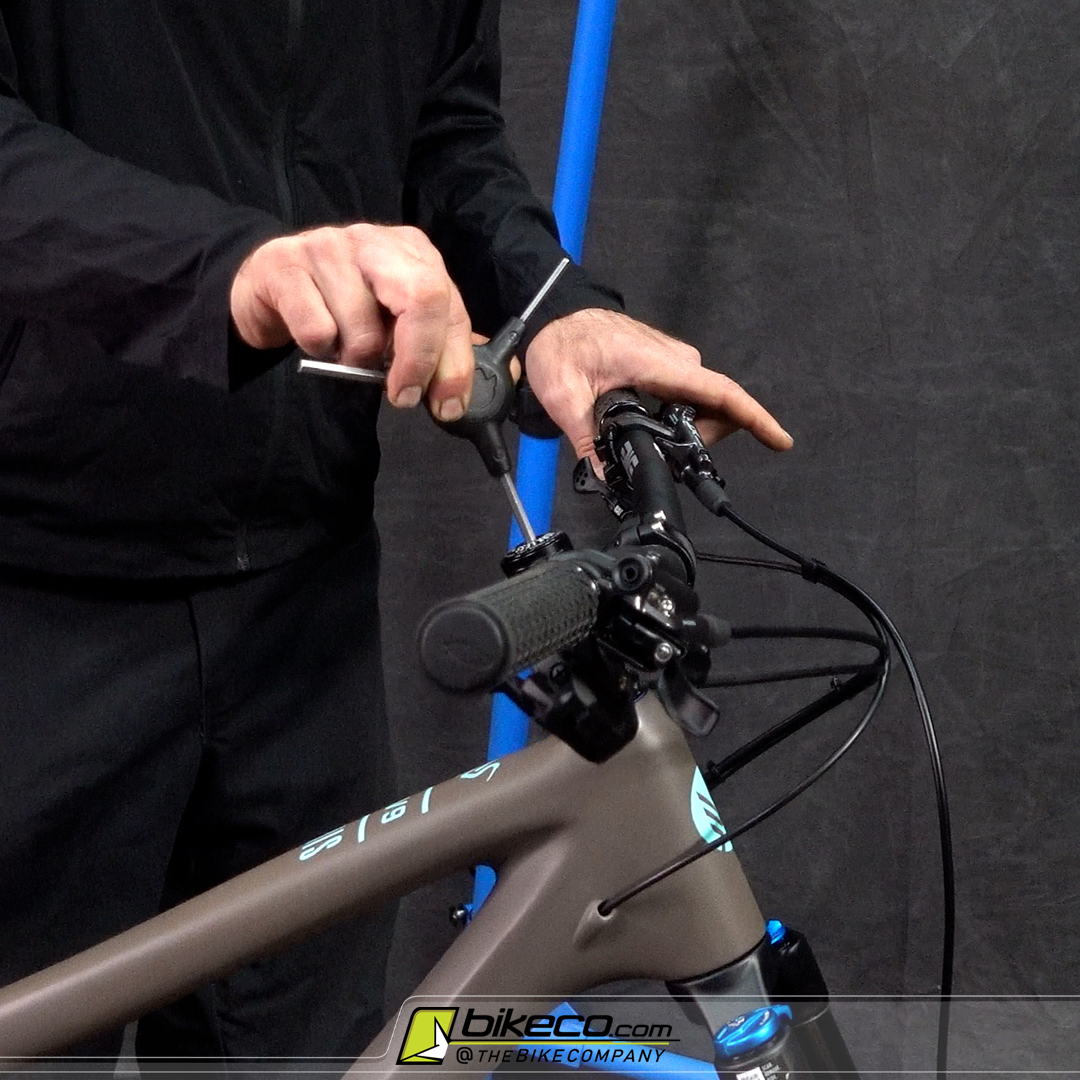
Box Bike Build Common Question headset adjustment

Adjust the Headset

Keeping the headset adjusted is important to your bike’s performance and lifespan.

The easiest way to adjust an MTB headset is to apply the front brake with one hand and with the other slightly rock the bike fore and aft while slowly tightening the stem cap adjustment bolt.

When the headset no longer “clicks”, or you feel the headset moving stop tightening the adjustment bolt.

If you have questions about adjusting a headset we have a full video available as well.

Straighten your Handlebars

Standing over the bike with both eyes open straighten your handlebars. BikeCo owner Joe Binatena likes to slightly slap the grips to center the bar.

Once the bar is straight you’ll tighten the stem. Switch between the stem bolts slowly bringing each up to the proper manufacturer’s torque setting.

Check to ensure your cockpit doesn’t slide prior to test riding.

Suspension

Your bike has been setup at BikeCo based on your riding specifics. We’ve included a suspension setup sheet to give you a reference point. We suggest test riding this setup and notating any small adjustments you may make. If you find yourself wanting to make wholesale adjustments contact us so we can help define what you might be feeling (our setups are typically very, very close!)

Bed In Your Brakes

We’ve done a handful of stops to start the brake bed in process. But you should do a dozen good power ups and stops to bring the brake system up to full power. You’ll be removing any manufacturing or shipping glaze on both the pads and the rotors.

Bolt Checks

New bikes need bolt checks. Period. Bring a multi-tool with you and check your cockpit and control bolts after your first test ride and keep an eye on them for the first few trail rides.

Hardware is designed to be as small and light as functionally possible so there is some settling to be expected.

Personally I find my bikes will loosen up the first couple rides then settle in where I can increase the service length (riding time) between full bolt checks.

At this point you should be ready to test ride your bike! If everything feels good at your house or the parking lot take it to your trails. The best trails are the ones you’re totally comfortable with for familiarizing yourself with a new bike.

Our team will be in touch several times with a set of loaded questions to help you fine tune your suspension, cockpit, tire pressures, etc over the first couple weeks you have your bike. Remember we’re only a phone call, email or web chat away for any questions you have on your new rig.

Return to Top of Page

Posted on Leave a comment

New to MTB: Sighting Trail Users

Sighting Trail Users on MTB

Sighting trail users: MTB Etiquette New to MTB: Sighting Trail Users

There are a lot of new faces on the trails these days. Welcome – we hope you enjoy the outdoors as much as we do. There has been a lot of change (understatement right?) the last couple months. One that has effected new riders is the lack of group rides. A lot of group rides were effective to help new riders understand etiquette as well as tips to improve their riding. We’re going to publish a handful of concepts that will help new riders, and possibly refresh experienced riders. Let’s start with New to MTB: Sighting Trail Users.

It’s good to remember you’re probably not the only one on the trail. In fact, even if you have strong reason to believe you are, its best to always assume you’re not. MTB riding is a dynamic sport on shared trails. Just because there wasn’t a log, hole, or rut yesterday doesn’t ensure there won’t be today. The same goes for other trail users.

Continue reading New to MTB: Sighting Trail Users

Posted on Leave a comment

New Bike Assembly

MTB New Bike Assembly Common Issue

New Bike Assembly

A typical new bike delivered from BikeCo.com doesn’t need much to hit the trails. With some basic tools and a bit of skill you’re on your way. You’ve got a fresh BikeCo Build. New Bike Assembly shouldn’t be intimidating.

(so, the modern work from home means this video is in the yard, with my bike “standing in” for a new rig. Obviously your new bike will be cleaner, not have broken spokes in the back wheel, etc! haha. Also, I wouldn’t suggest grass if avoidable to minimize searching for things you might drop…)

Check out the video then read the post for more details.

Continue reading New Bike Assembly

Posted on Leave a comment

Improve Chain & Cassette Wear

Improve Chain & Cassette Wear

Improve Chain & Cassette Wear

There are a lot of tips and tricks to improve chain & cassette wear. This tip helps minimize wear and bent cassette teeth.

It’s pretty simple.

Check out the video then read the post for more details.

Continue reading Improve Chain & Cassette Wear

Posted on Leave a comment

Better MTB Cornering with Coach Kevin Aiello

MTB Cornering Tips with Kevin Aiello

Better MTB Cornering with Coach Kevin Aiello

I’ve come to terms with it. I’m kind of spoiled. For example, extending a morning ride counts as work if you invite the right people. So here’s Better MTB cornering with coach Kevin Aiello!

Are you  you’re already familiar with these concepts? Rad! In the world of “nothing’s new” there’s a lot of good advice out there. But take a minute to read and check out some photos that illustrate cornering techniques to make your ride more fun. Ready to take your riding to the next level? Contact Kevin at SoCalSpeedClinics.com and schedule a training session. Private lessons or with some buddies, Kevin will help you improve your understanding, confidence and speed.

The Basics

We’ve covered good cornering practices with Kevin illustrating how important fit is to proper cornering techniques. (In fact we have another post with Kevin on pedaling more efficiently as well) Our previous cornering post focused on fit and some basics you should practice using a cone drill. In this blog let’s look a bit more about how to take this to the dirt.

Continue reading Better MTB Cornering with Coach Kevin Aiello

Posted on Leave a comment

MTB: Prioritizing Components for Performance – Personality & Price

Prioritizing Components for Performance

MTB: Prioritizing Components for Performance – Personality & Price

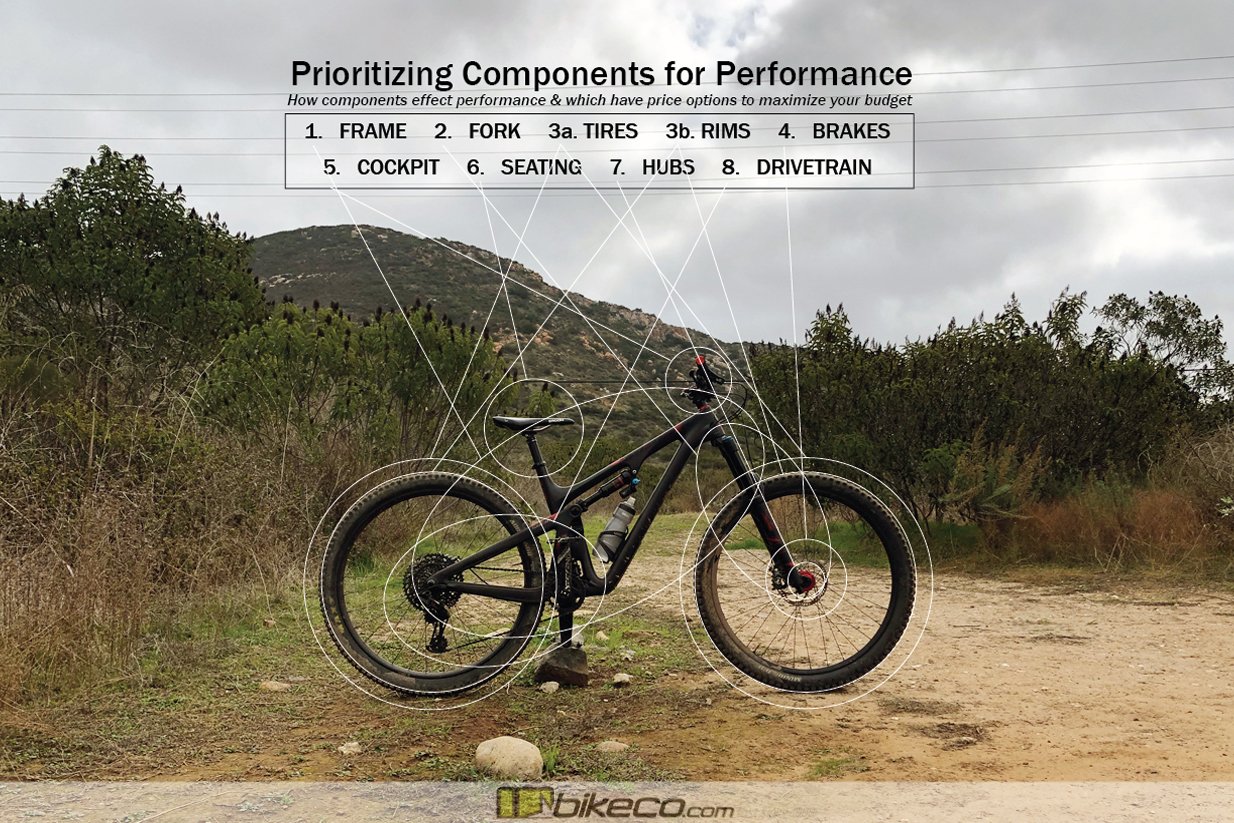
Recently I had a client hit me with with one of my favorite questions – What areas of my build will I most notice my budget? Well, BikeCo specializes in full custom as well as factory builds with upgrades. Our team is really versed on this. Understanding how to weigh performance gains and spec options allows riders to build a bike that’s going to hit their trail desires and budget. Prioritizing Components for Performance will allow you to dial in performance without breaking the bank.

If you’ve read previous posts you’ve read your MTB build is the “PRODUCT” (not “SUM”) of the parts. That’s to say: this part times that part times another part produces your final product. So, if you get in the weeds with components it quickly throws the whole thing off. Continue reading MTB: Prioritizing Components for Performance – Personality & Price

Posted on Leave a comment

Install Fork Volume Spacers – BikeCo Tips & Tricks

fork volume spacer bikeco blog

Install MTB Fork Volume Spacers

Want to increase or decrease the ramp rate on your fork? You can easily modify the ramp rate with volume spacers.

Disclaimer – If you doubt your mechanical ability utilize a professional resource. Suspension is critical to performance and your safety.

This video assumes your fork is in good working condition. If you suspect any issues such as “suck down”, or an over pressurized negative air chamber, it is important you use a qualified resource.

Continue reading Install Fork Volume Spacers – BikeCo Tips & Tricks

Posted on Leave a comment

Install Shock Volume Spacers – BikeCo Tips & Tricks

BikeCo Tips and Tricks Rear Shock Volume Spacer Install

Install MTB Shock Volume Spacers

Want to increase or decrease the ramp rate on your MTB shock? You can easily modify the ramp rate with volume spacers.

Disclaimer – If you doubt your mechanical ability utilize a professional resource. Suspension is critical to performance and your safety.

This video assumes your shock is in good working condition. If you suspect any issues such as “suck down”, or an over pressurized negative air chamber, it is important you use a qualified resource.


Continue reading Install Shock Volume Spacers – BikeCo Tips & Tricks

Posted on Leave a comment

Bike Yoke Revive Seatpost Hydraulic Reset – BikeCo Tips & Tricks

Bike Yoke Revive Seatpost Hydraulic Reset

Bike Yoke Revive Seatpost Hydraulic Reset

The Bike Yoke Revive seatpost has been extremely popular. Along with a variety of available travel lengths the Bike Yoke Revive seatpost also stands out with it’s simple hydraulic reset.

If your Bike Yoke Revive adjustable seatpost is “squishy” air has mixed with the hydraulic fluid.

To quickly reset your Bike Yoke Revive seatpost follow these steps.

Bike Yoke Seatpost Hydraulic Reset

First extend the post to its full height.

Insert a 4mm Allen wrench (or appropriate tool) into the reset located on the drive side near the saddle mount.

Gently rotate the Revive reset clockwise until you feel it hit the stop.

While holding the reset against the stop push the seatpost completely down with your other hand.

Release the 4mm Allen (or appropriate tool) in the Revive reset and let go of the saddle.

Bring the saddle to full height using the remote.

If you still have squish in the system repeat these steps.

If your seatpost is rigid go hit the trails…


Click to Shop Bike Yoke and other top Adjustable Seatposts.


Back to Tips & Tricks


Return to top of page.

Posted on Leave a comment

Chain Lube? Yup, Chain Lube. Pre-Ride Best Practices

MTB Pre-Ride Chain Clean & Lube Best Practice

Chain Lube? Yup, Chain Lube. Pre-Ride Best Practices

Really? Chain Lube? Yup. Because adhering to good practices cleaning and lubing allows your drivetrain perform better and last longer. Skipping these steps? Well you might have issues that drive you, or your riding buddies nuts.

Some quick drivetrain basics.

Your cassette, chain and chain ring wear in as a group.  It’s more than the anodized finish that wears off as you ride. Chain ring and cassette teeth change shape. The chain “stretches” (wears).

You might be able to get a couple chains and chain rings for each cassette. But if the drivetrain is well worn your new chain won’t want to hold power on the older teeth. Shifting is often compromised. It is likely to tick and skip under load. Older chain rings will often hang the chain instead of releasing it at the bottom of the radius creating a tick.

Overall the performance is probably better from the paired cassette, chain, and chain ring rather than mixing and matching new with worn.

Keeping the drivetrain properly lubed will dramatically slow wear and improve performance.

Continue reading Chain Lube? Yup, Chain Lube. Pre-Ride Best Practices